Intangir Bot (talk | contribs) m (Bot: Removing template: Sideicon) |
|||
| (47 intermediate revisions by 12 users not shown) | |||
| Line 1: | Line 1: | ||
| + | {{infobox location |
||
| − | {{Sideicon|FFI}} |
||
| − | + | |name=Cavern of Earth |
|
| + | |release=FFI |
||
| − | [[File:Cave of Earth - WM.png|thumb|The Cavern of Earth on the World Map.]] |
||
| + | |japanese=アースの洞窟 |
||
| − | The '''Cavern of Earth''' {{j|アースの洞窟|Āsu no Dōkutsu}}, also known as the '''Earth Cave''' and '''Terra Cavern''', is a location from the original ''[[Final Fantasy]]''. It is located south of [[Melmond]], at the "Devil's Tail", and the [[List of Final Fantasy Characters|Warriors of Light]] must come here to find the source of the earth's rot. |
||
| + | |romaji=Āsu no Dōkutsu |
||
| + | |lit= |
||
| + | |image=<gallery> |
||
| + | FF1 3DS EarthCave.jpg|Cave |
||
| + | FF1 3DS EarthCave Otherworld.jpg|World Map |
||
| + | </gallery> |
||
| + | |type=Cave |
||
| + | |region=South of [[Melmond]] |
||
| + | |items=*27050 [[gil]] (total |
||
| + | *[[Antidote (Final Fantasy)|Antidote]] |
||
| + | *[[Potion (Final Fantasy)|Potion]] |
||
| + | *[[Coral Sword (Final Fantasy)|Coral Sword]] |
||
| + | *[[Tent (Final Fantasy)|Tent]] |
||
| + | *[[Leather Shield (Final Fantasy)|Leather Shield]] |
||
| + | *[[Sleeping Bag (Final Fantasy)|Sleeping Bag]] |
||
| + | *[[Gold Needle (Final Fantasy)|Gold Needle]] |
||
| + | *[[Star Ruby (Final Fantasy)|Star Ruby]] |
||
| + | *[[Staff (Final Fantasy)|Staff]] |
||
| + | *[[Tent (Final Fantasy)|Tent]] |
||
| + | *[[Mythril Shield (Final Fantasy)|Mythril Shield]] |
||
| + | |enemies=*[[Anaconda (Final Fantasy)|Anaconda]] |
||
| + | *[[Black Widow (Final Fantasy)|Black Widow]] |
||
| + | *[[Cobra (Final Fantasy)|Cobra]] |
||
| + | *[[Cockatrice (Final Fantasy)|Cockatrice]] |
||
| + | *[[Earth Elemental (Final Fantasy)|Earth Elemental]] |
||
| + | *[[Gargoyle (Final Fantasy)|Gargoyle]] |
||
| + | *[[Ghast (Final Fantasy)|Ghast]] |
||
| + | *[[Goblin Guard (Final Fantasy)|Goblin Guard]] |
||
| + | *[[Hill Gigas (Final Fantasy)|Hill Gigas]] |
||
| + | *[[Hyenadon]] |
||
| + | *[[Lizard (Final Fantasy)|Lizard]] |
||
| + | *[[Minotaur (Final Fantasy)|Minotaur]] |
||
| + | *[[Mummy (Final Fantasy)|Mummy]] |
||
| + | *[[Ochre Jelly]] |
||
| + | *[[Ogre (Final Fantasy)|Ogre]] |
||
| + | *[[Ogre Chief (Final Fantasy)|Ogre Chief]] |
||
| + | *[[Ogre Mage (Final Fantasy)|Ogre Mage]] |
||
| + | *[[Piscodemon (Final Fantasy)|Piscodemon]] |
||
| + | *[[Sphinx (Final Fantasy)|Sphinx]] |
||
| + | *[[Tarantula (Final Fantasy)|Tarantula]] |
||
| + | *[[Troll (Final Fantasy)|Troll]] |
||
| + | *[[Werewolf (Final Fantasy)|Werewolf]] |
||
| + | *[[Wight (Final Fantasy)|Wight]] |
||
| + | *[[Wraith (Final Fantasy)|Wraith]] |
||
| + | *[[Vampire (Final Fantasy)|Vampire]] (boss) |
||
| + | *[[Lich (Final Fantasy)|Lich]] (boss) |
||
| + | |quests=*Defeating Lich |
||
| + | }} |
||
| + | The '''Cavern of Earth''', also known as the '''Earth Cave''' and '''Terra Cavern''', is a location from the original ''[[Final Fantasy]]''. It is located south of [[Melmond]], at the "Devil's Tail", and the [[Final Fantasy characters|Warriors of Light]] must come here to find the source of the earth's rot. |
||
| − | The first floor of the cave offers many branching paths away from the center starting point. The bend to the west of the entrance ladder is particularly dangerous as it forces repetitive battles at every single step, but the ladder to the next floor is a short walk east. The next three levels take some time to traverse through, as they are comprised of many small rooms and contain more powerful enemies. After defeating the Vampire and returning with the Earth Rod, the player can access the next two floors which hold |
+ | The first floor of the cave offers many branching paths away from the center starting point. The bend to the west of the entrance ladder is particularly dangerous as it forces repetitive battles at every single step, but the ladder to the next floor is a short walk east. The next three levels take some time to traverse through, as they are comprised of many small rooms and contain more powerful enemies. After defeating the [[Vampire (Final Fantasy)|Vampire]] and returning with the [[Earth Rod (Final Fantasy)|Earth Rod]], the player can access the next two floors which hold even harder enemies. |
| − | ==Story== |
+ | == Story == |
| + | {{spoiler}} |
||
| − | [[File:FF1 Earth Crystal Room.PNG|thumb|The Crystal Room in the Cavern of Earth.]] |
||
| + | [[File:FF1 Earth Crystal Room.PNG|thumb|left|The Crystal Room in the Cavern of Earth.]] |
||
| − | The Warriors of Light make their way to the bottom of the cave and defeat a [[Vampire (Final Fantasy)|vampire]] residing there on the third floor who seems to be the cause of the problem. However, this fails to stop the rotting of the earth. Later, they speak with the wise and ancient sage [[Sadda]] who lives in a cave to the west. Sadda gives them a rod with which they can move an obstacle at the back of the Vampire's chamber. They return with the rod and expose a secret passage, revealing two deeper floors into the cave. |
||
| + | The Warriors of Light descend through the cave and defeat a [[Vampire (Final Fantasy)|vampire]] residing on the third basement level, who seems to be the cause of the problem. However, this fails to stop the rotting of the earth. Later, they speak with the wise and ancient sage [[Sadda (Final Fantasy)|Sadda]] who lives in a cave to the west. Sadda gives them a rod with which they can move an obstacle at the back of the Vampire's chamber. They return with the rod and expose a secret passage, revealing two deeper floors into the cave. |
||
| − | Here, they find and defeat the [[Lich (Final Fantasy)|Lich]], the Fiend of Earth who is leeching power off from the [[Crystal ( |
+ | Here, they find and defeat the [[Lich (Final Fantasy)|Lich]], the Fiend of Earth who is leeching power off from the [[Crystal (term)#Final Fantasy|Earth Crystal]], and rid the earth of its rotting, the first purification of the [[Crystal (term)|Crystals]]. |
| − | == |
+ | ==Quests== |
| + | ===Level grinding=== |
||
| − | {|border="1" cellspacing="0" cellpadding="2" width="50%" style="text-align:center" |
||
| + | If players head immediately left upon entering the area, they will come to a deadend passageway, where every step sends them into a [[Battle (term)|battle]] with at least one [[Hill Gigas (Final Fantasy)|Hill Gigas]] and up to three [[Lizard (Final Fantasy)|Lizards]]. If the player is sufficiently [[level]]ed, they can kill the enemy party in a couple rounds, earning several hundred [[Experience Points|EXP]] and approximately a thousand [[gil]] every battle. This is a good place to [[Level grinding|level-grind]] early on. |
||
| − | |-class="FFIa" |
||
| + | == Treasure == |
||
| + | {|class="half-width FFI article-table" style="text-align:center" |
||
| + | |- |
||
!Item |
!Item |
||
!Location |
!Location |
||
|- |
|- |
||
| − | ! |
+ | !1,975 [[gil]] |
| + | |B1 |
||
|- |
|- |
||
| − | ! |
+ | !795 [[gil]] |
| + | |B1 |
||
|- |
|- |
||
| − | ! |
+ | ![[Antidote (Final Fantasy)|Antidote]] |
|B1 |
|B1 |
||
|- |
|- |
||
| − | ! |
+ | ![[Potion (Final Fantasy)|Potion]] |
|B1 |
|B1 |
||
|- |
|- |
||
| − | ! |
+ | !880 [[gil]] |
| + | |B1 |
||
|- |
|- |
||
| − | ! |
+ | !330 [[gil]] |
| + | |B2 |
||
|- |
|- |
||
| − | ! |
+ | ![[Coral Sword (Final Fantasy)|Coral Sword]] |
|B2 |
|B2 |
||
|- |
|- |
||
| − | ! |
+ | ![[Tent (Final Fantasy)|Tent]] |
|B2 |
|B2 |
||
|- |
|- |
||
| − | ! |
+ | !5,000 [[gil]] |
| + | |B2 |
||
|- |
|- |
||
| − | ! |
+ | ![[Leather Shield (Final Fantasy)|Leather Shield]] |
|B2 |
|B2 |
||
|- |
|- |
||
| − | ! |
+ | !575 [[gil]] |
| + | |B2 |
||
|- |
|- |
||
| − | ! |
+ | ![[Sleeping Bag (Final Fantasy)|Sleeping Bag]] |
|B3 |
|B3 |
||
|- |
|- |
||
| − | ! |
+ | !3,400 [[gil]] |
| + | |B3 |
||
|- |
|- |
||
| − | ! |
+ | ![[Gold Needle (Final Fantasy)|Gold Needle]] |
|B3 |
|B3 |
||
|- |
|- |
||
| − | ! |
+ | !3,400 [[gil]] |
| + | |B3 |
||
|- |
|- |
||
| − | ! |
+ | !1,020 [[gil]] |
| + | |B3 |
||
|- |
|- |
||
| − | ! |
+ | ![[Star Ruby (Final Fantasy)|Star Ruby]] |
|B3 |
|B3 |
||
|- |
|- |
||
| − | ! |
+ | !Staff |
|B4 |
|B4 |
||
|- |
|- |
||
| − | ! |
+ | !3,400 [[gil]] |
| + | |B4 |
||
|- |
|- |
||
| − | ! |
+ | !1,520 [[gil]] |
| + | |B4 |
||
|- |
|- |
||
| − | ! |
+ | !5,450 [[gil]] |
| + | |B4 |
||
|- |
|- |
||
| − | ! |
+ | !1,455 [[gil]] |
| + | |B4 |
||
|- |
|- |
||
| − | ! |
+ | ![[Tent (Final Fantasy)|Tent]] |
|B4 |
|B4 |
||
|- |
|- |
||
| − | ! |
+ | ![[Mythril Shield (Final Fantasy)|Mythril Shield]] |
|B4 |
|B4 |
||
|- |
|- |
||
| − | ! |
+ | !1,250 [[gil]] |
| + | |B4 |
||
|} |
|} |
||
| − | ==Enemies== |
+ | == Enemies == |
[[File:FFI Background Cavern of Earth1.PNG|right|thumb|Battle Background.]] |
[[File:FFI Background Cavern of Earth1.PNG|right|thumb|Battle Background.]] |
||
[[File:FFI Background Cavern of Earth2.PNG|right|thumb|[[Lich (Final Fantasy)|Lich]]'s Battle Background.]] |
[[File:FFI Background Cavern of Earth2.PNG|right|thumb|[[Lich (Final Fantasy)|Lich]]'s Battle Background.]] |
||
| + | === B1 === |
||
| − | *[[Anaconda (Final Fantasy)|Anaconda]] |
||
| − | *[[ |
+ | * [24/64] [[Anaconda (Final Fantasy)|Anaconda]] x2-6 |
| − | *[[ |
+ | * [12/64] [[Minotaur (Final Fantasy)|Minotaur]] x1-2 |
| − | *[[ |
+ | * [12/64] [[Cobra (Final Fantasy)|Cobra]] x3-7 |
| − | *[[ |
+ | * [6/64] [[Ogre Chief (Final Fantasy)|Ogre Chief]] x1-4, [[Ogre (Final Fantasy)|Ogre]] x0-2 |
| − | *[[Gargoyle (Final Fantasy)|Gargoyle]] |
+ | * [6/64] [[Gargoyle (Final Fantasy)|Gargoyle]] x3-8 |
| − | *[[ |
+ | * [3/64] [[Tarantula (Final Fantasy)|Tarantula]] x3-6, [[Black Widow (Final Fantasy)|Black Widow]] x0-2 |
| − | *[[ |
+ | * [1/64] [[Mummy (Final Fantasy)|Mummy]] x2-5 |
| − | *[[ |
+ | * [Step-on-tile] [[Earth Elemental (Final Fantasy)|Earth Elemental]] x1 |
| + | * [Step-on-tile] [[Hill Gigas (Final Fantasy)|Hill Gigas]] x1-2 |
||
| − | *[[Hyenadon]] |
||
| − | *[[Lizard (Final Fantasy)|Lizard]] |
+ | * [Step-on-tile] [[Hill Gigas (Final Fantasy)|Hill Gigas]] x1-2, [[Lizard (Final Fantasy)|Lizard]] x0-3 |
| + | |||
| − | *[[Minotaur (Final Fantasy)|Minotaur]] |
||
| + | === B2 === |
||
| − | *[[Mummy (Final Fantasy)|Mummy]] |
||
| + | * [12/64] [[Cobra (Final Fantasy)|Cobra]] x3-7 |
||
| − | *[[Ochre Jelly]] |
||
| − | *[[ |
+ | * [12/64] [[Minotaur (Final Fantasy)|Minotaur]] x1-2 |
| − | *[[ |
+ | * [12/64] [[Gargoyle (Final Fantasy)|Gargoyle]] x3-8 |
| − | *[[Ogre |
+ | * [12/64] [[Ogre Chief (Final Fantasy)|Ogre Chief]] x1-4, [[Ogre (Final Fantasy)|Ogre]] x0-2 |
| − | *[[ |
+ | * [6/64] [[Werewolf (Final Fantasy)|Werewolf]] x2-5, [[Warg Wolf (Final Fantasy)|Warg Wolf]] x0-5 |
| − | *[[ |
+ | * [6/64] [[Tarantula (Final Fantasy)|Tarantula]] x4-8 |
| − | *[[ |
+ | * [3/64] [[Troll (Final Fantasy)|Troll]] x1-2, [[Minotaur (Final Fantasy)|Minotaur]] x0-1 |
| − | *[[ |
+ | * [1/64] [[Hill Gigas (Final Fantasy)|Hill Gigas]] x1-2 |
| + | === B3 === |
||
| − | *[[Warg Wolf (Final Fantasy)|Warg Wolf]] |
||
| + | |||
| − | *[[Werewolf (Final Fantasy)|Werewolf]] |
||
| − | *[[ |
+ | * [12/64] [[Werewolf (Final Fantasy)|Werewolf]] x2-5, [[Warg Wolf (Final Fantasy)|Warg Wolf]] x0-5 |
| − | *[[ |
+ | * [12/64] [[Ogre Chief (Final Fantasy)|Ogre Chief]] x1-4, [[Ogre (Final Fantasy)|Ogre]] x0-2 |
| − | *[[ |
+ | * [12/64] [[Piscodemon (Final Fantasy)|Piscodemon]] x2-4 |
| − | *[[ |
+ | * [12/64] [[Wight (Final Fantasy)|Wight]] x2-5, [[Ghast (Final Fantasy)|Ghast]] x2-5 |
| + | * [6/64] [[Wraith (Final Fantasy)|Wraith]] x2-6 |
||
| + | * [6/64] [[Cockatrice (Final Fantasy)|Cockatrice]] x2-6 |
||
| + | * [3/64] [[Mummy (Final Fantasy)|Mummy]] x2-5 |
||
| + | * [1/64] [[Ochre Jelly]] x2-5, [[Tarantula (Final Fantasy)|Tarantula]] x0-5 |
||
| + | * [Step-on-tile] [[Earth Elemental (Final Fantasy)|Earth Elemental]] x1 |
||
| + | * [Boss] [[Vampire (Final Fantasy)|Vampire]] x1 |
||
| + | === B4 === |
||
| + | * [12/64] [[Piscodemon (Final Fantasy)|Piscodemon]] x2-4 |
||
| + | * [12/64] [[Wight (Final Fantasy)|Wight]] x2-5, [[Ghast (Final Fantasy)|Ghast]] x2-5 |
||
| + | * [12/64] [[Wraith (Final Fantasy)|Wraith]] x2-6 |
||
| + | * [12/64] [[Troll (Final Fantasy)|Troll]] x1-2 |
||
| + | * [9/64] [[Goblin Guard (Final Fantasy)|Goblin Guard]] x0-5, [[Werewolf (Final Fantasy)|Werewolf]] x1-3, [[Hill Gigas (Final Fantasy)|Hill Gigas]] x0-2 |
||
| + | * [6/64] [[Cockatrice (Final Fantasy)|Cockatrice]] x2-6 |
||
| + | * [1/64] [[Ochre Jelly]] x2-5, [[Tarantula (Final Fantasy)|Tarantula]] x0-5 |
||
| + | * [Step-on-tile] [[Ogre Mage (Final Fantasy)|Ogre Mage]] x1, [[Ogre Chief (Final Fantasy)|Ogre Chief]] x1, [[Hyenadon]] x0-2 |
||
| + | * [Step-on-tile] [[Sphinx (Final Fantasy)|Sphinx]] x1-2 |
||
| + | === B5 === |
||
| + | * [12/64] [[Troll (Final Fantasy)|Troll]] x1-2 |
||
| + | * [12/64] [[Wraith (Final Fantasy)|Wraith]] x2-6 |
||
| + | * [12/64] [[Tarantula (Final Fantasy)|Tarantula]] x4-8 |
||
| + | * [12/64] [[Troll (Final Fantasy)|Troll]] x1-2, [[Minotaur (Final Fantasy)|Minotaur]] x0-1 |
||
| + | * [6/64] [[Hill Gigas (Final Fantasy)|Hill Gigas]] x1-2 |
||
| + | * [6/64] [[Mummy (Final Fantasy)|Mummy]] x2-5 |
||
| + | * [3/64] [[Ochre Jelly]] x2-5, [[Tarantula (Final Fantasy)|Tarantula]] x0-5 |
||
| + | * [1/64] [[Earth Elemental (Final Fantasy)|Earth Elemental]] x1 |
||
| + | * [Boss] [[Lich (Final Fantasy)|Lich]] x1 |
||
| + | == Musical themes == |
||
| − | ==Music== |
||
| − | {{ |
+ | {{audio|filename=FF - Gurgu Volcano.ogg|title="Gurgu Volcano"}} |
| − | The |
+ | The background music for the Cavern of Earth is "[[Mt. Gulg (theme)|Gurgu Volcano]]". |
| − | {{ |
+ | {{clear}} |
| − | ==Other |
+ | == Other appearances == |
| − | ===''[[Dissidia 012 Final Fantasy]]''=== |
+ | === ''[[Dissidia 012 Final Fantasy]]'' === |
{{spoiler}} |
{{spoiler}} |
||
In the [[Confessions of the Creator]] Scenario, a Teleport Stone can be found at the Devil's Tail, and is named after the Cavern of Earth. Instead of the dungeon, the [[Confessions of the Creator/Chasm in the Rotting Land|Chasm in the Rotting Land]] [[Gateway]] is located in the middle of the mountains. The player's first objective in the storyline is to head here and rescue the mured moogle. |
In the [[Confessions of the Creator]] Scenario, a Teleport Stone can be found at the Devil's Tail, and is named after the Cavern of Earth. Instead of the dungeon, the [[Confessions of the Creator/Chasm in the Rotting Land|Chasm in the Rotting Land]] [[Gateway]] is located in the middle of the mountains. The player's first objective in the storyline is to head here and rescue the mured moogle. |
||
| − | After rescuing him and eventually being directed to the Lands of Discord, the mured moogle reveals himself as [[Cid of the Lufaine]] and reveals the circumstances that lead to him becoming a moogle and being sealed in the gateway. When [[Chaos ( |
+ | After rescuing him and eventually being directed to the Lands of Discord, the mured moogle reveals himself as [[Cid of the Lufaine]] and reveals the circumstances that lead to him becoming a moogle and being sealed in the gateway. When [[Chaos (Dissidia)|Chaos]] became [[Feral Chaos]] and killed all the summoned warriors, Cid took on the form of a moogle to enter [[World B]] and sealed himself and [[Cosmos (Dissidia)|Cosmos]] in the depths of the Chasm in the Rotting Land gateway to protect the goddess from Feral Chaos's wrath. The time being sealed caused Cid to lose many of his memories, which he began to recover once the player rescued him. |
| − | The [[Report (Dissidia 012)|Reports]] reveal that the Chasm in the Rotting Land is where Cid stayed during the cycles of war and conducted his studies and experiments. Here he created the [[Warrior |
+ | The [[Report (Dissidia 012)|Reports]] reveal that the Chasm in the Rotting Land is where Cid stayed during the cycles of war and conducted his studies and experiments. Here he created the [[Warrior of Light (Dissidia)|Warrior of Light]] by infusing a [[manikin]] with his own memories, but when it did not show a will of its own, he placed it among the warriors summoned by the gods to observe how it grew. |
{{endspoiler}} |
{{endspoiler}} |
||
| + | === ''[[Final Fantasy Record Keeper]]'' === |
||
| − | ==Gallery== |
||
| + | |||
| − | {{Gallery|class=FFIa |
||
| − | + | ==== Cavern of Earth 1 ==== |
|
| + | {{Quote|Word reaches the warriors that a vampire residing within the Cavern of Earth is responsible for the rot that plagues the land around Melmond. The warriors go to the cavern to investigate.|Description}} |
||
| − | |File:Earthcavemap1.gif|Earth Cave, floor one (NES). |
||
| + | The Cavern of Earth 1 is unlocked by completing [[Vile Peaks]], Part 2 in the ''[[Final Fantasy XIII]]'' realm. Completion of this dungeon unlocks Cavern of Earth 2. |
||
| − | |File:Earthcavemap2.gif|Earth Cave, floor two (NES). |
||
| + | |||
| − | |File:FF NES - Cavern of Earth Third Floor.gif|Earth Cave, floor three (NES). |
||
| + | {{infobox dungeon info FFRK |
||
| − | |File:TerraCavernF4.GIF|Earth Cave, floor four (NES). |
||
| − | | |
+ | |dungeon = Cavern of Earth |
| + | |background=FFRK Cavern of Earth 1 FFI.png |
||
| − | |File:EarthCave.gif|Earth Cave battle background (NES). |
||
| + | |classic difficulty = 34 |
||
| − | |File:Terra Cavern World Map PS.png|Terra Cavern on the World Map (PS). |
||
| + | |classic total stamina = 37 |
||
| − | |File:Terra Cavern PS.png|Terra Cavern (PS). |
||
| + | |elite difficulty = 48 |
||
| − | |File:FF Cavern of Earth WM GBA.png|Cavern of Earth on the World Map (GBA). |
||
| + | |elite total stamina = 53 |
||
| − | |File:FF Cavern of Earth GBA.png|Cavern of Earth (GBA). |
||
| − | | |
+ | |stage 1 = Cavern of Earth - 1st Level |
| + | |stage 1 classic stamina = 9 |
||
| − | |File:D012 Chasm in the Rotting Land.png|The Chasm in the Rotting Land Gateway in World B in ''Dissidia 012 Final Fantasy''. |
||
| + | |stage 1 elite stamina = 13 |
||
| + | |stage 1 rounds = 3 |
||
| + | |stage 2 = Cavern of Earth - 2nd Level |
||
| + | |stage 2 classic stamina = 9 |
||
| + | |stage 2 elite stamina = 13 |
||
| + | |stage 2 rounds = 3 |
||
| + | |stage 3 = Cavern of Earth - 3rd Level |
||
| + | |stage 3 classic stamina = 9 |
||
| + | |stage 3 elite stamina = 13 |
||
| + | |stage 3 rounds = 3 |
||
| + | |stage 4 = Cavern of Earth - Stone Tablet |
||
| + | |stage 4 classic stamina = 10 |
||
| + | |stage 4 elite stamina = 14 |
||
| + | |stage 4 rounds = 3 |
||
| + | |enemies = [[File:FFRK Black Widow FFI.png|link=Black Widow (Final Fantasy)|Black Widow]][[File:FFRK Crawler FFI.png|link=Crawler (Final Fantasy)|Crawler]][[File:FFRK Scorpion FFI.png|link=Scorpion (Final Fantasy)|Scorpion]] |
||
| + | |boss 1 = [[File:FFRK Vampire FFI.png|link=Vampire (Final Fantasy)#Final Fantasy Record Keeper|Vampire]] |
||
| + | |target scores = '''Cavern of Earth - Stone Tablet''' |
||
| + | Exploit the Vampire's weakness to fire attacks.<br> |
||
| + | Exploit the Vampire's weakness to holy attacks. |
||
| + | |classic complete=2,500 gil |
||
| + | |classic first time={{Charicon FFRK|Warrior of Light}} [[File:FFRK Stamina Shard.png|32px|Stamina Shard]] |
||
| + | |classic mastery=3[[File:FFRK Power Orb.png|32px|Power Orb]] [[File:FFRK Stamina Shard.png|32px|Stamina Shard]] |
||
| + | |elite complete=10,000 gil |
||
| + | |elite first time=[[File:FFRK Mythril.png|32px|Mythril]] [[File:FFRK Stamina Shard.png|32px|Stamina Shard]] |
||
| + | |elite mastery=[[File:FFRK Stamina Shard.png|32px|Stamina Shard]] 3[[File:FFRK Greater Power Orb.png|32px|Greater Power Orb]] |
||
}} |
}} |
||
| + | {{clear}} |
||
| + | ==== Cavern of Earth 2 ==== |
||
| − | ==Etymology== |
||
| + | {{Quote|When the warriors brandish the Earth Rod, a stone slab at the back of the vampire's room splits, revealing a stairway. Steeling their resolve, the warriors press onward.|Description}} |
||
| − | {{Etym|Terra}} |
||
| + | The Cavern of Earth 2 is unlocked by completing Cavern of Earth 1. Completion of this dungeon unlocks [[Mount Gulg (Final Fantasy)|Mount Gulg]]. |
||
| + | {{infobox dungeon info FFRK |
||
| − | ==Trivia== |
||
| + | |dungeon = Cavern of Earth |
||
| − | *If players head immediately left upon entering the area, they will come to a dead end passageway, where every step sends them into a battle with at least one [[Hill Gigas (Final Fantasy)|Hill Gigas]] and up to three [[Lizard (Final Fantasy)|Lizards]]. If the player is sufficiently leveled, they can kill the enemy party in a couple rounds, earning several hundred EXP and approximately a thousand gil every battle. If the player wishes, this is a good place to [[Level Grinding|level-grind]] early in the game. |
||
| + | |background=FFRK Cavern of Earth 2 FFI.png |
||
| + | |classic difficulty = 35 |
||
| + | |classic total stamina = 46 |
||
| + | |elite difficulty = 50 |
||
| + | |elite total stamina = 66 |
||
| + | |stage 1 = Cavern of Earth - Stone Tablet |
||
| + | |stage 1 classic stamina = 9 |
||
| + | |stage 1 elite stamina = 13 |
||
| + | |stage 1 rounds = 3 |
||
| + | |stage 2 = Cavern of Earth - 4th Level |
||
| + | |stage 2 classic stamina = 9 |
||
| + | |stage 2 elite stamina = 13 |
||
| + | |stage 2 rounds = 3 |
||
| + | |stage 3 = Cavern of Earth - 5th Level |
||
| + | |stage 3 classic stamina = 9 |
||
| + | |stage 3 elite stamina = 13 |
||
| + | |stage 3 rounds = 3 |
||
| + | |stage 4 = Cavern of Earth - 6th Level |
||
| + | |stage 4 classic stamina = 10 |
||
| + | |stage 4 elite stamina = 14 |
||
| + | |stage 4 rounds = 3 |
||
| + | |stage 5 = Cavern of Earth - Crystal Sanctum |
||
| + | |stage 5 classic stamina = 10 |
||
| + | |stage 5 elite stamina = 14 |
||
| + | |stage 5 rounds = 3 |
||
| + | |enemies = [[File:FFRK Black Widow FFI.png|link=Black Widow (Final Fantasy)|Black Widow]][[File:FFRK Crawler FFI.png|link=Crawler (Final Fantasy)|Crawler]][[File:FFRK Scorpion FFI.png|link=Scorpion (Final Fantasy)|Scorpion]] |
||
| + | |boss 1 = [[File:FFRK Lich FFI.png|100px|link=Lich (Final Fantasy)#Final Fantasy Record Keeper|Lich]] |
||
| + | |target scores = '''Cavern of Earth - Crystal Sanctum''' |
||
| + | Exploit the Lich's weakness to fire attacks. |
||
| + | |classic complete=2,500 gil |
||
| + | |classic first time=[[File:FFRK Mythril.png|32px|Mythril]] [[File:FFRK Stamina Shard.png|32px|Stamina Shard]] |
||
| + | |classic mastery=3[[File:FFRK Earth Orb.png|32px|Earth Orb]] [[File:FFRK Stamina Shard.png|32px|Stamina Shard]] |
||
| + | |elite complete=10,000 gil |
||
| + | |elite first time=[[File:FFRK Mythril.png|32px|Mythril]] [[File:FFRK Stamina Shard.png|32px|Stamina Shard]] |
||
| + | |elite mastery=[[File:FFRK Stamina Shard.png|32px|Stamina Shard]] [[File:FFRK Large Adamantite.png|32px|Large Adamantite]] |
||
| + | }} |
||
| + | {{clear}} |
||
| + | == Gallery == |
||
| − | {{FFI}} |
||
| + | <gallery> |
||
| − | {{D012}} |
||
| + | FF NES Cavern of Earth WM.png|Earth Cave on the World Map (NES). |
||
| + | Earthcavemap1.gif|Earth Cave, floor one (NES). |
||
| + | Earthcavemap2.gif|Earth Cave, floor two (NES). |
||
| + | FF NES - Cavern of Earth Third Floor.gif|Earth Cave, floor three (NES). |
||
| + | TerraCavernF4.GIF|Earth Cave, floor four (NES). |
||
| + | FF NES - Cavern of Earth Fifth Floor.gif|Earth Cave, floor five (NES). |
||
| + | EarthCave.gif|Earth Cave battle background (NES). |
||
| + | Terra Cavern World Map PS.png|Terra Cavern on the World Map (PS). |
||
| + | Terra Cavern PS.png|Terra Cavern (PS). |
||
| + | FF Cavern of Earth WM GBA.png|Cavern of Earth on the World Map (GBA). |
||
| + | FF Cavern of Earth GBA.png|Cavern of Earth (GBA). |
||
| + | FFI Earth Crystal Room GBA.png|Earth Crystal room (GBA). |
||
| + | FF1 3DS CaveEarth2.jpg| |
||
| + | FF1 3DS CaveEarth3.jpg| |
||
| + | FF1 3DS CaveEarth4.jpg| |
||
| + | FF1 3DS CaveEarth5.jpg| |
||
| + | D012 Chasm in the Rotting Land.png|The Chasm in the Rotting Land Gateway in World B in ''Dissidia 012 Final Fantasy''. |
||
| + | FFRK Cavern of Earth 1 JP FFI.png|The japanese dungeon image for ''Cavern of Earth 1'' in ''[[Final Fantasy Record Keeper]]''. |
||
| + | FFRK Cavern of Earth 2 JP FFI.png|The japanese dungeon image for ''Cavern of Earth 2'' in ''[[Final Fantasy Record Keeper]]''. |
||
| + | </gallery> |
||
| + | == Etymology == |
||
| + | {{Etym|Terra}} |
||
| + | |||
| + | {{navbox setting FFI}} |
||
| + | {{navbox setting D012}} |
||
| + | {{navbox realms FFRK}} |
||
| + | |||
| + | [[Category:Locations in Final Fantasy]] |
||
| + | [[Category:Caves]] |
||
[[de:Terra-Höhle]] |
[[de:Terra-Höhle]] |
||
[[es:Cueva de Tierra]] |
[[es:Cueva de Tierra]] |
||
| − | [[Category:Final Fantasy Locations]] |
||
| − | [[Category:Caves]] |
||
Latest revision as of 02:05, 5 January 2022
The Cavern of Earth, also known as the Earth Cave and Terra Cavern, is a location from the original Final Fantasy. It is located south of Melmond, at the "Devil's Tail", and the Warriors of Light must come here to find the source of the earth's rot.
The first floor of the cave offers many branching paths away from the center starting point. The bend to the west of the entrance ladder is particularly dangerous as it forces repetitive battles at every single step, but the ladder to the next floor is a short walk east. The next three levels take some time to traverse through, as they are comprised of many small rooms and contain more powerful enemies. After defeating the Vampire and returning with the Earth Rod, the player can access the next two floors which hold even harder enemies.
Story[]

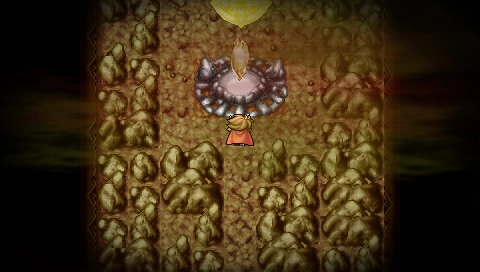
The Crystal Room in the Cavern of Earth.
The Warriors of Light descend through the cave and defeat a vampire residing on the third basement level, who seems to be the cause of the problem. However, this fails to stop the rotting of the earth. Later, they speak with the wise and ancient sage Sadda who lives in a cave to the west. Sadda gives them a rod with which they can move an obstacle at the back of the Vampire's chamber. They return with the rod and expose a secret passage, revealing two deeper floors into the cave.
Here, they find and defeat the Lich, the Fiend of Earth who is leeching power off from the Earth Crystal, and rid the earth of its rotting, the first purification of the Crystals.
Quests[]
Level grinding[]
If players head immediately left upon entering the area, they will come to a deadend passageway, where every step sends them into a battle with at least one Hill Gigas and up to three Lizards. If the player is sufficiently leveled, they can kill the enemy party in a couple rounds, earning several hundred EXP and approximately a thousand gil every battle. This is a good place to level-grind early on.
Treasure[]
| Item | Location |
|---|---|
| 1,975 gil | B1 |
| 795 gil | B1 |
| Antidote | B1 |
| Potion | B1 |
| 880 gil | B1 |
| 330 gil | B2 |
| Coral Sword | B2 |
| Tent | B2 |
| 5,000 gil | B2 |
| Leather Shield | B2 |
| 575 gil | B2 |
| Sleeping Bag | B3 |
| 3,400 gil | B3 |
| Gold Needle | B3 |
| 3,400 gil | B3 |
| 1,020 gil | B3 |
| Star Ruby | B3 |
| Staff | B4 |
| 3,400 gil | B4 |
| 1,520 gil | B4 |
| 5,450 gil | B4 |
| 1,455 gil | B4 |
| Tent | B4 |
| Mythril Shield | B4 |
| 1,250 gil | B4 |
Enemies[]

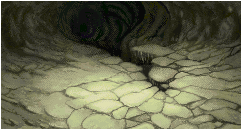
Battle Background.

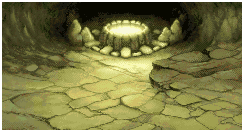
Lich's Battle Background.
B1[]
- [24/64] Anaconda x2-6
- [12/64] Minotaur x1-2
- [12/64] Cobra x3-7
- [6/64] Ogre Chief x1-4, Ogre x0-2
- [6/64] Gargoyle x3-8
- [3/64] Tarantula x3-6, Black Widow x0-2
- [1/64] Mummy x2-5
- [Step-on-tile] Earth Elemental x1
- [Step-on-tile] Hill Gigas x1-2
- [Step-on-tile] Hill Gigas x1-2, Lizard x0-3
B2[]
- [12/64] Cobra x3-7
- [12/64] Minotaur x1-2
- [12/64] Gargoyle x3-8
- [12/64] Ogre Chief x1-4, Ogre x0-2
- [6/64] Werewolf x2-5, Warg Wolf x0-5
- [6/64] Tarantula x4-8
- [3/64] Troll x1-2, Minotaur x0-1
- [1/64] Hill Gigas x1-2
B3[]
- [12/64] Werewolf x2-5, Warg Wolf x0-5
- [12/64] Ogre Chief x1-4, Ogre x0-2
- [12/64] Piscodemon x2-4
- [12/64] Wight x2-5, Ghast x2-5
- [6/64] Wraith x2-6
- [6/64] Cockatrice x2-6
- [3/64] Mummy x2-5
- [1/64] Ochre Jelly x2-5, Tarantula x0-5
- [Step-on-tile] Earth Elemental x1
- [Boss] Vampire x1
B4[]
- [12/64] Piscodemon x2-4
- [12/64] Wight x2-5, Ghast x2-5
- [12/64] Wraith x2-6
- [12/64] Troll x1-2
- [9/64] Goblin Guard x0-5, Werewolf x1-3, Hill Gigas x0-2
- [6/64] Cockatrice x2-6
- [1/64] Ochre Jelly x2-5, Tarantula x0-5
- [Step-on-tile] Ogre Mage x1, Ogre Chief x1, Hyenadon x0-2
- [Step-on-tile] Sphinx x1-2
B5[]
- [12/64] Troll x1-2
- [12/64] Wraith x2-6
- [12/64] Tarantula x4-8
- [12/64] Troll x1-2, Minotaur x0-1
- [6/64] Hill Gigas x1-2
- [6/64] Mummy x2-5
- [3/64] Ochre Jelly x2-5, Tarantula x0-5
- [1/64] Earth Elemental x1
- [Boss] Lich x1
Musical themes[]
The background music for the Cavern of Earth is "Gurgu Volcano".
Other appearances[]
Dissidia 012 Final Fantasy[]
In the Confessions of the Creator Scenario, a Teleport Stone can be found at the Devil's Tail, and is named after the Cavern of Earth. Instead of the dungeon, the Chasm in the Rotting Land Gateway is located in the middle of the mountains. The player's first objective in the storyline is to head here and rescue the mured moogle.
After rescuing him and eventually being directed to the Lands of Discord, the mured moogle reveals himself as Cid of the Lufaine and reveals the circumstances that lead to him becoming a moogle and being sealed in the gateway. When Chaos became Feral Chaos and killed all the summoned warriors, Cid took on the form of a moogle to enter World B and sealed himself and Cosmos in the depths of the Chasm in the Rotting Land gateway to protect the goddess from Feral Chaos's wrath. The time being sealed caused Cid to lose many of his memories, which he began to recover once the player rescued him.
The Reports reveal that the Chasm in the Rotting Land is where Cid stayed during the cycles of war and conducted his studies and experiments. Here he created the Warrior of Light by infusing a manikin with his own memories, but when it did not show a will of its own, he placed it among the warriors summoned by the gods to observe how it grew.
Final Fantasy Record Keeper[]
Cavern of Earth 1[]
Word reaches the warriors that a vampire residing within the Cavern of Earth is responsible for the rot that plagues the land around Melmond. The warriors go to the cavern to investigate.
Description
The Cavern of Earth 1 is unlocked by completing Vile Peaks, Part 2 in the Final Fantasy XIII realm. Completion of this dungeon unlocks Cavern of Earth 2.
Cavern of Earth 2[]
When the warriors brandish the Earth Rod, a stone slab at the back of the vampire's room splits, revealing a stairway. Steeling their resolve, the warriors press onward.
Description
The Cavern of Earth 2 is unlocked by completing Cavern of Earth 1. Completion of this dungeon unlocks Mount Gulg.
Gallery[]
")
")
")
")
")
")
")
")
")
")
")
")
")
")
")
")
")
")
")
Etymology[]
"Terra" is the Latin word for "Earth". It is also present in some Latin-derived languages such as Italian and Portuguese.