Omega Mk.XII (talk | contribs) |
m (Undo revision 3683651 by 79.171.158.222 (talk) that doesn't make any difference) Tag: Undo |
||
| (13 intermediate revisions by 4 users not shown) | |||
| Line 2: | Line 2: | ||
The '''Catacombs''' are a location in ''[[Vagrant Story]]''. They are located between the [[Wine Cellar]] and the [[Sanctum (Vagrant Story)|Sanctum]]. [[Ashley Riot]] passes through here during his investigation for the [[Valendia Knights of the Peace|VKP]] and it is presumed the [[Order of the Crimson Blades]] did so as well. This is where the basic knowledge of [[Leá Monde]], particularly of the sigils, the grimoires, and the dark creatures that roam the city, can be obtained. |
The '''Catacombs''' are a location in ''[[Vagrant Story]]''. They are located between the [[Wine Cellar]] and the [[Sanctum (Vagrant Story)|Sanctum]]. [[Ashley Riot]] passes through here during his investigation for the [[Valendia Knights of the Peace|VKP]] and it is presumed the [[Order of the Crimson Blades]] did so as well. This is where the basic knowledge of [[Leá Monde]], particularly of the sigils, the grimoires, and the dark creatures that roam the city, can be obtained. |
||
| − | ==Story== |
+ | == Story == |
Ashley enters the Catacombs from the [[Wine Cellar]] and finds a shortcut in a room filled with coffins of a sort. However, this room is haunted by a Ghost which attacks Ashley. The Riskbreaker manages to defeat the Ghost, but as soon as he defeats it, the room shakes, prompting him to return to the previous room. From there, he realizes that certain places have changed due to the tremors. The Riskbreaker leaves the Catacombs, not noticing that Hardin was spying at him. |
Ashley enters the Catacombs from the [[Wine Cellar]] and finds a shortcut in a room filled with coffins of a sort. However, this room is haunted by a Ghost which attacks Ashley. The Riskbreaker manages to defeat the Ghost, but as soon as he defeats it, the room shakes, prompting him to return to the previous room. From there, he realizes that certain places have changed due to the tremors. The Riskbreaker leaves the Catacombs, not noticing that Hardin was spying at him. |
||
| − | ==Sublocations== |
+ | == Sublocations == |
| − | {| |
+ | {|class="full-width VagrS article-table" style="text-align:center" |
| + | |- |
||
| − | ! |
+ | !width="25%"|Sublocation |
| − | !class="VagrSa"|Treasures |
||
| + | !Treasures |
||
| − | !class="VagrSa"|Enemies |
||
| + | !Enemies |
||
|- |
|- |
||
!class="VagrSb"|Hall of Sworn Revenge |
!class="VagrSb"|Hall of Sworn Revenge |
||
| Line 15: | Line 16: | ||
|N/A |
|N/A |
||
|- |
|- |
||
| − | ! |
+ | !The Last Blessing |
|N/A |
|N/A |
||
|[[Hellhound (Vagrant Story)|Hellhound]], [[Bat (Vagrant Story)|Bat]] |
|[[Hellhound (Vagrant Story)|Hellhound]], [[Bat (Vagrant Story)|Bat]] |
||
|- |
|- |
||
| − | ! |
+ | !The Weeping Corridor |
|N/A |
|N/A |
||
|[[Skeleton (Vagrant Story)|Skeleton]] |
|[[Skeleton (Vagrant Story)|Skeleton]] |
||
|- |
|- |
||
| − | ! |
+ | !Persecution Hall |
|N/A |
|N/A |
||
|[[Skeleton (Vagrant Story)|Skeleton]], [[Hellhound (Vagrant Story)|Hellhound]] |
|[[Skeleton (Vagrant Story)|Skeleton]], [[Hellhound (Vagrant Story)|Hellhound]] |
||
|- |
|- |
||
| − | ! |
+ | !Rodent-Ridden Chamber |
|Chest: |
|Chest: |
||
| − | *Pink Squirrel |
+ | * Pink Squirrel |
:-Goblin Club |
:-Goblin Club |
||
:-Wooden Grip |
:-Wooden Grip |
||
| − | *Cross Guard |
+ | * Cross Guard |
| − | *Cuirass |
+ | * Cuirass |
| − | *Long Boots |
+ | * Long Boots |
| − | *Iocus Gem |
+ | * Iocus Gem |
| − | *Mana Root (X3) |
+ | * Mana Root (X3) |
| − | *Cure Bulb (X3) |
+ | * Cure Bulb (X3) |
|[[Skeleton (Vagrant Story)|Skeleton]] |
|[[Skeleton (Vagrant Story)|Skeleton]] |
||
|- |
|- |
||
| − | ! |
+ | !Shrine to the Matyrs |
|N/A |
|N/A |
||
|[[Skeleton (Vagrant Story)|Skeleton]], [[Hellhound (Vagrant Story)|Hellhound]] |
|[[Skeleton (Vagrant Story)|Skeleton]], [[Hellhound (Vagrant Story)|Hellhound]] |
||
|- |
|- |
||
| − | ! |
+ | !The Lamenting Mother |
|N/A |
|N/A |
||
|[[Ghost (Vagrant Story)|Ghost]] (Boss) |
|[[Ghost (Vagrant Story)|Ghost]] (Boss) |
||
|- |
|- |
||
| − | ! |
+ | !Hall of Dying Hope |
|N/A |
|N/A |
||
|[[Zombie Knight (Vagrant Story)|Zombie Knight]] (X2) |
|[[Zombie Knight (Vagrant Story)|Zombie Knight]] (X2) |
||
|- |
|- |
||
| − | ! |
+ | !Bandit's Hideout |
|Chest: |
|Chest: |
||
:-Scramasax |
:-Scramasax |
||
:-Swept Hilt |
:-Swept Hilt |
||
| − | *Targe |
+ | * Targe |
| − | *Knuckles |
+ | * Knuckles |
| − | *Bear Mask |
+ | * Bear Mask |
| − | *Haerilis Gem |
+ | * Haerilis Gem |
| − | *Spirit Orison (X3) |
+ | * Spirit Orison (X3) |
| − | *Eye of Argon (X3) |
+ | * Eye of Argon (X3) |
|[[Ghost (Vagrant Story)|Ghost]], [[Bat (Vagrant Story)|Bat]], [[Hellhound (Vagrant Story)|Hellhound]] |
|[[Ghost (Vagrant Story)|Ghost]], [[Bat (Vagrant Story)|Bat]], [[Hellhound (Vagrant Story)|Hellhound]] |
||
|- |
|- |
||
| − | ! |
+ | !The Beast's Domain |
|[[Lizardman (Vagrant Story)|Lizardman]] Boss Prize: |
|[[Lizardman (Vagrant Story)|Lizardman]] Boss Prize: |
||
| − | *Glaive |
+ | * Glaive |
| − | *Knuckles |
+ | * Knuckles |
| − | *Grimoire of Antidote |
+ | * Grimoire of Antidote |
| − | *Elixir of Queens |
+ | * Elixir of Queens |
|[[Lizardman (Vagrant Story)|Lizardman]] (Boss X2) |
|[[Lizardman (Vagrant Story)|Lizardman]] (Boss X2) |
||
|- |
|- |
||
| − | ! |
+ | !Faith Overcome Fear |
|N/A |
|N/A |
||
|[[Skeleton (Vagrant Story)|Skeleton]], [[Zombie Knight (Vagrant Story)|Zombie Knight]] |
|[[Skeleton (Vagrant Story)|Skeleton]], [[Zombie Knight (Vagrant Story)|Zombie Knight]] |
||
|- |
|- |
||
| − | ! |
+ | !Withered Spring |
|N/A |
|N/A |
||
|[[Ghoul (Vagrant Story)|Ghoul]], [[Zombie Knight (Vagrant Story)|Zombie Knight]] |
|[[Ghoul (Vagrant Story)|Ghoul]], [[Zombie Knight (Vagrant Story)|Zombie Knight]] |
||
|- |
|- |
||
| − | ! |
+ | !Work of Art |
|Workshop, Magic Circle |
|Workshop, Magic Circle |
||
|N/A |
|N/A |
||
|- |
|- |
||
| − | ! |
+ | !Repent, O Ye Sinners |
|N/A |
|N/A |
||
|[[Bat (Vagrant Story)|Bat]], [[Ghoul (Vagrant Story)|Ghoul]] |
|[[Bat (Vagrant Story)|Bat]], [[Ghoul (Vagrant Story)|Ghoul]] |
||
|- |
|- |
||
| − | ! |
+ | !The Reaper's Victims |
|N/A |
|N/A |
||
|[[Bat (Vagrant Story)|Bat]], [[Zombie Knight (Vagrant Story)|Zombie Knight]] |
|[[Bat (Vagrant Story)|Bat]], [[Zombie Knight (Vagrant Story)|Zombie Knight]] |
||
|- |
|- |
||
| − | ! |
+ | !The Last Stab of Hope |
|N/A |
|N/A |
||
|[[Skeleton (Vagrant Story)|Skeleton]] (X2) |
|[[Skeleton (Vagrant Story)|Skeleton]] (X2) |
||
|- |
|- |
||
| − | ! |
+ | !Hallway of Heroes |
|N/A |
|N/A |
||
|[[Zombie Knight (Vagrant Story)|Zombie Knight]], [[Skeleton (Vagrant Story)|Skeleton]] |
|[[Zombie Knight (Vagrant Story)|Zombie Knight]], [[Skeleton (Vagrant Story)|Skeleton]] |
||
| Line 102: | Line 103: | ||
|} |
|} |
||
| + | == Musical themes == |
||
| − | ==Music== |
||
| − | "Catacombs" is the track that plays during the exploration and fight sequences within the location. |
+ | "Catacombs" is the track that plays during the exploration and fight sequences within the location. |
| + | |||
| ⚫ | |||
| + | <gallery> |
||
| ⚫ | |||
| ⚫ | |||
| ⚫ | |||
| + | </gallery> |
||
| + | {{navbox VagrS}} |
||
| ⚫ | |||
| − | <center>{{Gallery |
||
| ⚫ | |||
| ⚫ | |||
| ⚫ | |||
| − | }}</center> |
||
| ⚫ | |||
| − | {{VS}} |
||
| ⚫ | |||
Latest revision as of 15:14, 6 November 2022

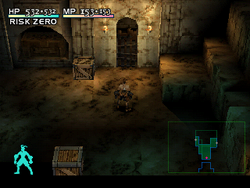
A location in the Catacombs.
The Catacombs are a location in Vagrant Story. They are located between the Wine Cellar and the Sanctum. Ashley Riot passes through here during his investigation for the VKP and it is presumed the Order of the Crimson Blades did so as well. This is where the basic knowledge of Leá Monde, particularly of the sigils, the grimoires, and the dark creatures that roam the city, can be obtained.
Story[]
Ashley enters the Catacombs from the Wine Cellar and finds a shortcut in a room filled with coffins of a sort. However, this room is haunted by a Ghost which attacks Ashley. The Riskbreaker manages to defeat the Ghost, but as soon as he defeats it, the room shakes, prompting him to return to the previous room. From there, he realizes that certain places have changed due to the tremors. The Riskbreaker leaves the Catacombs, not noticing that Hardin was spying at him.
Sublocations[]
| Sublocation | Treasures | Enemies |
|---|---|---|
| Hall of Sworn Revenge | Magic Circle | N/A |
| The Last Blessing | N/A | Hellhound, Bat |
| The Weeping Corridor | N/A | Skeleton |
| Persecution Hall | N/A | Skeleton, Hellhound |
| Rodent-Ridden Chamber | Chest:
|
Skeleton |
| Shrine to the Matyrs | N/A | Skeleton, Hellhound |
| The Lamenting Mother | N/A | Ghost (Boss) |
| Hall of Dying Hope | N/A | Zombie Knight (X2) |
| Bandit's Hideout | Chest:
|
Ghost, Bat, Hellhound |
| The Beast's Domain | Lizardman Boss Prize:
|
Lizardman (Boss X2) |
| Faith Overcome Fear | N/A | Skeleton, Zombie Knight |
| Withered Spring | N/A | Ghoul, Zombie Knight |
| Work of Art | Workshop, Magic Circle | N/A |
| Repent, O Ye Sinners | N/A | Bat, Ghoul |
| The Reaper's Victims | N/A | Bat, Zombie Knight |
| The Last Stab of Hope | N/A | Skeleton (X2) |
| Hallway of Heroes | N/A | Zombie Knight, Skeleton |
Musical themes[]
"Catacombs" is the track that plays during the exploration and fight sequences within the location.
")
")
")