(enemy template split) |
Monterossa (talk | contribs) |
||
| (15 intermediate revisions by 5 users not shown) | |||
| Line 1: | Line 1: | ||
{{sideicon|XIII2}} |
{{sideicon|XIII2}} |
||
| + | {{DISPLAYTITLE:Caius Ballad (''Final Fantasy XIII-2'' boss)}} |
||
| − | {{IncompleteTable|XIII2|Requiem of the Goddess Stats}} |
||
| + | {{infobox enemy |
||
| − | {{Enemy |
||
| release = XIII2 |
| release = XIII2 |
||
| name = Caius Ballad |
| name = Caius Ballad |
||
| Line 8: | Line 8: | ||
| romaji = Kaiasu Baraddo |
| romaji = Kaiasu Baraddo |
||
| type = Boss |
| type = Boss |
||
| − | | character = |
+ | | character = Caius Ballad |
| location = [[Oerba]] -200 AF-<br>[[Void Beyond]] -??? AF-<br>[[Dying World]] -700 AF-<br>[[Academia]] -500 AF-<br>[[Valhalla (Fabula Nova Crystallis)|Valhalla]] -??? AF- |
| location = [[Oerba]] -200 AF-<br>[[Void Beyond]] -??? AF-<br>[[Dying World]] -700 AF-<br>[[Academia]] -500 AF-<br>[[Valhalla (Fabula Nova Crystallis)|Valhalla]] -??? AF- |
||
}} |
}} |
||
| − | {{ |
+ | {{Quote|Embrace the terror!|Caius}} |
'''Caius Ballad''' is a recurring [[boss]] in ''[[Final Fantasy XIII-2]]''. He is fought a total of five times in the main story. |
'''Caius Ballad''' is a recurring [[boss]] in ''[[Final Fantasy XIII-2]]''. He is fought a total of five times in the main story. |
||
| − | After the player has completed the main storyline and repeats the first three battles against Caius with the [[Fragment#List of Fragment Skills|Paradox Scope]] fragment skill active, his [[stats]] are significantly increased |
+ | After the player has completed the main storyline and repeats the first three battles against Caius with the [[Fragment#List of Fragment Skills|Paradox Scope]] fragment skill active, his [[stats]] are significantly increased, and defeating him will result in a [[paradox ending]]. Caius is also fought in the [[Final Fantasy XIII-2 downloadable content|downloadable episode]] "[[Lightning's Story: Requiem of the Goddess]]". The specific stats for this form are unknown, as they are not listed in the official guide. |
==Stats== |
==Stats== |
||
| + | {{infobox enemy stats XIII2 |
||
| − | {{XIII2 Enemy Stats |
||
| sec 1 = Oerba -200 AF- (Normal) |
| sec 1 = Oerba -200 AF- (Normal) |
||
| location = [[Oerba]] -200 AF- |
| location = [[Oerba]] -200 AF- |
||
| Line 59: | Line 59: | ||
| common drop rate = |
| common drop rate = |
||
| rare drop rate = |
| rare drop rate = |
||
| − | | 1 abilities = [[ |
+ | | 1 abilities = [[Final Fantasy XIII-2 enemy abilities#Heart of Chaos|Heart of Chaos]], [[Final Fantasy XIII-2 enemy abilities#Body and Soul|Body and Soul]], [[Final Fantasy XIII-2 enemy abilities#Chain Break|Chain Break]], [[Final Fantasy XIII-2 enemy abilities#Blast Wave|Blast Wave]], [[Final Fantasy XIII-2 enemy abilities#Graviton|Graviton]], [[Final Fantasy XIII-2 enemy abilities#Giga-Graviton|Giga-Graviton]], [[Final Fantasy XIII-2 enemy abilities#Eye of Bahamut|Eye of Bahamut]] |
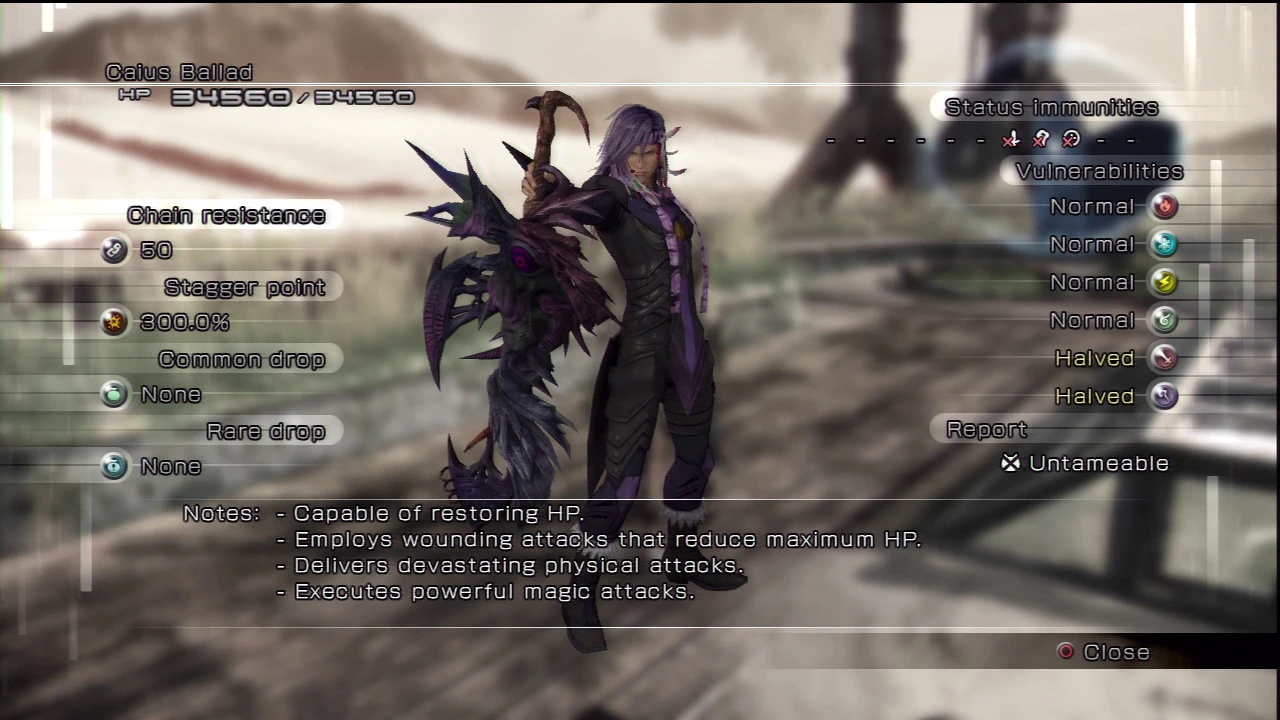
| notes = - Capable of restoring HP.<br/>- Employs wounding attacks that reduce maximum HP.<br/>- Delivers devastating physical attacks.<br/>- Executes powerful magic attacks. |
| notes = - Capable of restoring HP.<br/>- Employs wounding attacks that reduce maximum HP.<br/>- Delivers devastating physical attacks.<br/>- Executes powerful magic attacks. |
||
| sec 2 = Void Beyond -??? AF- (Normal) |
| sec 2 = Void Beyond -??? AF- (Normal) |
||
| Line 67: | Line 67: | ||
| 2 stagger = 200% |
| 2 stagger = 200% |
||
| 2 location = [[Void Beyond]] -??? AF- |
| 2 location = [[Void Beyond]] -??? AF- |
||
| − | | 2 abilities = [[ |
+ | | 2 abilities = [[Final Fantasy XIII-2 enemy abilities#Heart of Chaos|Heart of Chaos]], [[Final Fantasy XIII-2 enemy abilities#Body and Soul|Body and Soul]], [[Final Fantasy XIII-2 enemy abilities#Chain Break|Chain Break]], [[Final Fantasy XIII-2 enemy abilities#Blast Wave|Blast Wave]], [[Final Fantasy XIII-2 enemy abilities#Graviton|Graviton]], [[Final Fantasy XIII-2 enemy abilities#Giga-Graviton|Giga-Graviton]], [[Final Fantasy XIII-2 enemy abilities#Inferno|Inferno]], [[Final Fantasy XIII-2 enemy abilities#Eye of Bahamut|Eye of Bahamut]] |
| 2 notes = - Capable of restoring HP.<br/>- Employs non-elemental attacks.<br/>- Delivers devastating physical attacks.<br/>- Executes powerful magic attacks. |
| 2 notes = - Capable of restoring HP.<br/>- Employs non-elemental attacks.<br/>- Delivers devastating physical attacks.<br/>- Executes powerful magic attacks. |
||
| sec 3 = Dying World -700 AF- (Normal) |
| sec 3 = Dying World -700 AF- (Normal) |
||
| Line 75: | Line 75: | ||
| 3 stagger = 150% |
| 3 stagger = 150% |
||
| 3 location = [[Dying World]] -700 AF- |
| 3 location = [[Dying World]] -700 AF- |
||
| − | | 3 common drop = [[ |
+ | | 3 common drop = [[Final Fantasy XIII-2 accessories#Martyr's Emblem|Martyr's Emblem]] |
| 3 common drop rate = 100 |
| 3 common drop rate = 100 |
||
| − | | 3 abilities = [[ |
+ | | 3 abilities = [[Final Fantasy XIII-2 enemy abilities#Heart of Chaos|Heart of Chaos]], [[Final Fantasy XIII-2 enemy abilities#Body and Soul|Body and Soul]], [[Final Fantasy XIII-2 enemy abilities#Chain Break|Chain Break]], [[Final Fantasy XIII-2 enemy abilities#Blast Wave|Blast Wave]], [[Final Fantasy XIII-2 enemy abilities#Graviton|Graviton]], [[Final Fantasy XIII-2 enemy abilities#Giga-Graviton|Giga-Graviton]], [[Final Fantasy XIII-2 enemy abilities#Inferno|Inferno]], [[Final Fantasy XIII-2 enemy abilities#Eye of Bahamut|Eye of Bahamut]] |
| 3 notes = - Capable of restoring HP.<br/>- Employs non-elemental attacks.<br/>- Delivers devastating physical attacks.<br/>- Executes powerful magic attacks. |
| 3 notes = - Capable of restoring HP.<br/>- Employs non-elemental attacks.<br/>- Delivers devastating physical attacks.<br/>- Executes powerful magic attacks. |
||
| sec 4 = Academia -500 AF- |
| sec 4 = Academia -500 AF- |
||
| Line 85: | Line 85: | ||
| 4 stagger = 300% |
| 4 stagger = 300% |
||
| 4 location = [[Academia]] -500 AF- |
| 4 location = [[Academia]] -500 AF- |
||
| − | | 4 abilities = [[ |
+ | | 4 abilities = [[Final Fantasy XIII-2 enemy abilities#Heart of Chaos|Heart of Chaos]], [[Final Fantasy XIII-2 enemy abilities#Body and Soul|Body and Soul]], [[Final Fantasy XIII-2 enemy abilities#Chain Break|Chain Break]], [[Final Fantasy XIII-2 enemy abilities#Blast Wave|Blast Wave]], [[Final Fantasy XIII-2 enemy abilities#Graviton|Graviton]], [[Final Fantasy XIII-2 enemy abilities#Giga-Graviton|Giga-Graviton]], [[Final Fantasy XIII-2 enemy abilities#Inferno|Inferno]], [[Final Fantasy XIII-2 enemy abilities#Eye of Bahamut|Eye of Bahamut]] |
| 4 notes = - Capable of restoring HP.<br/>- Employs physical and magical combination attacks.<br/>- Employs non-elemental attacks.<br/>- Cannot be provoked. |
| 4 notes = - Capable of restoring HP.<br/>- Employs physical and magical combination attacks.<br/>- Employs non-elemental attacks.<br/>- Cannot be provoked. |
||
| sec 5 = Valhalla -??? AF- |
| sec 5 = Valhalla -??? AF- |
||
| Line 93: | Line 93: | ||
| 5 stagger = 200% |
| 5 stagger = 200% |
||
| 5 location = [[Valhalla (Fabula Nova Crystallis)|Valhalla]] -??? AF- |
| 5 location = [[Valhalla (Fabula Nova Crystallis)|Valhalla]] -??? AF- |
||
| − | | 5 abilities = [[ |
+ | | 5 abilities = [[Final Fantasy XIII-2 enemy abilities#Heart of Chaos|Heart of Chaos]], [[Final Fantasy XIII-2 enemy abilities#Body and Soul|Body and Soul]], [[Final Fantasy XIII-2 enemy abilities#Chain Break|Chain Break]], [[Final Fantasy XIII-2 enemy abilities#Blast Wave|Blast Wave]], [[Final Fantasy XIII-2 enemy abilities#Graviton|Graviton]], [[Final Fantasy XIII-2 enemy abilities#Giga-Graviton|Giga-Graviton]], [[Final Fantasy XIII-2 enemy abilities#Inferno|Inferno]], [[Final Fantasy XIII-2 enemy abilities#Eye of Bahamut|Eye of Bahamut]], [[Final Fantasy XIII-2 enemy abilities#Absolution|Absolution]], [[Final Fantasy XIII-2 enemy abilities#Ultima|Ultima]], [[Final Fantasy XIII-2 enemy abilities#Pulsar Burst|Pulsar Burst]] |
| 5 notes = - Capable of restoring HP.<br/>- Employs physical and magical combination attacks.<br/>- Employs non-elemental attacks.<br/>- Employs wounding attacks that reduce maximum HP. |
| 5 notes = - Capable of restoring HP.<br/>- Employs physical and magical combination attacks.<br/>- Employs non-elemental attacks.<br/>- Employs wounding attacks that reduce maximum HP. |
||
| sec 6 = Oerba -200 AF- (Paradox Scope) |
| sec 6 = Oerba -200 AF- (Paradox Scope) |
||
| Line 101: | Line 101: | ||
| 6 stagger = 300% |
| 6 stagger = 300% |
||
| 6 location = [[Oerba]] -200 AF- |
| 6 location = [[Oerba]] -200 AF- |
||
| − | | 6 Abilities = [[ |
+ | | 6 Abilities = [[Final Fantasy XIII-2 enemy abilities#Heart of Chaos|Heart of Chaos]], [[Final Fantasy XIII-2 enemy abilities#Body and Soul|Body and Soul]], [[Final Fantasy XIII-2 enemy abilities#Chain Break|Chain Break]], [[Final Fantasy XIII-2 enemy abilities#Blast Wave|Blast Wave]], [[Final Fantasy XIII-2 enemy abilities#Graviton|Graviton]], [[Final Fantasy XIII-2 enemy abilities#Giga-Graviton|Giga-Graviton]], [[Final Fantasy XIII-2 enemy abilities#Inferno|Inferno]], [[Final Fantasy XIII-2 enemy abilities#Eye of Bahamut|Eye of Bahamut]], [[Final Fantasy XIII-2 enemy abilities#Absolution|Absolution]] |
| 6 Notes = - Capable of restoring HP.<br/>- Employs wounding attacks that reduce maximum HP.<br/>- Delivers devastating physical attacks.<br/>- Executes powerful magic attacks. |
| 6 Notes = - Capable of restoring HP.<br/>- Employs wounding attacks that reduce maximum HP.<br/>- Delivers devastating physical attacks.<br/>- Executes powerful magic attacks. |
||
| sec 7 = Void Beyond -??? AF- (Paradox Scope) |
| sec 7 = Void Beyond -??? AF- (Paradox Scope) |
||
| Line 109: | Line 109: | ||
| 7 stagger = 200% |
| 7 stagger = 200% |
||
| 7 location = [[Void Beyond]] -??? AF- |
| 7 location = [[Void Beyond]] -??? AF- |
||
| − | | 7 abilities = [[ |
+ | | 7 abilities = [[Final Fantasy XIII-2 enemy abilities#Heart of Chaos|Heart of Chaos]], [[Final Fantasy XIII-2 enemy abilities#Body and Soul|Body and Soul]], [[Final Fantasy XIII-2 enemy abilities#Chain Break|Chain Break]], [[Final Fantasy XIII-2 enemy abilities#Blast Wave|Blast Wave]], [[Final Fantasy XIII-2 enemy abilities#Graviton|Graviton]], [[Final Fantasy XIII-2 enemy abilities#Giga-Graviton|Giga-Graviton]], [[Final Fantasy XIII-2 enemy abilities#Inferno|Inferno]], [[Final Fantasy XIII-2 enemy abilities#Eye of Bahamut|Eye of Bahamut]], [[Final Fantasy XIII-2 enemy abilities#Absolution|Absolution]] |
| 7 Notes = - Capable of restoring HP.<br/>- Employs physical and magical combination attacks<br/>- Employs non-elemental attacks<br/>- Employs wounding attacks that reduce maximum HP. |
| 7 Notes = - Capable of restoring HP.<br/>- Employs physical and magical combination attacks<br/>- Employs non-elemental attacks<br/>- Employs wounding attacks that reduce maximum HP. |
||
| sec 8 = Dying World -700 AF- (Paradox Scope) |
| sec 8 = Dying World -700 AF- (Paradox Scope) |
||
| Line 117: | Line 117: | ||
| 8 stagger = 150% |
| 8 stagger = 150% |
||
| 8 location = [[Dying World]] -700 AF- |
| 8 location = [[Dying World]] -700 AF- |
||
| − | | 8 abilities = [[ |
+ | | 8 abilities = [[Final Fantasy XIII-2 enemy abilities#Heart of Chaos|Heart of Chaos]], [[Final Fantasy XIII-2 enemy abilities#Body and Soul|Body and Soul]], [[Final Fantasy XIII-2 enemy abilities#Chain Break|Chain Break]], [[Final Fantasy XIII-2 enemy abilities#Blast Wave|Blast Wave]], [[Final Fantasy XIII-2 enemy abilities#Graviton|Graviton]], [[Final Fantasy XIII-2 enemy abilities#Giga-Graviton|Giga-Graviton]], [[Final Fantasy XIII-2 enemy abilities#Inferno|Inferno]], [[Final Fantasy XIII-2 enemy abilities#Eye of Bahamut|Eye of Bahamut]], [[Final Fantasy XIII-2 enemy abilities#Absolution|Absolution]] |
| 8 notes = - Capable of restoring HP.<br/>- Employs non-elemental attacks<br/>- Delivers devastating physical attacks.<br/>- Executes powerful magic attacks. |
| 8 notes = - Capable of restoring HP.<br/>- Employs non-elemental attacks<br/>- Delivers devastating physical attacks.<br/>- Executes powerful magic attacks. |
||
| sec 9 = Requiem of the Goddess |
| sec 9 = Requiem of the Goddess |
||
| Line 124: | Line 124: | ||
| 9 strength = |
| 9 strength = |
||
| 9 magic = |
| 9 magic = |
||
| − | | 9 stagger = 300 |
+ | | 9 stagger = 300 |
| 9 Chain Res = 60 |
| 9 Chain Res = 60 |
||
| 9 keep = |
| 9 keep = |
||
| Line 132: | Line 132: | ||
| 9 gil = 0 |
| 9 gil = 0 |
||
| 9 physical = 100%{{foot|Ravager and Healer Stances}}/50%{{foot|Commando Stance}} |
| 9 physical = 100%{{foot|Ravager and Healer Stances}}/50%{{foot|Commando Stance}} |
||
| − | | 9 magical = 100%{{foot| |
+ | | 9 magical = 100%{{foot|Commando and Healer Stances}}/50%{{foot|Ravager Stance}} |
| 9 deprotect = |
| 9 deprotect = |
||
| 9 deshell = |
| 9 deshell = |
||
| Line 148: | Line 148: | ||
| 9 dispel = |
| 9 dispel = |
||
| 9 wound = |
| 9 wound = |
||
| − | | 9 abilities = '''Commando Stance:''' [[ |
+ | | 9 abilities = '''Commando Stance:''' [[Final Fantasy XIII-2 enemy abilities#Blast Wave|Blast Wave]], [[Final Fantasy XIII-2 enemy abilities#Graviton|Graviton]], [[Final Fantasy XIII-2 enemy abilities#Giga-Graviton|Giga-Graviton]], [[Final Fantasy XIII-2 enemy abilities#Inferno|Inferno]], [[Final Fantasy XIII-2 enemy abilities#Eye of Bahamut|Eye of Bahamut]], [[Final Fantasy XIII-2 enemy abilities#Ultima|Ultima]], [[Final Fantasy XIII-2 enemy abilities#Pulsar Burst|Pulsar Burst]]<br/>'''Ravager Stance:''' Graviton<br/>'''Healer Stance:''' [[Final Fantasy XIII-2 enemy abilities#Heart of Chaos|Heart of Chaos]], [[Final Fantasy XIII-2 enemy abilities#Body and Soul|Body and Soul]], [[Final Fantasy XIII-2 enemy abilities#Absolution|Absolution]], [[Final Fantasy XIII-2 enemy abilities#Dispelga|Dispelga]] |
| 9 notes = |
| 9 notes = |
||
}} |
}} |
||
| − | == |
+ | == Battle == |
=== Oerba -200 AF- === |
=== Oerba -200 AF- === |
||
| ⚫ | |||
| − | Caius starts the battle with Heart of Chaos, which bestows [[Reraise (status)|Reraise]]. Despite this status, which usually automatically revives defeated units, the battle will end by |
+ | Caius starts the battle with [[Heart of Chaos]], which bestows [[Reraise (status)|Reraise]]. Despite this status, which usually automatically revives defeated units, the battle will end by depleting Caius's [[HP (stat)|HP]] once. |
| − | Caius tends to focus |
+ | Caius tends to focus on a single party member, so the player should deploy a [[Synergist (Final Fantasy XIII-2)|Synergist]] that can cast [[Vigilance (Final Fantasy XIII-2)|Vigilance]]. Using a [[Saboteur (Final Fantasy XIII-2)|Saboteur]] to inflict status effects, especially [[Poison (status)|Poison]] and either [[Deprotect (status)|Deprotect]] and [[Deshell (status)|Deshell]] upon Caius, is also recommended. |
| − | Caius |
+ | Caius uses Body and Soul to buff himself, the most notable being [[Regen (status)|Regen]]. Thus it is important to defeat Caius before the first [[Stagger (Final Fantasy XIII)|Stagger]] period is over, otherwise he will regenerate nearly all of his HP. The player should use Relentless Assault to raise Caius's chain gauge close to the stagger point, then switch to a healing paradigm, such as Combat Clinic, to restore lost HP, then switch back to Relentless Assault to stagger Caius. |
| − | About halfway through the stagger period, the party should shift to Cerberus (three [[Commando (Final Fantasy XIII-2)|Commandos]]) to end the battle before Caius recovers from stagger. The player should use [[ |
+ | About halfway through the stagger period, the party should shift to Cerberus (three [[Commando (Final Fantasy XIII-2)|Commandos]]) to end the battle before Caius recovers from stagger. The player should use [[Final Fantasy XIII-2 items#Potion|Potions]] and [[Final Fantasy XIII-2 items#Phoenix Down|Phoenix Downs]] if any more healing is required during the stagger period. |
==== Paradox Scope ==== |
==== Paradox Scope ==== |
||
| Line 173: | Line 174: | ||
* Combat Clinic (MED/MED/SEN) |
* Combat Clinic (MED/MED/SEN) |
||
| − | The player should begin |
+ | The player should begin with Tri-disaster and blast Caius with spells until he is staggered. The player can either stay in that paradigm or switch to RAV/MED/RAV, COM/RAV/RAV, or COM/COM/COM based on preference. |
Once Caius recovers from stagger the party should switch to MED/MED/SEN to heal to full health and then switch over to SAB/SEN/SEN and blast Poison until Caius is poisoned. This will counteract his Regen. Once Caius is poisoned the party should start over from the beginning. [[Meteor Javelin]] or [[Ultima Arrow]] can be used while he is staggered for extra damage. |
Once Caius recovers from stagger the party should switch to MED/MED/SEN to heal to full health and then switch over to SAB/SEN/SEN and blast Poison until Caius is poisoned. This will counteract his Regen. Once Caius is poisoned the party should start over from the beginning. [[Meteor Javelin]] or [[Ultima Arrow]] can be used while he is staggered for extra damage. |
||
=== Void Beyond -??? AF- === |
=== Void Beyond -??? AF- === |
||
| − | Useful paradigms: |
+ | Useful paradigms include: |
* Dualcasting (RAV/RAV) |
* Dualcasting (RAV/RAV) |
||
* Double Trouble (COM/COM) |
* Double Trouble (COM/COM) |
||
| Line 186: | Line 187: | ||
* Lifeguard (SEN/MED) |
* Lifeguard (SEN/MED) |
||
| − | Caius will focus on launching [[Serah Farron|Serah]]. The |
+ | Caius will focus on launching [[Serah Farron/Gameplay|Serah]]. The player should debuff (preferably Deshell) Caius and switch to Dualcasting and start spamming [[Thunder (Final Fantasy XIII-2)|Thunder]]. By the time the party attempts to do this Caius will have cast Graviton twice, or maybe even three times, but it shouldn't hurt too badly with quick healing. The player's first goal is to stagger him; in stagger Caius is weak and should pose little danger. The only attack the party should be concerned about is Blast Wave. If Caius casts Chain Break, the player should switch back to Dualcasting and try again. |
==== Paradox Scope ==== |
==== Paradox Scope ==== |
||
| − | This battle is significantly harder with the Paradox Scope active as the player has only two party members, and if Serah is [[Knocked Out|knocked out]] the battle will end. Caius's HP and stagger point are not overly high, but he is fast and capable of restoring his HP, emptying his chain gauge and of attacking fast in succession, as well as launching his targets in the air incapacitating them. After his HP is depleted to zero Caius will revive himself and the player must repeat the process. |
+ | This battle is significantly harder with the Paradox Scope active as the player has only two party members, and if Serah is [[Knocked Out|knocked out]] the battle will end. Caius's HP and stagger point are not overly high, but he is fast and capable of restoring his HP, emptying his chain gauge and of attacking fast in succession, as well as launching his targets in the air, incapacitating them. After his HP is depleted to zero Caius will revive himself and the player must repeat the process. |
| − | Pairing Serah with a [[Sentinel (Final Fantasy XIII-2)|Sentinel]] ally is a good idea, especially one that cannot be launched even when not guarding, such as the |
+ | Pairing Serah with a [[Sentinel (Final Fantasy XIII-2)|Sentinel]] ally is a good idea, especially one that cannot be launched even when not guarding, such as the [[armadillon]]s. The Sentinel ally should know [[Provoke (Final Fantasy XIII-2)|Provoke]] to draw Caius's attacks, as well as either [[Steelguard (Final Fantasy XIII-2)|Steelguard]] or [[Mediguard (Final Fantasy XIII-2)|Mediguard]] for defense (Steelguard may be better, because it reduces damage more). |
Useful paradigms include: |
Useful paradigms include: |
||
| Line 200: | Line 201: | ||
* Arcane Defense (RAV/SEN) |
* Arcane Defense (RAV/SEN) |
||
| − | While the Sentinel ally draws Caius's attention, Serah should attempt to apply either Deprotect or Deshell depending on her proficiency, along with [[Imperil (status)|Imperil]], and possibly Poison. If Caius has both Deshell/Deprotect and Imperil the [[Ravager (Final Fantasy XIII-2)|Ravager]] job makes his HP drop like a stone, as his physical/magical resistance becomes normal and he becomes weak to [[Element (term)|elements]], taking double damage from Ravager skills. If the player can apply [[Faith (status)|Faith]]/[[Bravery (status)|Bravery]] with a [[Feral Link]] skill, the effect is even greater. What makes this difficult is that Caius |
+ | While the Sentinel ally draws Caius's attention, Serah should attempt to apply either Deprotect or Deshell depending on her proficiency, along with [[Imperil (status)|Imperil]], and possibly Poison. If Caius has both Deshell/Deprotect and Imperil the [[Ravager (Final Fantasy XIII-2)|Ravager]] job makes his HP drop like a stone, as his physical/magical resistance becomes normal and he becomes weak to [[Element (term)|elements]], taking double damage from Ravager skills. If the player can apply [[Faith (status)|Faith]]/[[Bravery (status)|Bravery]] with a [[Feral Link]] skill, the effect is even greater. What makes this difficult is that Caius restores his status with Absolution and keeps buffing himself. |
| − | Saboteur |
+ | Saboteur inflicts [[Wound (term)|Wound damage]], which is especially useful against Caius as he revives himself after being defeated the first time, but is unable to restore Wound damage, meaning he will be revived at whatever his maximum HP was at the time he runs out of HP the first time. He is also not immune to [[Dispel (Final Fantasy XIII-2)|Dispel]], which also deals damage. Although Saboteur skills don't deal much damage when compared to Commando or Ravager, they slow his chain gauge while still building chain, and the Wound damage builds up over time and caps his max HP. |
| − | When Caius prepares [[Inferno (ability)|Inferno]] the player can quickly shift to SEN/SEN to minimize damage, and when the Sentinel is on low HP the player can shift to MED/SEN to heal the Sentinel. Using [[ |
+ | When Caius prepares [[Inferno (ability)|Inferno]] the player can quickly shift to SEN/SEN to minimize damage, and when the Sentinel is on low HP the player can shift to MED/SEN to heal the Sentinel. Using [[Final Fantasy XIII-2 items#Wound Potion|Wound Potions]] may be necessary if the battle draws for long. |
=== A Dying World -700 AF- === |
=== A Dying World -700 AF- === |
||
| Line 215: | Line 216: | ||
* MED |
* MED |
||
| ⚫ | |||
| − | Caius will start by rushing [[Noel Kreiss|Noel]] and launching him up in the air. The player should start by using [[Protect ( |
+ | Caius will start by rushing [[Noel Kreiss/Gameplay|Noel]] and launching him up in the air. The player should start by using [[Protect (Final Fantasy XIII-2)|Protect]] and then switch over to Saboteur and cast Deshell. When Deshell sticks the player should switch to Ravager and cast Thunder, which has the fastest casting time of all spells. |
| − | Once Caius is staggered Noel should switch over to Commando, but after his health drops to around half Caius will use Chain Break followed by Heart and Soul to counter this. The player should switch to Saboteur and start casting Dispel and once Caius's [[Haste (status)|Haste]] is removed, switch over to Ravager and stagger Caius and switch to Commando for the win. |
+ | Once Caius is staggered Noel should switch over to Commando, but after his health drops to around half Caius will use Chain Break followed by Heart and Soul to counter this. The player should switch to Saboteur and start casting Dispel, and once Caius's [[Haste (status)|Haste]] is removed, switch over to Ravager and stagger Caius and switch to Commando for the win. |
| − | It is possible to lose this battle and still continue playing, but this misses out on a [[Bestiary (Final Fantasy XIII-2)|bestiary]] entry. If this happens and the player still wants to complete the bestiary (there is a [[fragment]] quest that requires this) they need to close Academia 4XX's Time Gate and play on to reach A Dying World 700 AF again. |
+ | It is possible to lose this battle and still continue playing, but this misses out on a [[Bestiary (Final Fantasy XIII-2)|bestiary]] entry. If this happens and the player still wants to complete the bestiary (there is a [[fragment]] quest that requires this) they need to close Academia 4XX's [[Time Gate]] and play on to reach A Dying World 700 AF again. |
==== Paradox Scope ==== |
==== Paradox Scope ==== |
||
| − | This fight is hard, and it is easy to die as Noel is alone. The above strategy should work fine (at a higher [[level]]) |
+ | This fight is hard, and it is easy to die as Noel is alone. The above strategy should work fine (at a higher [[level]]) with increased focus on healing and buffing. |
=== Academia -500 AF- === |
=== Academia -500 AF- === |
||
| Line 233: | Line 235: | ||
* Consolidation(SEN/SEN/MED) |
* Consolidation(SEN/SEN/MED) |
||
| − | Caius will usually focus on Serah, and use a nasty spell called Eye of Bahamut |
+ | Caius will usually focus on Serah, and use a nasty spell called Eye of Bahamut. The player should switch over to SYN/SYN/MED and use Protect on Serah. The player should next switch to SAB/SAB/MED and use Deshell on Caius. Caius will likely unleash a barrage of attacks that will launch Serah in the air, but after the Deshell has been applied the player should switch over to RAV/RAV/RAV and spam Thunder. |
By this time, Caius will again use Eye of Bahamut, but once the party gets Caius down to around half of his HP, he will use Chain Break then Heart of Chaos. Once he does this, the party should switch over to SAB/SAB/MED and start casting Dispel until it rids of his Haste status, then switch back to RAV/RAV/RAV until he is staggered. |
By this time, Caius will again use Eye of Bahamut, but once the party gets Caius down to around half of his HP, he will use Chain Break then Heart of Chaos. Once he does this, the party should switch over to SAB/SAB/MED and start casting Dispel until it rids of his Haste status, then switch back to RAV/RAV/RAV until he is staggered. |
||
| Line 240: | Line 242: | ||
=== Valhalla -??? AF- === |
=== Valhalla -??? AF- === |
||
| + | [[File:FFXIII-2 Finish Him.png|thumb|The last cinematic action in the game.]] |
||
| − | Useful paradigms: |
+ | Useful paradigms include: |
* Cerberus (COM/COM/COM) |
* Cerberus (COM/COM/COM) |
||
* Tri-disaster (RAV/RAV/RAV) |
* Tri-disaster (RAV/RAV/RAV) |
||
| Line 247: | Line 250: | ||
* Premeditation (SYN/SAB/SEN) |
* Premeditation (SYN/SAB/SEN) |
||
| − | Caius will start the battle by casting [[Ultima (ability)#Final Fantasy XIII-2|Ultima]] |
+ | Caius will start the battle by casting [[Ultima (ability)#Final Fantasy XIII-2|Ultima]]. The player can switch to the Tortoise paradigm to reduce damage, but the spell isn't overly powerful. The player should use a paradigm with a Synergist and cast Protect, [[Shell (status)|Shell]], Vigilance, and [[Veil (status)#Final Fantasy XIII-2|Veil]] on the party, then switch to Tri-disaster and raise Caius's chain gauge. |
When he is staggered, the party should switch to Cerberus and attack. After Caius performs four or so cycles of attacks, the player should switch to Tortoise to absorb the damage of Caius's Inferno attack, which can devastate the party, and then heal if needed. Caius will not do anything for a while, so this opportunity can be taken to deal as much damage as possible before he empties his chain gauge. |
When he is staggered, the party should switch to Cerberus and attack. After Caius performs four or so cycles of attacks, the player should switch to Tortoise to absorb the damage of Caius's Inferno attack, which can devastate the party, and then heal if needed. Caius will not do anything for a while, so this opportunity can be taken to deal as much damage as possible before he empties his chain gauge. |
||
| Line 253: | Line 256: | ||
After this, he will likely cast Body and Soul or Absolution, and start his cycle over again by casting Ultima. The party's attacks before Caius empties his chain gauge will likely reduce his health by at least half. |
After this, he will likely cast Body and Soul or Absolution, and start his cycle over again by casting Ultima. The party's attacks before Caius empties his chain gauge will likely reduce his health by at least half. |
||
| − | Should Caius cast Eye of Bahamut on any of the party members, the player should |
+ | Should Caius cast Eye of Bahamut on any of the party members, the player should remove all the status ailments before Caius casts Inferno, as it can easily KO anyone if they have Deshell or Imperil. When his HP is depleted once, Caius will revive himself to max HP, minus any Wound damage. |
Another strategy is to use SAB/SAB/MED and casting Dispel to remove his Haste then use Deshell and once that sticks switch to Tri-disaster and cast Thunder on Caius to raise his chain gauge. |
Another strategy is to use SAB/SAB/MED and casting Dispel to remove his Haste then use Deshell and once that sticks switch to Tri-disaster and cast Thunder on Caius to raise his chain gauge. |
||
| Line 259: | Line 262: | ||
=== Valhalla -??? AF- (Requiem of the Goddess DLC) === |
=== Valhalla -??? AF- (Requiem of the Goddess DLC) === |
||
==== Level 0-2 ==== |
==== Level 0-2 ==== |
||
| ⚫ | |||
| − | Caius will switch between three paradigm stances: Commando, Ravager, and Medic. When he is in his Commando Stance, the player should stay in Paladin and either Shaman or Mage—Paladin used to stabilize the chain gauge and Shaman or Mage to build it. The player should remain cautious of when Caius snaps his fingers, an indication he is about to attack. When he does, the player should switch immediately to Knight and using Immortality negate the damage from the attack. When Caius is in Ravager stance, the player must be alert as they will have to rapidly change between roles. |
||
| + | Caius will switch between three paradigm stances: Commando, Ravager, and Medic. When he is in his Commando stance, he focuses on devastating attacks and spells, along with debuffs using Eye of Bahamut that is further enhanced by the Auto-Bravery and Auto-Faith he gains upon assuming the stance. Upon snapping his fingers, he will swiftly attack. It is necessary to immediately switch to Knight for access to Immortality to negate the damage. For attacking, the player should stay in Paladin and either Shaman or Mage—Paladin used to stabilize the chain gauge and Shaman or Mage to build it. He resists physical attacks, so Ruin from Knight and Shaman, or Mage's lightning and wind magic are best to use against him. When Caius is in Ravager stance, he focuses on relentless and swift attacks boosted by the speed-enhancing attributes of Auto-Haste along with gaining Graviton and is capable of quickly interrupting Lightning from executing attacks and landing his own. He resists magical attacks in this mode; Shaman and Mage's skills, along with Knight's Ruin, will be ineffective against him, but Knight's other abilities will work well. The player will have to rapidly change between roles to adjust. |
||
When Caius is not attacking, staying in either Shaman or Mage is advisable, but as soon as he moves, the player must switch to the Knight role to minimize damage from Caius's combos, or else be sure to have enough HP to survive the onslaught. At some point the player will be forced to go to the Paladin role to stabilize the gauge. The rapid changing of roles may mean that the player has to stay on the role menu as [[Lightning (Final Fantasy XIII)/Gameplay|Lightning]] is attacking Caius, ready to switch when needed. |
When Caius is not attacking, staying in either Shaman or Mage is advisable, but as soon as he moves, the player must switch to the Knight role to minimize damage from Caius's combos, or else be sure to have enough HP to survive the onslaught. At some point the player will be forced to go to the Paladin role to stabilize the gauge. The rapid changing of roles may mean that the player has to stay on the role menu as [[Lightning (Final Fantasy XIII)/Gameplay|Lightning]] is attacking Caius, ready to switch when needed. |
||
| ⚫ | |||
| − | When Caius switches to Medic, the player has the greatest chance of staggering Caius, |
+ | When Caius switches to Medic, the player has the greatest chance of staggering him, as he doesn't resist anything. When in Medic stance Caius gains Auto-Regen, and thus the player needs to focus solely on attacking to overcome the health regeneration. The player must go all out with either the Shaman or Mage, perhaps occasionally using the Paladin role to stabilize the gauge. If the player staggers Caius, they should switch to the Paladin role and [[Launch (ability)|launch]] him before switching to the Shaman or Mage role to build up the gauge. As he is in the air, the player can build up the gauge to a reasonable point—normally between 500-600%—before switching back to the Paladin role and keeping him in the air. It is recommended to quickly make Caius exit the Medic Stance by relentlessly attacking him as while his Dispelga deals little magical damage, Absolution and Body and Soul will give Caius multiple buffs that will remain after he switches stances and can also remove any Wound damage done to him and restore his health, prolonging the battle and making Caius more powerful based on the buffs he bestows on himself. His most devastating move is the Heart of Chaos that will revive him after he falls if he succeeds in casting it. |
| − | Just before his stagger ends, the player must be in the Paladin role and be ready to use Smite. The very second Smite hits, the player should use [[ |
+ | Just before his stagger ends, the player must be in the Paladin role and be ready to use Smite. The very second Smite hits, the player should use [[Legion of One]] if it is ready. The player should make sure to switch first, or otherwise Legion of One will be a lot weaker. So long as the player is ready to quickly switch roles to Knight before Caius attacks, and they make the best use of his stagger duration, the battle is winnable. |
==== Level 3-4 ==== |
==== Level 3-4 ==== |
||
| − | The strategy remains identical to the one above, but at the start of the battle, the player should enter the Conjurer role and use the "Mighty Guard" spell that casts Protect, Shell, Veil and most importantly Vigilance. |
+ | The strategy remains otherwise identical to the one above, but at the start of the battle, the player should enter the Conjurer role and use the "Mighty Guard" spell that casts Protect, Shell, Veil, and most importantly, Vigilance. |
| − | As Lightning now has Vigilance and is, in turn, unlikely to be interrupted, when Caius switches to the Ravager stance, the player does not have to switch to the Knight role—unless they need to conserve HP. Due to the buffs from Mighty Guard, the battle will normally go a lot quicker. Also, when Lightning |
+ | As Lightning now has Vigilance and is, in turn, unlikely to be interrupted, when Caius switches to the Ravager stance, the player does not have to switch to the Knight role—unless they need to conserve HP. Due to the buffs from Mighty Guard, the battle will normally go a lot quicker. Also, when Lightning is buffed, when Caius switches to Healer stance, he will unavoidably cast Dispelga, which will remove all of Lightning's buffs. It can be negated by switching to Knight and using Immortality, which will conserve the buffs. |
==== Level 5 ==== |
==== Level 5 ==== |
||
| Line 276: | Line 281: | ||
==== Level 6-7 ==== |
==== Level 6-7 ==== |
||
| − | Same as Level 5, however, now when Caius is staggered, upon casting Aura on Lightning, the player should switch to the Sorcerer role and cast Chaos on Caius to inflict a number of status ailments |
+ | Same as Level 5, however, now when Caius is staggered, upon casting Aura on Lightning, the player should switch to the Sorcerer role and cast Chaos on Caius to inflict a number of status ailments so he will take more damage while he is in stagger. Caius's Absolution may make it necessary to cast it multiple times as any of the status ailments will be removed when he casts it. |
==== Level 8-10 ==== |
==== Level 8-10 ==== |
||
| Line 283: | Line 288: | ||
== Gallery == |
== Gallery == |
||
<gallery> |
<gallery> |
||
| ⚫ | |||
| ⚫ | |||
13-2 RoTG absolution.PNG|Absolution. |
13-2 RoTG absolution.PNG|Absolution. |
||
13-2 RoTG blast wave.PNG|Blast Wave. |
13-2 RoTG blast wave.PNG|Blast Wave. |
||
| Line 292: | Line 295: | ||
FFXIII-2 Eye of Bahamut.png|Eye of Bahamut. |
FFXIII-2 Eye of Bahamut.png|Eye of Bahamut. |
||
13-2 RoTG pulsar burst.PNG|Pulsar Burst. |
13-2 RoTG pulsar burst.PNG|Pulsar Burst. |
||
| ⚫ | |||
| ⚫ | |||
13-2 RoTG ravager stance.PNG|[[Ravager (Final Fantasy XIII-2)|Ravager]] Stance. |
13-2 RoTG ravager stance.PNG|[[Ravager (Final Fantasy XIII-2)|Ravager]] Stance. |
||
FFXIII-2 Ultima.png|[[Ultima (ability)|Ultima]]. |
FFXIII-2 Ultima.png|[[Ultima (ability)|Ultima]]. |
||
| Line 301: | Line 302: | ||
=== ''[[Lightning Returns: Final Fantasy XIII]]'' === |
=== ''[[Lightning Returns: Final Fantasy XIII]]'' === |
||
* [[Caius Ballad (Lightning Returns boss)|Caius Ballad]] |
* [[Caius Ballad (Lightning Returns boss)|Caius Ballad]] |
||
| − | [[Category:Final Fantasy XIII-2 |
+ | [[Category:Bosses in Final Fantasy XIII-2]] |
Revision as of 16:06, 10 July 2020
Template:Sideicon
Embrace the terror!
Caius
Caius Ballad is a recurring boss in Final Fantasy XIII-2. He is fought a total of five times in the main story.
After the player has completed the main storyline and repeats the first three battles against Caius with the Paradox Scope fragment skill active, his stats are significantly increased, and defeating him will result in a paradox ending. Caius is also fought in the downloadable episode "Lightning's Story: Requiem of the Goddess". The specific stats for this form are unknown, as they are not listed in the official guide.
Stats
Oerba -200 AF- (Normal)
Void Beyond -??? AF- (Normal)
Dying World -700 AF- (Normal)
Academia -500 AF-
Valhalla -??? AF-
Oerba -200 AF- (Paradox Scope)
Void Beyond -??? AF- (Paradox Scope)
Dying World -700 AF- (Paradox Scope)
Requiem of the Goddess
Battle
Oerba -200 AF-
First battle against Caius in Oerba.
Caius starts the battle with Heart of Chaos, which bestows Reraise. Despite this status, which usually automatically revives defeated units, the battle will end by depleting Caius's HP once.
Caius tends to focus on a single party member, so the player should deploy a Synergist that can cast Vigilance. Using a Saboteur to inflict status effects, especially Poison and either Deprotect and Deshell upon Caius, is also recommended.
Caius uses Body and Soul to buff himself, the most notable being Regen. Thus it is important to defeat Caius before the first Stagger period is over, otherwise he will regenerate nearly all of his HP. The player should use Relentless Assault to raise Caius's chain gauge close to the stagger point, then switch to a healing paradigm, such as Combat Clinic, to restore lost HP, then switch back to Relentless Assault to stagger Caius.
About halfway through the stagger period, the party should shift to Cerberus (three Commandos) to end the battle before Caius recovers from stagger. The player should use Potions and Phoenix Downs if any more healing is required during the stagger period.
Paradox Scope
With the Paradox Scope active Caius's stats are boosted and he will now revive himself after his HP has been depleted once.
Useful paradigms include:
- Tri-disaster (RAV/RAV/RAV)
- Thaumaturgy (RAV/MED/RAV)
- Relentless Assault (COM/RAV/RAV)
- Cerberus (COM/COM/COM)
- Countermeasure (SAB/SEN/SEN)
- Combat Clinic (MED/MED/SEN)
The player should begin with Tri-disaster and blast Caius with spells until he is staggered. The player can either stay in that paradigm or switch to RAV/MED/RAV, COM/RAV/RAV, or COM/COM/COM based on preference.
Once Caius recovers from stagger the party should switch to MED/MED/SEN to heal to full health and then switch over to SAB/SEN/SEN and blast Poison until Caius is poisoned. This will counteract his Regen. Once Caius is poisoned the party should start over from the beginning. Meteor Javelin or Ultima Arrow can be used while he is staggered for extra damage.
Void Beyond -??? AF-
Useful paradigms include:
- Dualcasting (RAV/RAV)
- Double Trouble (COM/COM)
- Double Dose (MED/MED)
- Sap & Salve (SAB/MED)
- Symbiosis (SYN/MED)
- Lifeguard (SEN/MED)
Caius will focus on launching Serah. The player should debuff (preferably Deshell) Caius and switch to Dualcasting and start spamming Thunder. By the time the party attempts to do this Caius will have cast Graviton twice, or maybe even three times, but it shouldn't hurt too badly with quick healing. The player's first goal is to stagger him; in stagger Caius is weak and should pose little danger. The only attack the party should be concerned about is Blast Wave. If Caius casts Chain Break, the player should switch back to Dualcasting and try again.
Paradox Scope
This battle is significantly harder with the Paradox Scope active as the player has only two party members, and if Serah is knocked out the battle will end. Caius's HP and stagger point are not overly high, but he is fast and capable of restoring his HP, emptying his chain gauge and of attacking fast in succession, as well as launching his targets in the air, incapacitating them. After his HP is depleted to zero Caius will revive himself and the player must repeat the process.
Pairing Serah with a Sentinel ally is a good idea, especially one that cannot be launched even when not guarding, such as the armadillons. The Sentinel ally should know Provoke to draw Caius's attacks, as well as either Steelguard or Mediguard for defense (Steelguard may be better, because it reduces damage more).
Useful paradigms include:
- Twin Shields (SEN/SEN)
- Lifeguard (MED/SEN)
- Stumbling Block (SAB/SEN)
- Dualcasting (RAV/RAV)
- Arcane Defense (RAV/SEN)
While the Sentinel ally draws Caius's attention, Serah should attempt to apply either Deprotect or Deshell depending on her proficiency, along with Imperil, and possibly Poison. If Caius has both Deshell/Deprotect and Imperil the Ravager job makes his HP drop like a stone, as his physical/magical resistance becomes normal and he becomes weak to elements, taking double damage from Ravager skills. If the player can apply Faith/Bravery with a Feral Link skill, the effect is even greater. What makes this difficult is that Caius restores his status with Absolution and keeps buffing himself.
Saboteur inflicts Wound damage, which is especially useful against Caius as he revives himself after being defeated the first time, but is unable to restore Wound damage, meaning he will be revived at whatever his maximum HP was at the time he runs out of HP the first time. He is also not immune to Dispel, which also deals damage. Although Saboteur skills don't deal much damage when compared to Commando or Ravager, they slow his chain gauge while still building chain, and the Wound damage builds up over time and caps his max HP.
When Caius prepares Inferno the player can quickly shift to SEN/SEN to minimize damage, and when the Sentinel is on low HP the player can shift to MED/SEN to heal the Sentinel. Using Wound Potions may be necessary if the battle draws for long.
A Dying World -700 AF-
Useful paradigms:
- COM
- RAV
- SEN
- SYN
- SAB
- MED

Body and Soul.
Caius will start by rushing Noel and launching him up in the air. The player should start by using Protect and then switch over to Saboteur and cast Deshell. When Deshell sticks the player should switch to Ravager and cast Thunder, which has the fastest casting time of all spells.
Once Caius is staggered Noel should switch over to Commando, but after his health drops to around half Caius will use Chain Break followed by Heart and Soul to counter this. The player should switch to Saboteur and start casting Dispel, and once Caius's Haste is removed, switch over to Ravager and stagger Caius and switch to Commando for the win.
It is possible to lose this battle and still continue playing, but this misses out on a bestiary entry. If this happens and the player still wants to complete the bestiary (there is a fragment quest that requires this) they need to close Academia 4XX's Time Gate and play on to reach A Dying World 700 AF again.
Paradox Scope
This fight is hard, and it is easy to die as Noel is alone. The above strategy should work fine (at a higher level) with increased focus on healing and buffing.
Academia -500 AF-
Suggested paradigms:
- Tri-disaster (RAV/RAV/RAV)
- Cerberus (COM/COM/COM)
- Salvation (MED/MED/MED)
- Safe Subversion (SAB/SAB/MED)
- Recuperation (SYN/SYN/MED)
- Consolidation(SEN/SEN/MED)
Caius will usually focus on Serah, and use a nasty spell called Eye of Bahamut. The player should switch over to SYN/SYN/MED and use Protect on Serah. The player should next switch to SAB/SAB/MED and use Deshell on Caius. Caius will likely unleash a barrage of attacks that will launch Serah in the air, but after the Deshell has been applied the player should switch over to RAV/RAV/RAV and spam Thunder.
By this time, Caius will again use Eye of Bahamut, but once the party gets Caius down to around half of his HP, he will use Chain Break then Heart of Chaos. Once he does this, the party should switch over to SAB/SAB/MED and start casting Dispel until it rids of his Haste status, then switch back to RAV/RAV/RAV until he is staggered.
After Caius is staggered the player should switch over to COM/COM/COM and attack; if this doesn't kill him he uses Chain Break again. The player should switch over to SAB/SAB/MED and Dispel Caius's Haste, then switch over to RAV/RAV/RAV and get his stagger gauge to about 200%, then switch to COM/COM/COM to finish the battle.
Valhalla -??? AF-
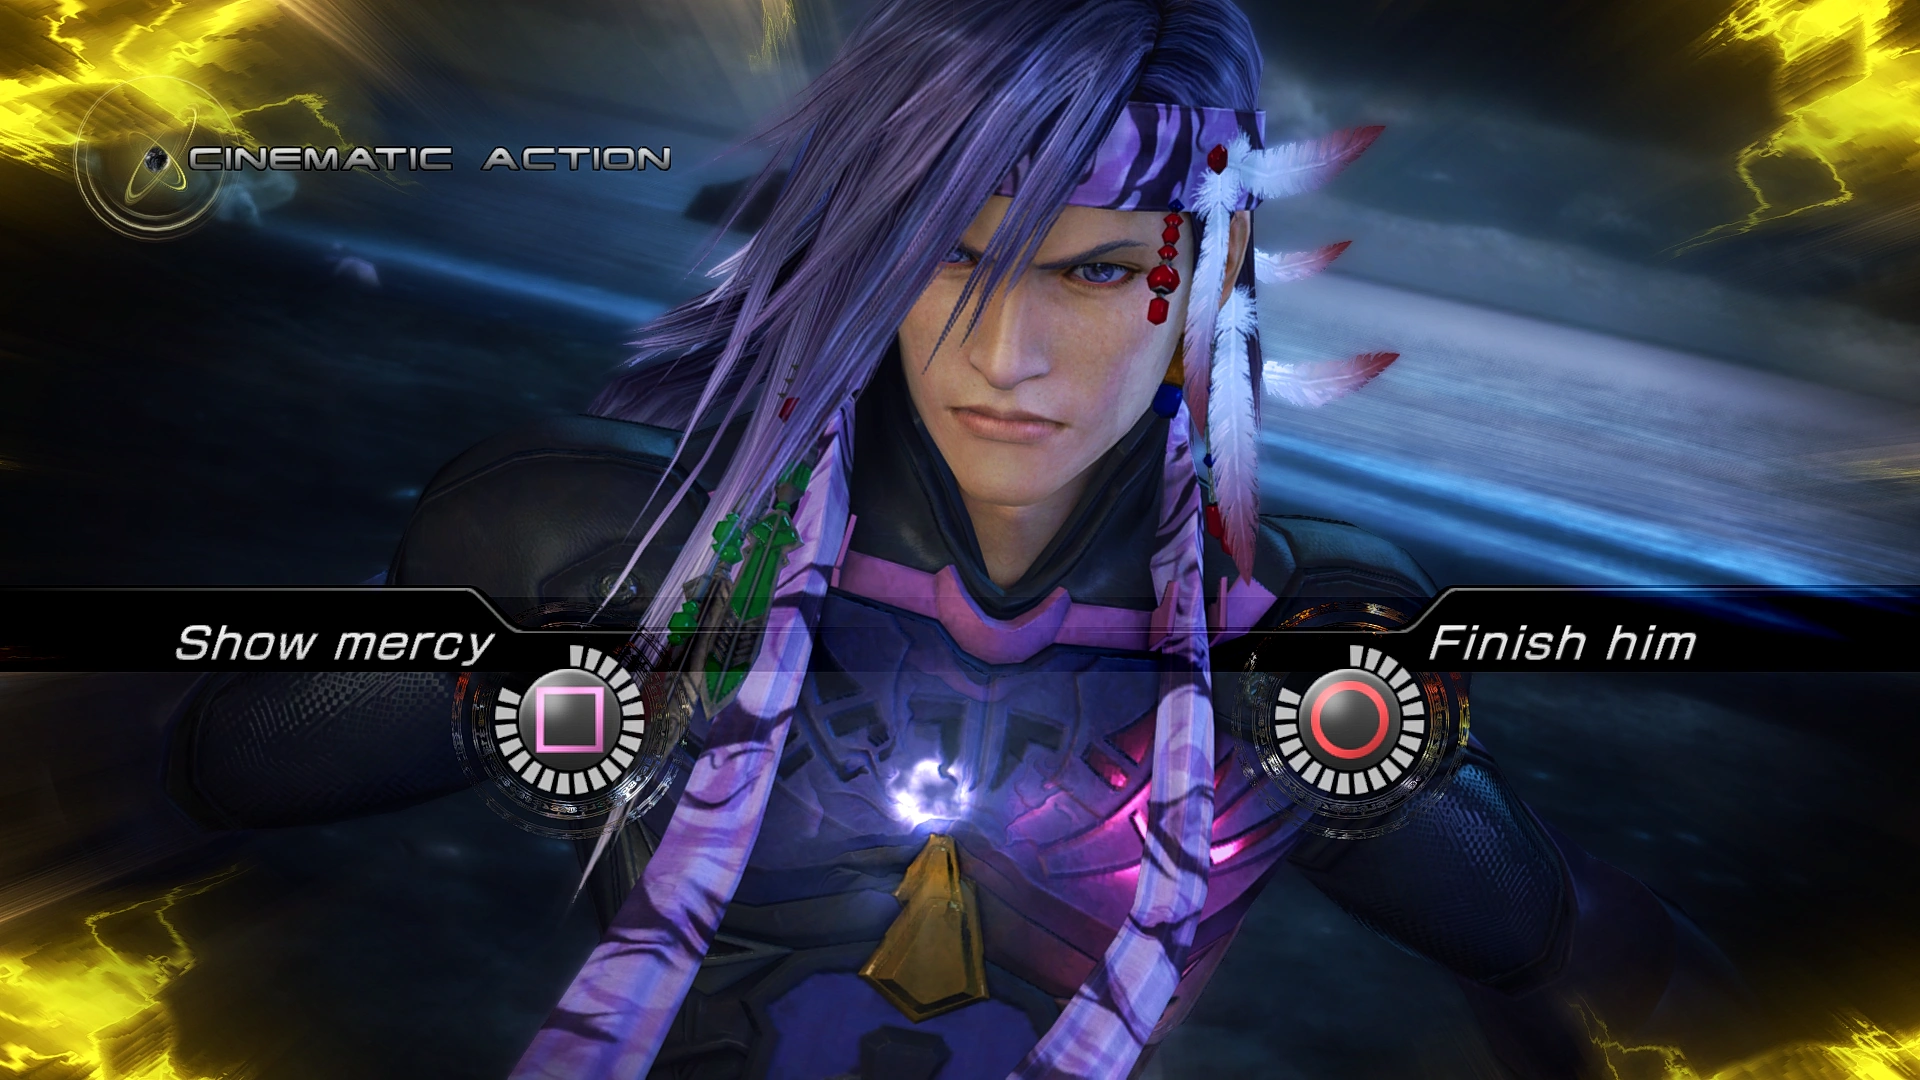

The last cinematic action in the game.
Useful paradigms include:
- Cerberus (COM/COM/COM)
- Tri-disaster (RAV/RAV/RAV)
- Tortoise (SEN/SEN/SEN)
- Combat Clinic (MED/MED/SEN)
- Premeditation (SYN/SAB/SEN)
Caius will start the battle by casting Ultima. The player can switch to the Tortoise paradigm to reduce damage, but the spell isn't overly powerful. The player should use a paradigm with a Synergist and cast Protect, Shell, Vigilance, and Veil on the party, then switch to Tri-disaster and raise Caius's chain gauge.
When he is staggered, the party should switch to Cerberus and attack. After Caius performs four or so cycles of attacks, the player should switch to Tortoise to absorb the damage of Caius's Inferno attack, which can devastate the party, and then heal if needed. Caius will not do anything for a while, so this opportunity can be taken to deal as much damage as possible before he empties his chain gauge.
After this, he will likely cast Body and Soul or Absolution, and start his cycle over again by casting Ultima. The party's attacks before Caius empties his chain gauge will likely reduce his health by at least half.
Should Caius cast Eye of Bahamut on any of the party members, the player should remove all the status ailments before Caius casts Inferno, as it can easily KO anyone if they have Deshell or Imperil. When his HP is depleted once, Caius will revive himself to max HP, minus any Wound damage.
Another strategy is to use SAB/SAB/MED and casting Dispel to remove his Haste then use Deshell and once that sticks switch to Tri-disaster and cast Thunder on Caius to raise his chain gauge.
Valhalla -??? AF- (Requiem of the Goddess DLC)
Level 0-2

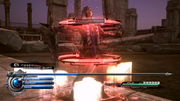
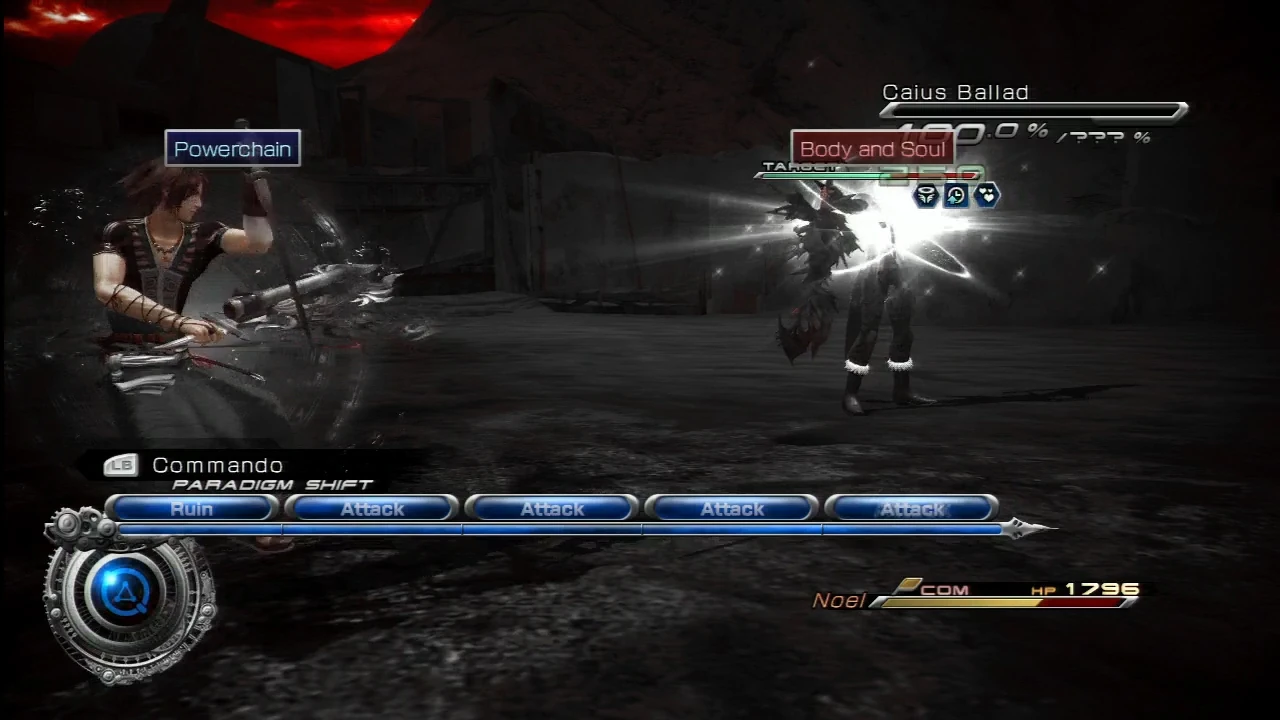
Commando Stance.
Caius will switch between three paradigm stances: Commando, Ravager, and Medic. When he is in his Commando stance, he focuses on devastating attacks and spells, along with debuffs using Eye of Bahamut that is further enhanced by the Auto-Bravery and Auto-Faith he gains upon assuming the stance. Upon snapping his fingers, he will swiftly attack. It is necessary to immediately switch to Knight for access to Immortality to negate the damage. For attacking, the player should stay in Paladin and either Shaman or Mage—Paladin used to stabilize the chain gauge and Shaman or Mage to build it. He resists physical attacks, so Ruin from Knight and Shaman, or Mage's lightning and wind magic are best to use against him. When Caius is in Ravager stance, he focuses on relentless and swift attacks boosted by the speed-enhancing attributes of Auto-Haste along with gaining Graviton and is capable of quickly interrupting Lightning from executing attacks and landing his own. He resists magical attacks in this mode; Shaman and Mage's skills, along with Knight's Ruin, will be ineffective against him, but Knight's other abilities will work well. The player will have to rapidly change between roles to adjust.
When Caius is not attacking, staying in either Shaman or Mage is advisable, but as soon as he moves, the player must switch to the Knight role to minimize damage from Caius's combos, or else be sure to have enough HP to survive the onslaught. At some point the player will be forced to go to the Paladin role to stabilize the gauge. The rapid changing of roles may mean that the player has to stay on the role menu as Lightning is attacking Caius, ready to switch when needed.
When Caius switches to Medic, the player has the greatest chance of staggering him, as he doesn't resist anything. When in Medic stance Caius gains Auto-Regen, and thus the player needs to focus solely on attacking to overcome the health regeneration. The player must go all out with either the Shaman or Mage, perhaps occasionally using the Paladin role to stabilize the gauge. If the player staggers Caius, they should switch to the Paladin role and launch him before switching to the Shaman or Mage role to build up the gauge. As he is in the air, the player can build up the gauge to a reasonable point—normally between 500-600%—before switching back to the Paladin role and keeping him in the air. It is recommended to quickly make Caius exit the Medic Stance by relentlessly attacking him as while his Dispelga deals little magical damage, Absolution and Body and Soul will give Caius multiple buffs that will remain after he switches stances and can also remove any Wound damage done to him and restore his health, prolonging the battle and making Caius more powerful based on the buffs he bestows on himself. His most devastating move is the Heart of Chaos that will revive him after he falls if he succeeds in casting it.
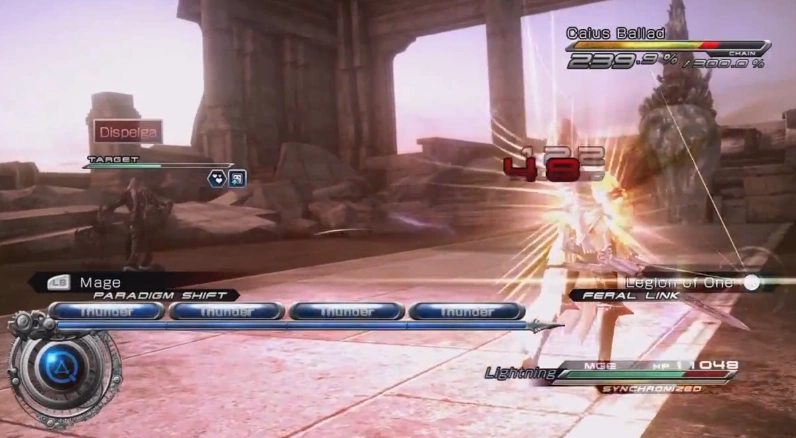
Just before his stagger ends, the player must be in the Paladin role and be ready to use Smite. The very second Smite hits, the player should use Legion of One if it is ready. The player should make sure to switch first, or otherwise Legion of One will be a lot weaker. So long as the player is ready to quickly switch roles to Knight before Caius attacks, and they make the best use of his stagger duration, the battle is winnable.
Level 3-4
The strategy remains otherwise identical to the one above, but at the start of the battle, the player should enter the Conjurer role and use the "Mighty Guard" spell that casts Protect, Shell, Veil, and most importantly, Vigilance.
As Lightning now has Vigilance and is, in turn, unlikely to be interrupted, when Caius switches to the Ravager stance, the player does not have to switch to the Knight role—unless they need to conserve HP. Due to the buffs from Mighty Guard, the battle will normally go a lot quicker. Also, when Lightning is buffed, when Caius switches to Healer stance, he will unavoidably cast Dispelga, which will remove all of Lightning's buffs. It can be negated by switching to Knight and using Immortality, which will conserve the buffs.
Level 5
As before, the player should cast Mighty Guard at the start. This time, when Caius enters stagger, the player should immediately switch back to Conjurer and cast Aura on Lightning to give her Haste, Bravery and Faith. To build the chain while Caius is staggered, it is recommended to use the Shaman role and cast Windstorm.
Level 6-7
Same as Level 5, however, now when Caius is staggered, upon casting Aura on Lightning, the player should switch to the Sorcerer role and cast Chaos on Caius to inflict a number of status ailments so he will take more damage while he is in stagger. Caius's Absolution may make it necessary to cast it multiple times as any of the status ailments will be removed when he casts it.
Level 8-10
Same as all previous strategies, but now that "Bladestorm" has been unlocked for the Shaman role, it is arguably the best way to build chain when Caius is staggered; it will render him weak by launching him and the player can constantly keep attacking him.
")
")
")
")
")
")
")
")
")