A combat simulator developed to train Shinra troops. Allows one to experience battle in a virtual space while earning EXP and other rewards.
Loading screen tip
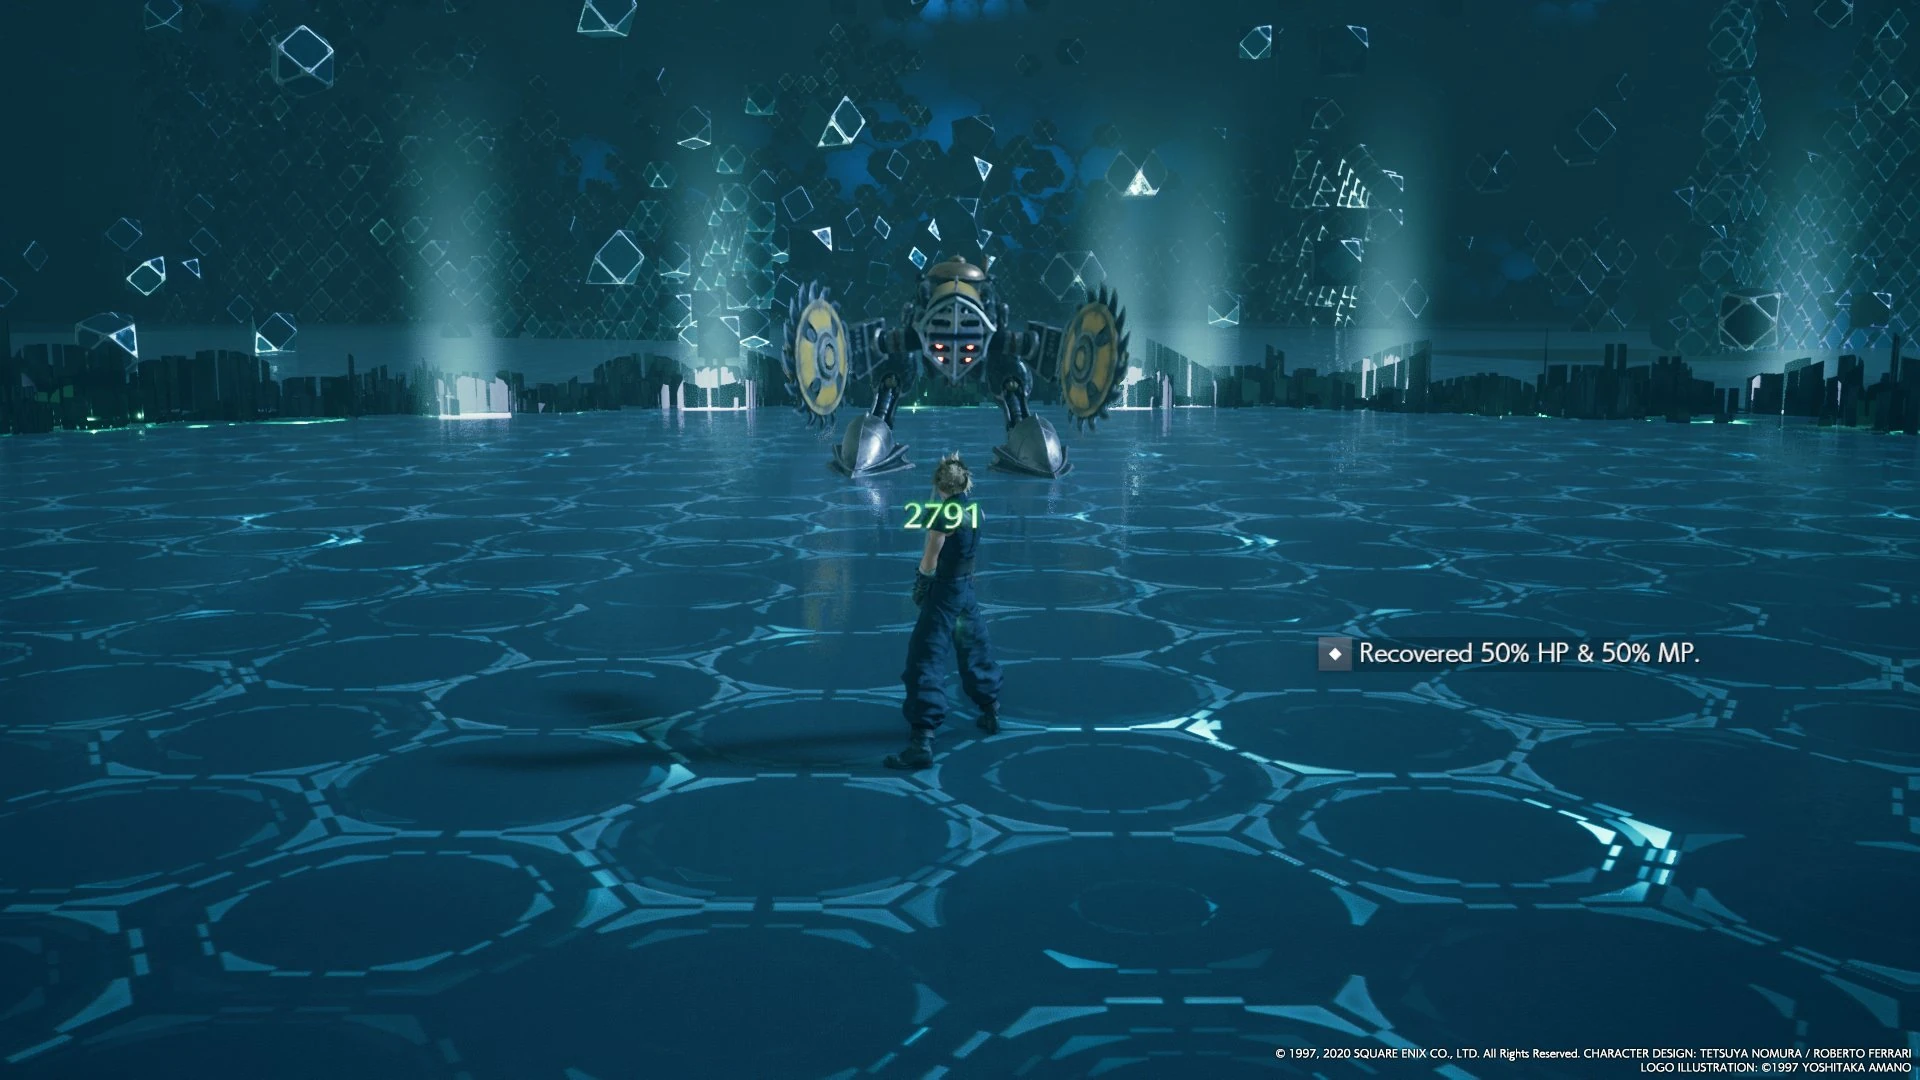
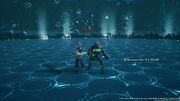
The Shinra Combat Simulator is a battle arena in Final Fantasy VII Remake and "Episode INTERmission". It is a simulated arena in which participants fight a number of battles in a virtual reality setting.
The player first uses the Shinra Combat Simulator in "A Helping Hand" during Chapter 16, "The Belly of the Beast". There, the simulator is located on the 63rd floor. In hard mode it can be used at the end of "A Way Out" in Chapter 17, "Deliverance from Chaos", by taking the path right to reach it instead of taking a path ahead to the tunnel to proceed with the story. In INTERmission, the combat simulator is found in the Advanced Weaponry Division, and it has matches the player can partake in during hard mode.
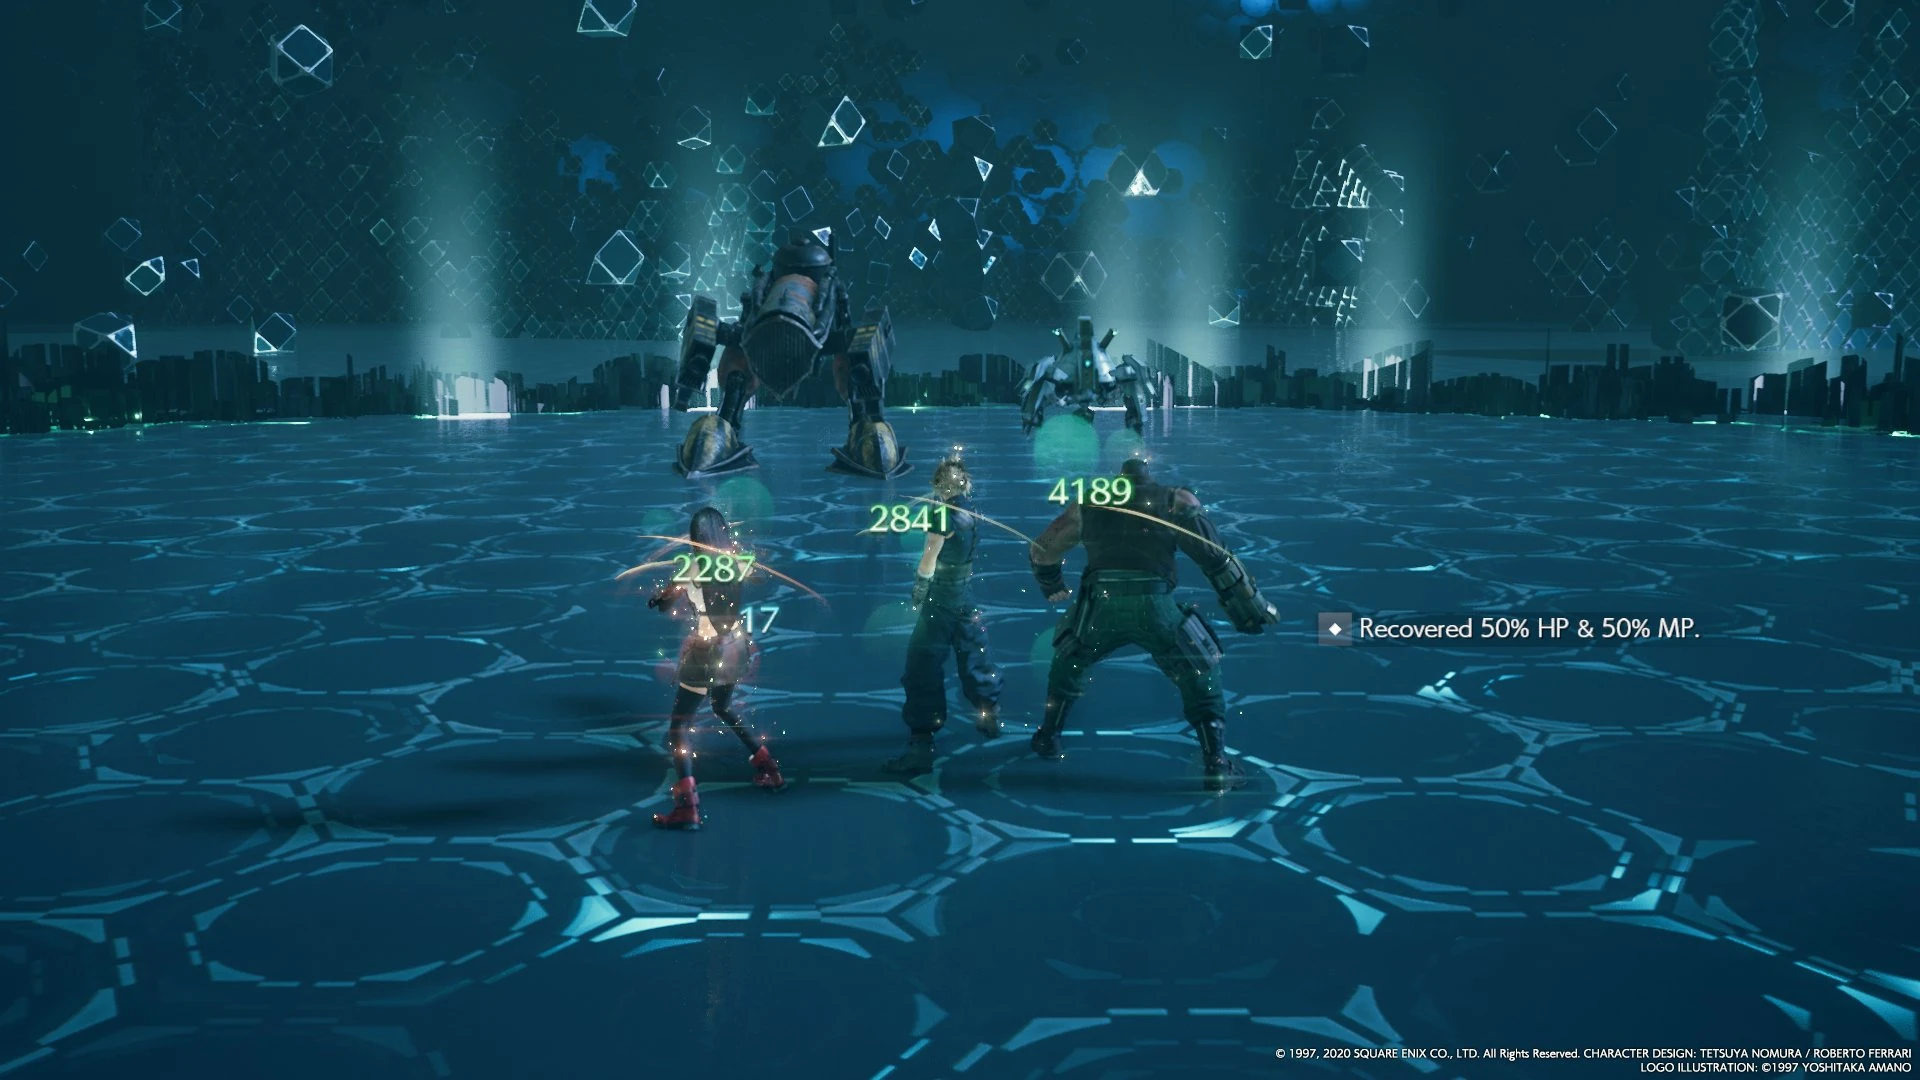
Items cannot be used in any challenge. With the exception of "Three-Person Team vs. Mayor Is Best", all challenges last five rounds, and between each round, 50% of HP and MP is restored. Upon repeating challenges, a "Grab Bag" prize is awarded instead of the original prize. Any items stolen from the enemies in the simulator, are not kept after the battle.
A portable version of the combat simulator is used by Chadley for summon matches during Battle Intel quests.
Normal challenges[]
These challenges can be faced in chapter 16, and later chapter 17 with Chapter Select, at any difficulty. Aerith vs. SOLDIER Trainees can only be done in chapter 17 with Chapter Select.
| Challenge | Description | Rank | Gil | Enemy level | Reward |
|---|---|---|---|---|---|
| Three-Person Team vs. Mayor Is Best | A three-person team battle in which you pick your team. Show who's really the best by taking on powerful foes handpicked by a top Shinra executive who is also Mayor Domino's secret ally. | 3 | 0 | 31 | Mega-Potion x1 |
| Cloud vs. SOLDIER Trainees | A series of solo battles for Cloud. Take on standard training exercises for SOLDIER operators. | 4 | 400 | 35 | Cog Bangle |
| Barret vs. SOLDIER Trainees | A series of solo battles for Barret. Take on standard training exercises for SOLDIER operators. | 4 | 400 | 35 | Supreme Bracer |
| Tifa vs. SOLDIER Trainees | A series of solo battles for Tifa. Take on standard training exercises for SOLDIER operators. | 4 | 400 | 35 | Rune Armlet |
| Aerith vs. SOLDIER Trainees | A series of solo battles for Aerith. Take on standard training exercises for SOLDIER operators. | 4 | 400 | 35 | Geometric Bracelet |
| Two-Person Team vs. High Flyers | A series of two-person team battles in which you pick your team. Fight practice bouts against airborne helitroopers and grenadier long-range specialists. | 4 | 400 | 35 | |
| Three-Person Team vs. Team Ragbag | A series of three-person team battles in which you pick your team. Fight in war-game battles designed by Shinra to simulate a Wutai invasion. | 4 | 400 | 35 |
Three-Person Team vs. Mayor Is Best[]


This challenge is required for the quest "A Helping Hand". It is straightforward and comprises only one round against two Cutters. Using ![]() Lightning Materia is best, either paired with
Lightning Materia is best, either paired with ![]() Elemental Materia or used for casting spells. Destroying the left and right arm and cripplnig them is an effective way to pressure and stagger them, leaving them open to more powerful attacks. Focus one first before destroying the next.
Elemental Materia or used for casting spells. Destroying the left and right arm and cripplnig them is an effective way to pressure and stagger them, leaving them open to more powerful attacks. Focus one first before destroying the next.
vs. SOLDIER Trainees[]

The vs. SOLDIER Trainees challenges are solo challenges that reward high level armor pieces. Rounds are all against single durable enemies, meaning most battles are endurance challenges. With the exception of the final round, all enemies are weak to ![]() Fire, meaning the
Fire, meaning the ![]() Fire Materia is best to exploit it. Defensive materia such as
Fire Materia is best to exploit it. Defensive materia such as ![]() Steadfast Block Materia and
Steadfast Block Materia and ![]() Barrier Materia are also especially helpful for each battle, while
Barrier Materia are also especially helpful for each battle, while ![]() Deadly Dodge Materia can be especially useful with how often characters will be dodge rolling.
Deadly Dodge Materia can be especially useful with how often characters will be dodge rolling. ![]() Healing Materia should be equipped, and casting
Healing Materia should be equipped, and casting ![]() Regen at the start of each fight can be effective, as can casting
Regen at the start of each fight can be effective, as can casting ![]() Haste from
Haste from ![]() Time Materia.
Time Materia.
The different characters will require slightly different tactics. Cloud can remain in Punisher Mode and counterattack many of the enemies. He can benefit greatly from elemental materia, and should use Infinity's End as soon as an enemy is staggered. Barret can use Steelskin at the start of every battle and fire his attacks from range, taking advantage of Overcharge often. Tifa can use abilities such as Starshower and Focused Strike to build enemies' stagger gauges while remaining invulnerable, and should take advantage of Deadly Dodge often to hit enemies as soon as they are vulnerable, as well as her ability to increase stagger bonus damage with her Unbridled Strength techniques. Aerith can remain at a distance from enemies while firing attacks to build up her ATB. She should use Arcane Ward while hurling powerful spells, as well as using Ray of Judgment, to deal heavy damage.
Phantom.
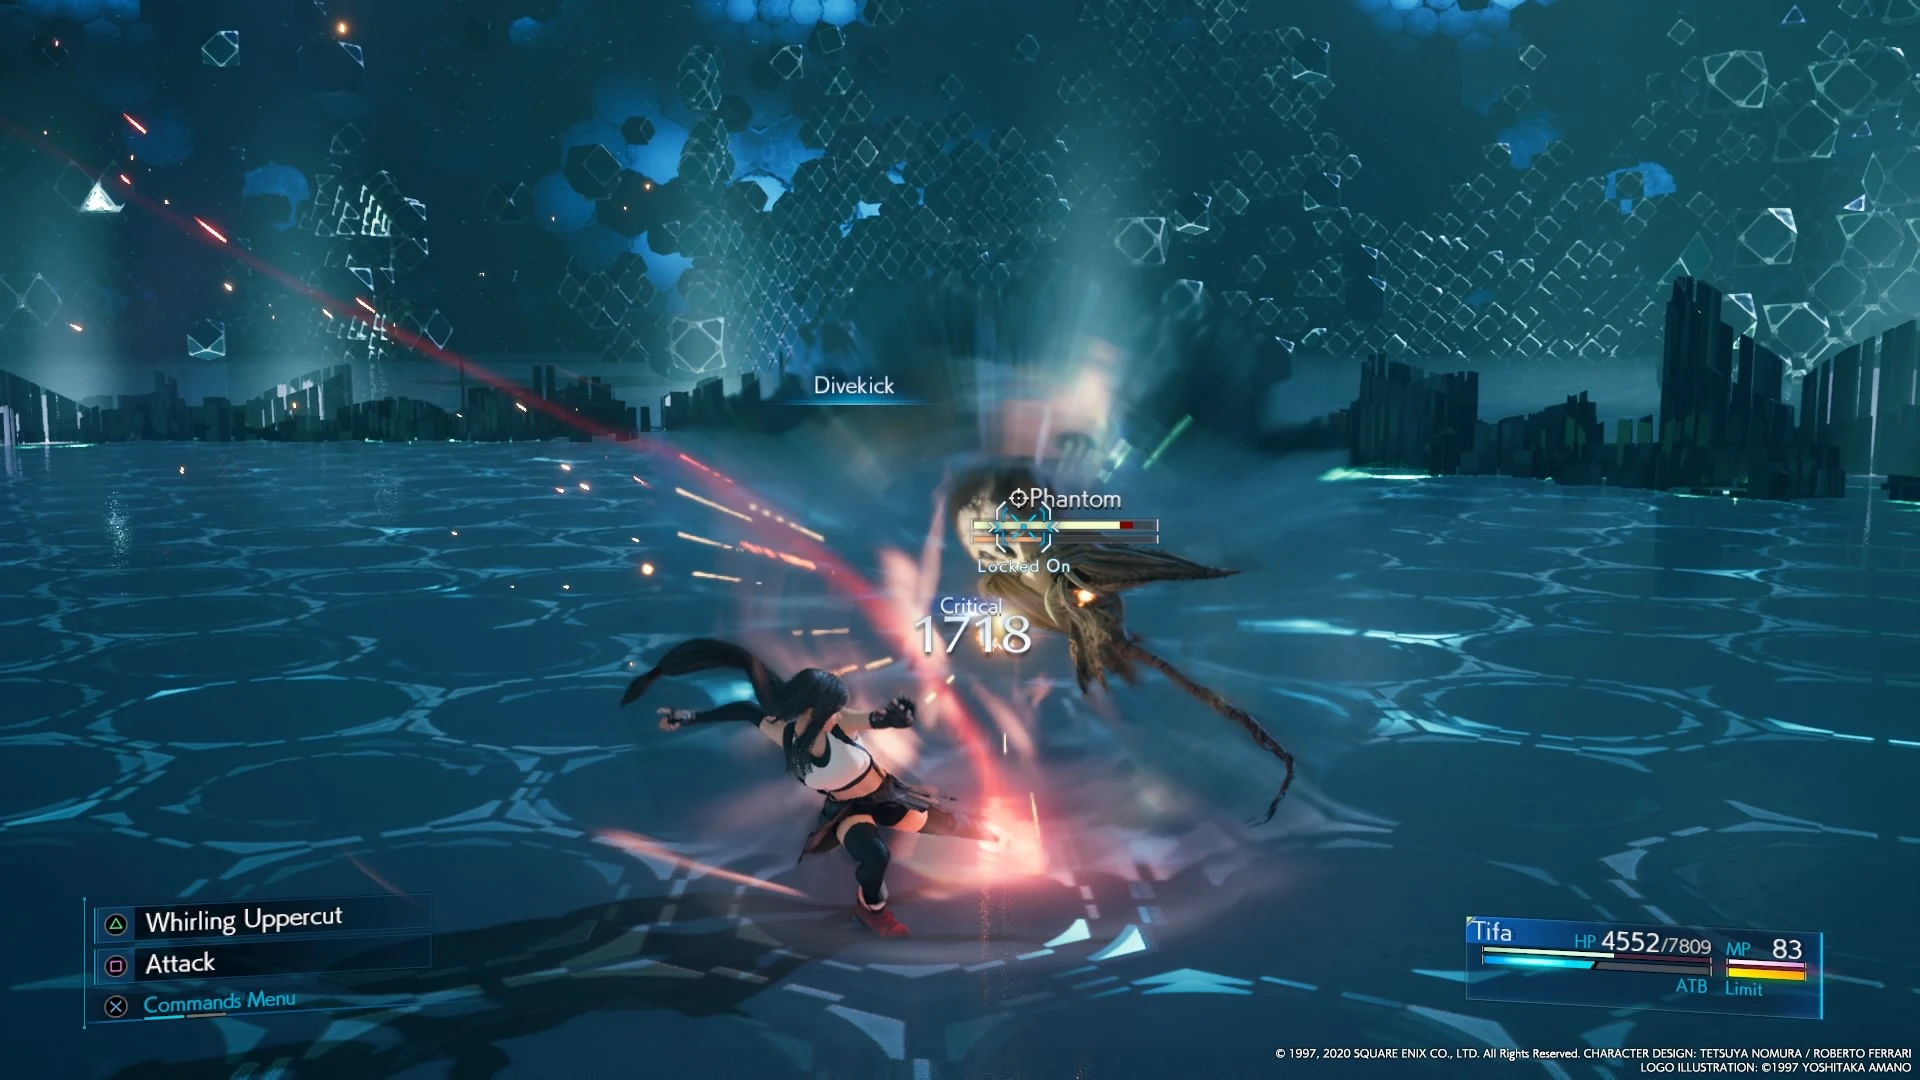
For the first round, a Sahagin Prince is fought. Dodging its Salientian Curse is crucial to avoid ![]() Toad, and can be done by rolling away from the smoke appearing on the ground before its attacks land. Its Jump attack can be dodged by rolling just before it lands. Aside from this, use abilities and attacks while maintaining a fair distance from it to stagger it, and then lay into it. The second round is fought against a Phantom, which is capable of phasing in and out of battle and returning to deal physical damage. Dodge its attacks as it phases back in, focusing on building its stagger gauge. When it uses its Essence Drain attack, maintain distance and use the opportunity to fire ranged abilities and spells at it.
Toad, and can be done by rolling away from the smoke appearing on the ground before its attacks land. Its Jump attack can be dodged by rolling just before it lands. Aside from this, use abilities and attacks while maintaining a fair distance from it to stagger it, and then lay into it. The second round is fought against a Phantom, which is capable of phasing in and out of battle and returning to deal physical damage. Dodge its attacks as it phases back in, focusing on building its stagger gauge. When it uses its Essence Drain attack, maintain distance and use the opportunity to fire ranged abilities and spells at it.
The third round is fought against the Grungy Bandit. This enemy has powerful attacks and can bind a character, but all of its attacks are telegraphed by running forward. As it runs forward, dodge out of the way, as this will pressure it and leave it vulnerable, then lay into it and stagger it. The fourth round against the 3-C SOLDIER Operator requires similar tactics; guard against or dodge from its attacks, and then lay into it when it is vulnerable to destroy it.
The final round is fought against a Cutter, which requires different strategy. Crippling its left and right arm is best to leave it vulnerable to being staggered, then laying into it with spells and abilities is ideal. Its Buzzsaw Blitz attack should be avoided by dodging just before the attack lands.
Two-Person Team vs. High Flyers[]
Depending on the chapter, the two-person team can be any combination of two characters, though it is best to have one melee character and one ranged character. The enemies have a variety of weaknesses, though spells from lightning materia may be ideal as lightning spells are guaranteed to hit. Healing spells are also ideal.
The first round is fought against bugaboos, which can be finished off quickly using attacks that deal area-of-effect damage, such as Cloud's Blade Burst or Tifa's Divekick, as well as Deadly Dodge. For the second round, two Slug-Rays and two byobapolises are fought. The Slug-Rays are less durable, but their Luminous Blast makes them a bigger threat as it can stun characters. Destroy the Slug-Rays first with abilities and spells, and then focus on the byobapolises next with the same tactics.
For the third round, two terpsicolts and four Monodrives are fought. Monodrives can be dispatched more quickly with abilities, allowing the terpsicolts to be fought next. Against them, use attacks and abilities until they begin spinning, at which point, use spells to finish them off. The fourth round as against two elite helitroopers, against which spells are best to destroy them quickly, and aerial attacks are also helpful.
The final round is fought against a rust drake. This enemy absorbs spells when it is engulfed in darkness, and uses gravity-based attacks to deal significant HP damage. Aerial and ranged attacks are best to push it into stagger, at which point it is vulnerable to spells and abilities to finish it off.
Three-Person Team vs. Team Ragbag[]
This challenge can be completed with any combination of characters. Any team combination is viable, though a team composition should be balanced. It is important that a team have be capable of casting powerful magic spells with at least one character, using powerful physical abilities on demand, and healing or buffing the party. Many of the enemies are weak to ![]() Ice, while others are weak to
Ice, while others are weak to ![]() Lightning, meaning that equipping both ice and lightning materia is helpful.
Lightning, meaning that equipping both ice and lightning materia is helpful.
Characters in a chosen team should play to their strengths. Cloud is suited well to dealing raw physical and magic damage for bursting down enemies, and if used, can fill either gap in a team composition, keeping in mind his mobility is fairly limited. Tifa has very high mobility and is well-positioned to build an enemy's stagger gauge with her combos, and if used should focus on building stagger bonus damage to set up powerful spells from herself or her teammates. Barret is best suited to protect the party with Lifesaver, and either use physical abilities from range with a gun equipped, or deal more considerable damage up close with a melee weapon, keeping in mind his mobility will hinder him on some rounds. Aerith can make effective use of Arcane Ward to allow the party to burst down enemies while in stagger, though her durability is low and she will need other characters to draw fire away from her.
The first round is fought against an Abzu shoat, which can be defeated quickly with physical abilities. The second round is more challenging, and is fought against two varghidpolises and one trypapolis. Avoiding the Screech attack is important, as this attack stuns a party member. Beyond this, finishing off the smaller varghidpolises first makes sense, allowing the trypapolis to then be defeated as the last one standing. This enemy is durable, but can be burst down with ice spells.
The third round is fought against a hellhound and two bloodhounds. As before, the smaller bloodhounds should be defeated first with physical abilities; these are very mobile enemies, meaning that either Tifa should be used for her own mobility, or Barret's ranged abilities can instead be relied on. With the hellhound standing, ice spells should be used to pressure it and build its stagger gauge, at which point it can be burst down with spells and abilities. Another strategy is to use ![]() Raise on the hellhound to do 9999 damage to it.
Raise on the hellhound to do 9999 damage to it.
The fourth round is fought against two ringmaws and a Smogger. The ringmaws should be taken down with physical abilities, and the Smogger can be defeated with lightning spells. The Smogger's silencing attack is crucial to avoid in order to achieve this, and though its Haywire Haze unleashes strong attacks on all party members, these attacks are all telegraphed and can be avoided. During Haywire Haze, switch to a character not presently attacked to take advantage of its pressured state and stagger it, then use lightning spells to destroy it.
The final round is fought against a Sweeper Prototype and a Blast-Ray, and lightning spells are ideal against both. The Blast-Ray can be focused down with physical attacks until it is staggered, though it will then push both party members away, and should be finished off with a spell or with ranged abilities. The Sweeper Prototype can likewise be destroyed with spells, by engaging it with one melee character, then using spells from another to destroy it.
Hard mode challenges[]
The final challenge can only be faced after completing Battle Intel, and beating all Corneo Colosseum and Shinra Combat Simulator challenges, and are only available in chapter 17.
| Challenge | Description | Rank | Gil | Enemy level | Reward |
|---|---|---|---|---|---|
| Cloud vs. 3-C SOLDIER Candidates | A series of solo battles for Cloud. Take on training exercises designed for operators vying for promotion to SOLDIER: Third Class. | 5 | 500 | 50 | The Art of Swordplay Vol. XIII |
| Barret vs. 3-C SOLDIER Candidates | A series of solo battles for Barret. Take on training exercises designed for operators vying for promotion to SOLDIER: Third Class. | 5 | 500 | 50 | Sharpshooter's Companion Vol. XIII |
| Tifa vs. 3-C SOLDIER Candidates | A series of solo battles for Tifa. Take on training exercises designed for operators vying for promotion to SOLDIER: Third Class. | 5 | 500 | 50 | Way of the Fist Vol. XIII |
| Aerith vs. 3-C SOLDIER Candidates | A series of solo battles for Aerith. Take on training exercises designed for operators vying for promotion to SOLDIER: Third Class. | 5 | 500 | 50 | Telluric Scriptures Vol. XI |
| Two-Person Team vs. Dynamic Duos | A series of two-person team battles in which you pick your team. Take on training exercises designed for 3-C SOLDIER operators. | 5 | 500 | 50 | |
| Three-Person Team vs. Monsters of Legend | A series of three-person team battles in which you pick your team. Take on monsters of legend that have been recreated by analyzing ancient texts. | 6 | 600 | 50 | |
| Three-Person Team vs. Top Secrets | A series of three-person team battles in which you pick your team. After a succession of summoned beings awaits Shinra's ultimate weapon, one that only 1-C SOLDIER operators can hope to survive. | 7 | 700 | 50 | Götterdämmerung |
| Three-Person Team vs. The Immaculate One | A three-person team battle in which you pick your team. Defeat the leader of Deepground whose data Chadley has programmed into the system. | 7 | 700 | 50 | Götterdämmerung x2 |
vs. 3-C SOLDIER Candidates[]
A solo battle in which manuscripts are earned for each character. All characters can use a combination of ![]() Elemental Materia +
Elemental Materia + ![]() Lightning Materia materia on armor. This will cover most healing necessary by granting the ability to absorb powerful lightning attacks, and also to grant access to lightning spells which most enemies are weak to.
Lightning Materia materia on armor. This will cover most healing necessary by granting the ability to absorb powerful lightning attacks, and also to grant access to lightning spells which most enemies are weak to. ![]() First Strike Materia is also helpful for every character to open battles favorably.
First Strike Materia is also helpful for every character to open battles favorably. ![]() Parry Materia is useful on Tifa, while
Parry Materia is useful on Tifa, while ![]() Steadfast Block Materia is useful on the other characters. Time materia is also helpful, and beyond this, the usual materia setups apply.
Steadfast Block Materia is useful on the other characters. Time materia is also helpful, and beyond this, the usual materia setups apply.
The playstyle for each character will be different. Depending on the situation, Cloud can rely on Counterstance for enemies in melee range, or cast ![]() Thundaga on enemies at a range; to balance attributes for both, equipping the
Thundaga on enemies at a range; to balance attributes for both, equipping the ![]() Buster Sword is ideal. Barret is best off with ranged weapons due to the speed of the enemies' movement, and
Buster Sword is ideal. Barret is best off with ranged weapons due to the speed of the enemies' movement, and ![]() Big Bertha is optimal; he will either be using Maximum Fury on two ATB bars, or Thundaga at range. Tifa should use Starshower to deal damage while avoiding it, or True Strike against a staggered enemy; she is best equipping the
Big Bertha is optimal; he will either be using Maximum Fury on two ATB bars, or Thundaga at range. Tifa should use Starshower to deal damage while avoiding it, or True Strike against a staggered enemy; she is best equipping the ![]() Metal Knuckles to optimize her physical damage, but
Metal Knuckles to optimize her physical damage, but ![]() Feathered Gloves provides her balanced attributes should she need to cast Thundaga in some situations. Aerith can open battles with Arcane Ward defeat most enemies with Thundaga casts, so equipping her
Feathered Gloves provides her balanced attributes should she need to cast Thundaga in some situations. Aerith can open battles with Arcane Ward defeat most enemies with Thundaga casts, so equipping her ![]() Silver Staff optimizes her ability to do that.
Silver Staff optimizes her ability to do that.
The first round is a battle against an Unknown Entity and an elite shock trooper. The latter is fast-paced and best hit with a spell or in-between intervals when it moves. The Unknown Entity is slower, and its strongest attack is Thundaga; with a lightning + elemental combo on armor, this will heal the player character, meaning Unknown Entity should be prioritized last.
The second round is fought against a zenene, a durable enemy. This enemy is capable of binding characters if it gets too close, meaning dodging its attacks is important (as Tifa, Parry is especially useful here, though the other three are better remaining at a distance). In-between intervals when it attacks, it can be damaged and pressured.
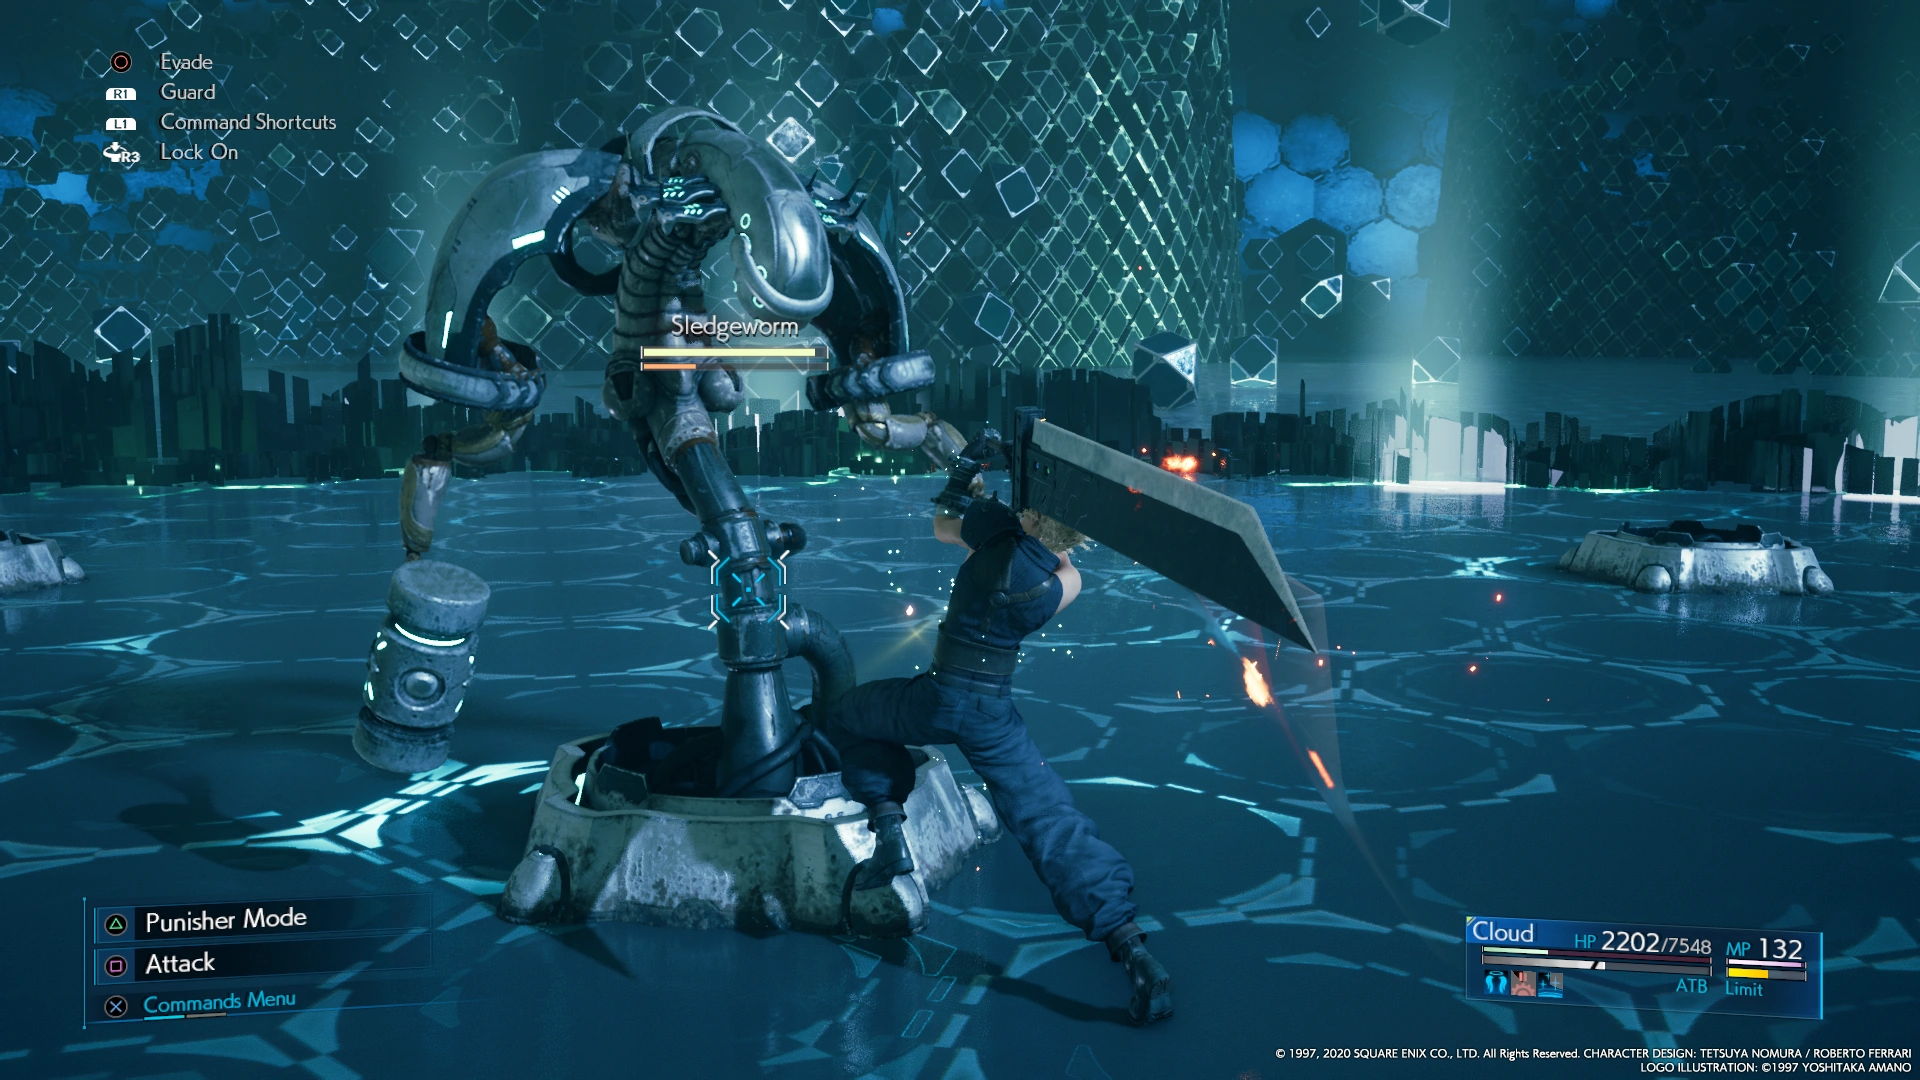
The third round is fought against the Sledgeworm, which moves in-between holes in the ground. As Tifa, Parry should can used to close in on it and attack it to build its stagger gauge, while the other characters rely on spells or ranged to deal damage to it. Its Torpid Strike attack inflicts ![]() Stop in a radius around it, and this should be dodged at all costs by staying distant as it uses the ability. Though Stop can be cast against it, it will simply end Stop on itself early and move to another hole partway through, making this less useful.
Stop in a radius around it, and this should be dodged at all costs by staying distant as it uses the ability. Though Stop can be cast against it, it will simply end Stop on itself early and move to another hole partway through, making this less useful.
An armored shock trooper is fought on the fourth round. Its most powerful attack is Skewer, which should be dodged (or countered with Counterstrike as Cloud) to avoid damage. This enemy reduces physical damage and is very durable, meaning most damage should be dealt during stagger. Casting Stop will lengthen its stagger, allowing it to be defeated more quickly.

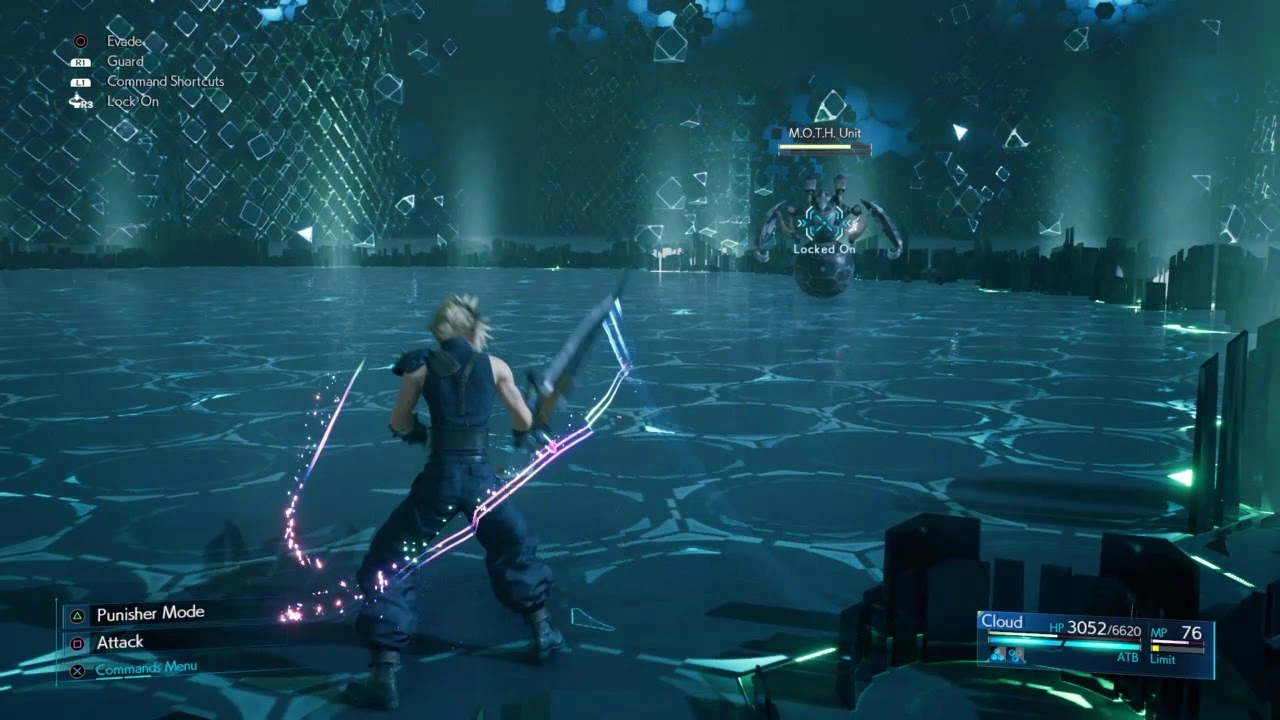
M.O.T.H. Unit
The final round is fought against a M.O.T.H. Unit. This enemy uses blades around itself, meaning melee attacks cannot hit it for the time being. Its voltage attack is a powerful lightning attack, but lightning + elemental on armor will absorb this. Once again, most damage can be dealt to it after it is pressured following its voltage attack or while it is staggered.
Two-Person Team vs. Dynamic Duos[]
The battle takes place against biological monsters and Shinra soldiers, and rewards a ![]() Refocus Materia. Any pair between Cloud, Barret, Tifa, and Aerith can be used in the battle. Both
Refocus Materia. Any pair between Cloud, Barret, Tifa, and Aerith can be used in the battle. Both ![]() Fire Materia and
Fire Materia and ![]() Ice Materia will be needed, across both characters, although lightning materia is also helpful. If
Ice Materia will be needed, across both characters, although lightning materia is also helpful. If ![]() Elemental Materia is used, it should be used on armor, paired with either, to absorb damage, as some enemies absorb certain elements. Beyond this,
Elemental Materia is used, it should be used on armor, paired with either, to absorb damage, as some enemies absorb certain elements. Beyond this, ![]() First Strike Materia is helpful to open battles favorably, and pairing
First Strike Materia is helpful to open battles favorably, and pairing ![]() Time Materia with
Time Materia with ![]() Magnify Materia is useful in a variety of cases.
Magnify Materia is useful in a variety of cases.
Any combination of characters can be used, but it is crucial to have access to both damage types. Cloud can deal raw damage of either type, and should rely on Counterstrike to deal physical damage as a counterattack and cast spells in-between; the Buster Sword is best in most cases, but if paired with Tifa, ![]() Iron Blade is a better choice to lean towards magic, and if paired with Aerith,
Iron Blade is a better choice to lean towards magic, and if paired with Aerith, ![]() Hardedge may be better to give Cloud a solely melee-oriented role. Barret's role is normally to protect the other with Lifesaver or to deal ranged damage; either give him Big Bertha if he is paired with Aerith or Cloud and use Maximum Fury, or
Hardedge may be better to give Cloud a solely melee-oriented role. Barret's role is normally to protect the other with Lifesaver or to deal ranged damage; either give him Big Bertha if he is paired with Aerith or Cloud and use Maximum Fury, or ![]() EKG Cannon with Tifa and use him to cast spells. Tifa's best role is to provide physical damage to complement the other and to increase stagger bonus damage; she should equip Metal Knuckles or Feathered Gloves, and can use Starshower and True Strike during the battle. Aerith will be best off using Arcane Ward and casting spells throughout the battle, and also is an excellent choice to amplify spells of the other party member; she should equip Silver Staff.
EKG Cannon with Tifa and use him to cast spells. Tifa's best role is to provide physical damage to complement the other and to increase stagger bonus damage; she should equip Metal Knuckles or Feathered Gloves, and can use Starshower and True Strike during the battle. Aerith will be best off using Arcane Ward and casting spells throughout the battle, and also is an excellent choice to amplify spells of the other party member; she should equip Silver Staff.
The first round is fought against a phantom and a ghost, both with a similar moveset: they will cast fire spells, phase in and out of battle, and can apply ![]() Reflect or
Reflect or ![]() Shield on themselves. Depending on which they use, use physical or magic damage respectively. It is best to attack them with physical damage first to cause them to use Shield on themselves, then cast
Shield on themselves. Depending on which they use, use physical or magic damage respectively. It is best to attack them with physical damage first to cause them to use Shield on themselves, then cast ![]() Firaga to defeat them quickly.
Firaga to defeat them quickly.
The second round is fought against an elite shock trooper and an elite helitrooper. Powerful fire spells can defeat them relatively quickly, but the elite helitrooper should be prioritized as it can interrupt a spellcaster. While one character casts spells, the other should draw their firepower.
The third round is fought against a 3-C SOLDIER operator and the Grungy Bandit. An easy strategy is to use one character to draw attention from them both away, while the other casts fire spells, killing them quickly.
The fourth round is fought against a zenene and a hellhound, both of which are fairly durable. The zenene is the weaker of the two, and can be killed first to make the hellhound more manageable. With time + magnify, ![]() Stop can be cast on both to allow one to be defeated first, simplifying the battle. The hellhound absorbs fire spells, and thus should be defeated with other types of spells. Its attacks should be guarded against, and with a melee attacker, it is best attacked from behind to avoid its breath attacks.
Stop can be cast on both to allow one to be defeated first, simplifying the battle. The hellhound absorbs fire spells, and thus should be defeated with other types of spells. Its attacks should be guarded against, and with a melee attacker, it is best attacked from behind to avoid its breath attacks.
The final round is fought against a Sweeper and a queen grashtrike. The queen grashtrike is capable of inflicting ![]() Slow on all party members, though casting
Slow on all party members, though casting ![]() Haste can mitigate this. It is best to defeat the queen grashtrike first with physical damage, and then unload on the Sweeper with all remaining spells to defeat it quickly.
Haste can mitigate this. It is best to defeat the queen grashtrike first with physical damage, and then unload on the Sweeper with all remaining spells to defeat it quickly.
Three-Person Team vs. Monsters of Legend[]
| Trophy: That's the Smell | |
|---|---|
| Defeat a malboro in "Three-Person Team vs. Monsters of Legend". | 
|
This battle features a malboro as its final boss, and rewards another Refocus materia. Any combination of Cloud, Barret, Tifa, and Aerith can be used for the battle. ![]() Revival Materia is crucial to have on at least one character, preferably the one with the lowest HP and a high MP pool (if used, Aerith is a great candidate).
Revival Materia is crucial to have on at least one character, preferably the one with the lowest HP and a high MP pool (if used, Aerith is a great candidate). ![]() Elemental Materia has no benefit on weapons and many enemies reduce elemental damage, but pairing it with
Elemental Materia has no benefit on weapons and many enemies reduce elemental damage, but pairing it with ![]() Fire Materia on armor can be helpful. Equipping
Fire Materia on armor can be helpful. Equipping ![]() Refocus Materia is helpful in two battles here. It is also best to bring
Refocus Materia is helpful in two battles here. It is also best to bring ![]() Enemy Skill Materia in order to learn Bad Breath from the malboro. Beyond this, the usual setups for each character apply.
Enemy Skill Materia in order to learn Bad Breath from the malboro. Beyond this, the usual setups for each character apply.
When choosing a team, it is important to balance roles to have a character with high HP who can tank either malboro or tonberry up front, a melee attacker with mobility who can attack malboro from behind, and a third role to provide support to the others. Cloud works well in any role, and if used should fill a gap in the team. Barret excels in tanking damage, and should be built either to using supportive spells or providing supplemental physical damage. Tifa excels in melee damage, and her mobility her ability to increase stagger bonus damage make her an excellent choice in a melee role. Though spellcasting is not a requirement for this battle, Aerith can provide excellent support from range, and by using lightning materia with Arcane Ward, her spell damage can still be very effective.
The first round is fought against a bomb. Fire + elemental on armor can absorb its attacks, and ice spells can be devastating against it. In most cases, it is best to use physical abilities to focus on staggering it, and then defeat it with overwhelming force.
In the second round, a tonberry is fought. This enemy is particularly durable, and its Doom and Gloom ability can cause certain death to the highest HP character. Cast ![]() Arise as soon as this happens, and melee attackers should dodge its Tantrum and Chef's Knife attacks instantly. Outside of this, focus on building its stagger gauge and then unleash attacks against it.
Arise as soon as this happens, and melee attackers should dodge its Tantrum and Chef's Knife attacks instantly. Outside of this, focus on building its stagger gauge and then unleash attacks against it.
In the third round, the Type-0 Behemoth from "Subterranean Menace" is fought. The strategy against it is the same as during the quest: do not cast spells, cripple its lower body and upper body to stagger it, and then cast Stop against it and deal damage to it. If Aerith is used in the party, destroying its horns is crucial to prevent it from countering spell attacks, allowing her to unleash Thundaga against it after this is often.
The fourth round is a combination of the bomb and tonberry. The same strategies apply, but the bomb should be defeated first as it is the less durable of the two.
The fifth round is fought against the malboro. Its Acid attacks can inflict ![]() Poison, but its most deadly attack is Bad Breath, which will inflict a number of debuffs including Toad and
Poison, but its most deadly attack is Bad Breath, which will inflict a number of debuffs including Toad and ![]() Sleep, effectively rendering the character useless. Though
Sleep, effectively rendering the character useless. Though ![]() Esuna can be cast, it is not necessary. Instead, the best strategy is to have one character fight it up front while it is casting Bad Breath, while the rest either attack it from beyond or move a distance away from it to avoid it. Other than this, use physical abilities and spells against it to defeat it.
Esuna can be cast, it is not necessary. Instead, the best strategy is to have one character fight it up front while it is casting Bad Breath, while the rest either attack it from beyond or move a distance away from it to avoid it. Other than this, use physical abilities and spells against it to defeat it.
Three-Person Team vs. Top Secrets[]
| Trophy: Ultimate Weapon | |
|---|---|
| Defeat the Pride and Joy Prototype in "Three-Person Team vs. Top Secrets". | 
|
This challenge is only unlocked by completing all Corneo Colosseum challenges, all Shinra Combat Simulator challenges, and all of Chadley's VR missions against summons, all in Hard Mode.
The battle is a gauntlet featuring hard versions of all the summon bosses, as well as Pride and Joy Prototype, fought at the end. Pride and Joy Prototype is weak to ![]() Lightning, while other summon bosses are weak to their respective opposite element (meaning Leviathan is also weak to lightning).
Lightning, while other summon bosses are weak to their respective opposite element (meaning Leviathan is also weak to lightning).
Setup[]
It is important to choose a balanced team for the battle that can last in all fights. For this battle, melee damage is important for all of its battles as one melee character should be able to hit the boss from behind. Spell damage can be extremely helpful in some fights, but is not necessary. More importantly, protection is required from many powerful attacks provided by some of the bosses, and it is important to guard against this with character choices as well as materia setups. Finally, the ability to increase stagger bonus damage is extremely useful, as all fights revolve around dealing most damage during stagger.
A combination of ![]() Fire Materia and a mastered
Fire Materia and a mastered ![]() Elemental Materia on armor is extremely helpful for multiple battles, causing powerful fire attacks to heal the character rather than interrupt and damage them. All characters should equip two mastered
Elemental Materia on armor is extremely helpful for multiple battles, causing powerful fire attacks to heal the character rather than interrupt and damage them. All characters should equip two mastered ![]() HP Up Materia (though Barret will need only one) and having a
HP Up Materia (though Barret will need only one) and having a ![]() Refocus Materia is very helpful. Depending on their role,
Refocus Materia is very helpful. Depending on their role, ![]() Magic Up Materia and
Magic Up Materia and ![]() MP Up Materia can also be very important, as the battles are long and drawn out.
MP Up Materia can also be very important, as the battles are long and drawn out. ![]() Prayer Materia provides a great MP-efficient way to heal. For melee damage,
Prayer Materia provides a great MP-efficient way to heal. For melee damage, ![]() Luck Up Materia increases damage output by boosting the critical hit rate. Having at least two
Luck Up Materia increases damage output by boosting the critical hit rate. Having at least two ![]() Revival Materia across characters is also very useful, and
Revival Materia across characters is also very useful, and ![]() ATB Boost Materia or
ATB Boost Materia or ![]() Skill Master Materia are extremely important for boosting the ATB gauge (the former allows this to be done on a cooldown on-demand, while the latter is built up over time).
Skill Master Materia are extremely important for boosting the ATB gauge (the former allows this to be done on a cooldown on-demand, while the latter is built up over time).
Barret is nigh-essential in a team for this battle due to his Lifesaver and other protective abilities he provides the party. In this role, Barret can equip a ranged weapon such as ![]() Big Bertha (for physical damage) or
Big Bertha (for physical damage) or ![]() Light Machine Gun (for Reprieve), and use the Crescent Moon Charm accessory to reduce damage taken. His materia should be protective materia; though his
Light Machine Gun (for Reprieve), and use the Crescent Moon Charm accessory to reduce damage taken. His materia should be protective materia; though his ![]() Magic is low, only his MP pool is relevant to his spellcasting ability. Barret can be given
Magic is low, only his MP pool is relevant to his spellcasting ability. Barret can be given ![]() Magnify Materia +
Magnify Materia + ![]() Barrier Materia to survive Bahamut's Megaflare, and other spells, such as
Barrier Materia to survive Bahamut's Megaflare, and other spells, such as ![]() Healing Materia and revival materia, are also useful. If used this way, Barret should equip at least two
Healing Materia and revival materia, are also useful. If used this way, Barret should equip at least two ![]() MP Up Materia, though he will only need one
MP Up Materia, though he will only need one ![]() HP Up Materia. Barret can also equip
HP Up Materia. Barret can also equip ![]() Skill Master Materia with how often he will expend ATB, and if doing so, is a good choice to give prayer materia. Though Barret can potentially be geared to offensive spells instead, this is an inefficient use of him and he should be firmly placed in a protective role.
Skill Master Materia with how often he will expend ATB, and if doing so, is a good choice to give prayer materia. Though Barret can potentially be geared to offensive spells instead, this is an inefficient use of him and he should be firmly placed in a protective role.
Cloud is versatile and can play any role in a team composition. He provides a high raw damage output, with ![]() Hardedge optimizing his melee damage,
Hardedge optimizing his melee damage, ![]() Iron Blade providing magic damage with defensive capabilities, and
Iron Blade providing magic damage with defensive capabilities, and ![]() Buster Sword as a mix of both. If used, Cloud is best off equipping
Buster Sword as a mix of both. If used, Cloud is best off equipping ![]() Steadfast Block Materia and making use of Punisher Mode and Counterstance to reduce damage taken and respond in kind. Depending on if he is built towards physical or magic damage, Magic Up or Luck Up should be used.
Steadfast Block Materia and making use of Punisher Mode and Counterstance to reduce damage taken and respond in kind. Depending on if he is built towards physical or magic damage, Magic Up or Luck Up should be used.
Tifa's main contribution will be her ability to increase stagger bonus damage (with how many bosses rely on damage dealt during stagger), as well as her high mobility. This makes her an excellent choice to provide physical damage to a party and kite around the slower bosses fought. If used, Tifa can equip ![]() Metal Knuckles to optimize her physical damage, or
Metal Knuckles to optimize her physical damage, or ![]() Purple Pain for Reprieve. She should use Starshower to deal damage while avoiding attacks, and equip Transference Module to use her limit break more quickly. For materia, she should equip
Purple Pain for Reprieve. She should use Starshower to deal damage while avoiding attacks, and equip Transference Module to use her limit break more quickly. For materia, she should equip ![]() Deadly Dodge Materia and
Deadly Dodge Materia and ![]() Parry Materia to improve her damage and mobility respectively.
Parry Materia to improve her damage and mobility respectively. ![]() HP Absorption Materia can also be paired well with either choice, and
HP Absorption Materia can also be paired well with either choice, and ![]() Time Materia is a great choice on her both to cast
Time Materia is a great choice on her both to cast ![]() Haste to on herself or
Haste to on herself or ![]() Stop on enemies. Pairing it with
Stop on enemies. Pairing it with ![]() Warding Materia helps in a few circumstances (namely Shiva and Bahamut), but this is a luxury choice.
Warding Materia helps in a few circumstances (namely Shiva and Bahamut), but this is a luxury choice.
Aerith serves a niche in terms of providing spellcasting damage from Arcane Ward, which is extremely potent in some battles but ineffective in others. Her damage output during certain battles will be extremely high, but in others, she will be relegated to kiting an enemy and dealing minimal damage, and has low durability. ![]() Silver Staff is ideal for long-term spellcasting, while
Silver Staff is ideal for long-term spellcasting, while ![]() Mythril Rod increases raw damage output. Aerith will need to equip both
Mythril Rod increases raw damage output. Aerith will need to equip both ![]() Lightning Materia and fire to optimize her role, and should pair lightning materia with
Lightning Materia and fire to optimize her role, and should pair lightning materia with ![]() MP Absorption Materia to last long in battle, and fire materia with elemental on armor to provide her much-needed protection.
MP Absorption Materia to last long in battle, and fire materia with elemental on armor to provide her much-needed protection.
A team composition should be balanced to deal with each fight, but any composition is viable. For a protective role, Barret provides an essential service to the party in terms of protecting them, though Cloud can still be given a similar materia setup if one wishes for a higher damage output in a party with Tifa and Aerith. For a melee damage role, Cloud or Tifa can serve the role well with a roughly even damage output, though Tifa's ability to increase stagger bonus damage is extremely helpful for all fights. Beyond this, the main difference comes in their playstyle; Tifa provides much more mobility and is better at dodging attacks, while Cloud is better at withstanding them and countering with his own. It is also possible to simply use both Cloud and Tifa in melee roles with Barret providing a defensive role, giving them spellcasting capabilities on the side. Aerith serves a spellcasting niche that is extremely potent in some fights with the right materia setup, and excels at the role, but can be foregone in favor of other options.
Battles[]
Many battles revolve around staggering the enemy. If possible, the bosses should be killed in a single stagger. With Tifa in the party, using her True Strike mixed with Unbridled Strength can build its damage up to 300%, simplifying the task if the player keeps her Unbridled Strength at max level and gives her two ATB bars before the enemy is staggered. Aerith can also boost stagger bonus damage with Ray of Judgment, but using spells from Arcane Ward can deal greater damage overall. Though Cloud and Barret cannot raise the stagger bonus, they can still optimize damage in stagger with Infinity's End or Maximum Fury, respectively.
The first battle is against Shiva, a more challenging version of the fight from a normal playthrough, as she will use Frost Familiars immediately after being hit by a spell. Fire spells should still be used to stagger her and deal considerable damage as before, but should be used relentlessly to stagger her before she can get up and use Frost Familiars. When Shiva summons Frost Familiars, she will avoid spell damage until all familiars are destroyed; use low-level spells to get rid of them before casting higher tier spells again. Shiva will inflict ![]() Slow often, so cast Haste to counteract it if possible. Try to stagger Shiva, and defeat her in a single stagger.
Slow often, so cast Haste to counteract it if possible. Try to stagger Shiva, and defeat her in a single stagger.
The second round is against Fat Chocobo, who summons tonberries (who have low health and can be defeated quickly). Strategies are similar to a normal playthrough: Fat Chocobo is durable until staggered, but can be pressured. Pressuring it with abilities such as Cloud's Triple Slash or Tifa's Starshower can be effective to permanently pressure it until it is staggered, and the smaller enemies it spawns should be destroyed as they appear.
Leviathan is fought in the third round. Though the battle again relies on dealing damage during stagger, Leviathan's attacks, particularly Tidal Wave, can be devastating and easily wipe the party. Therefore, it is important to stay at high HP at all times. Leviathan's attacks can be avoided by staying close to it (easily dodging its Briny Bellow attack), even with Barret and Aerith, so if spells are cast (it is weak to lightning), Arcane Ward is unreliable. Use attacks such as Cloud's Focused Thrust, Barret's Focused Shot, or Tifa's Starshower, to build up its stagger gauge; occasionally doing so can also pressure it, providing more opportunities to build stagger. Before it uses Tidal Wave, cast ![]() Manaward on the party and heal to full to survive. While it is flying in the final phases, use Barret's physical ranged attacks to rapidly fill its stagger gauge. If Barret is unavailable, use spells to defeat it, and when it is on low ground, focus once again on staggering it.
Manaward on the party and heal to full to survive. While it is flying in the final phases, use Barret's physical ranged attacks to rapidly fill its stagger gauge. If Barret is unavailable, use spells to defeat it, and when it is on low ground, focus once again on staggering it.
The fourth round is against Bahamut. Its attacks hit harder, many cannot be blocked, and it will summon Ifrit after losing 50% HP. It is essential to keep the ![]() Manaward buff on the entire party before Bahamut counts down to Megaflare, as well as remain at high HP, or the attack will kill the party. Switch between characters often to get in abilities, forcing Bahamut to switch targets in the process. The battle is one of endurance, as applying damage in the form of character abilities throughout will chip away at the boss's health. It is also possible to use multiple powerful abilities in succession, such as high-level spells under Arcane Ward or strong character abilities, to interrupt attacks such as Umbral Aura (Aerith's Arcane Ward can help if she is in the party). Ifrit, when summoned, can be dealt with using powerful spells, and with a fire + elemental combo on armor, many of Ifrit's attacks can be absorbed.
Manaward buff on the entire party before Bahamut counts down to Megaflare, as well as remain at high HP, or the attack will kill the party. Switch between characters often to get in abilities, forcing Bahamut to switch targets in the process. The battle is one of endurance, as applying damage in the form of character abilities throughout will chip away at the boss's health. It is also possible to use multiple powerful abilities in succession, such as high-level spells under Arcane Ward or strong character abilities, to interrupt attacks such as Umbral Aura (Aerith's Arcane Ward can help if she is in the party). Ifrit, when summoned, can be dealt with using powerful spells, and with a fire + elemental combo on armor, many of Ifrit's attacks can be absorbed.
The final round is against the Pride and Joy Prototype who uses powerful beam attacks, grapples party members, and uses bursts of fire damage in melee range. It is important to switch between characters often, having one character (Cloud with Counterstance, or Barret) take the heat, then switch to another character to attack it from behind (Tifa, or Cloud depending on party composition and the boss's current target), taking advantage of its slow movement speed. With fire + elemental on melee attackers hitting it this way, they will be healed in the process. If Aerith is in the party, she can use Arcane Ward from a safe distance and cast Thundaga to deal considerable damage. This fight is simpler than Bahamut, but is again a battle of endurance; prioritize high HP over dealing damage and unleash all attacks in stagger.
Three-Person Team vs. The Immaculate One[]
This challenge is only available in Final Fantasy VII Remake Intergrade. It is a single battle against Weiss, in which Götterdämmerung is only half effective (despite the blurb saying it does not work). The challenge is fast-paced and action-focused, with the main difficulty being avoiding Weiss's attacks.
Setup[]
Because this challenge is only a single boss fight, equipment and materia can be focused squarely on a single strategy against Weiss rather than needing to be generalized around multiple opponents. Weiss has no elemental weaknesses, and his attacks deal immense damage. Though ![]() HP Up Materia can help alleviate this issue, it is more likely an easier strategy to dodge Weiss's attacks altogether and instead focus materia on improving damage.
HP Up Materia can help alleviate this issue, it is more likely an easier strategy to dodge Weiss's attacks altogether and instead focus materia on improving damage.
Many strategies to defeat Weiss involve defeating him quickly during a stagger and defeating him before his phase shift. As such, ![]() ATB Stagger Materia and
ATB Stagger Materia and ![]() Skill Master Materia should be equipped to increase ATB gauges and get the highest damage output possible when an enemy is staggered. Other materia to improve damage output focuses on stats.
Skill Master Materia should be equipped to increase ATB gauges and get the highest damage output possible when an enemy is staggered. Other materia to improve damage output focuses on stats. ![]() Luck Up Materia and
Luck Up Materia and ![]() Magic Up Materia can increase physical or magic damage output, while other materia such as
Magic Up Materia can increase physical or magic damage output, while other materia such as ![]() Revival Materia and
Revival Materia and ![]() Refocus Materia provide other general stat increases. Fury Ring is the best accessory to increase pure damage output. Götterdämmerungs still allow the party to build up their limit breaks faster for use during Weiss's stagger. Revival Earrings are also useful.
Refocus Materia provide other general stat increases. Fury Ring is the best accessory to increase pure damage output. Götterdämmerungs still allow the party to build up their limit breaks faster for use during Weiss's stagger. Revival Earrings are also useful. ![]() First Strike Materia is useful on all characters, but equipping it on those not controlled most of the time is very beneficial.
First Strike Materia is useful on all characters, but equipping it on those not controlled most of the time is very beneficial.
Tifa is near-essential for the fight because of her ability to boost damage during stagger, and her agility, allowing her to most easily dodge Weiss's attacks. Using ![]() Parry Materia can help Tifa avoid Weiss' hits more easily than the other characters, and
Parry Materia can help Tifa avoid Weiss' hits more easily than the other characters, and ![]() Deadly Dodge Materia can also be helpful. If used this way, Tifa will be the main controlled character, meaning her
Deadly Dodge Materia can also be helpful. If used this way, Tifa will be the main controlled character, meaning her ![]() ATB Boost Materia and
ATB Boost Materia and ![]() ATB Assist Materia should be used. It is best to equip Tifa with the
ATB Assist Materia should be used. It is best to equip Tifa with the ![]() Metal Knuckles to give her the highest possible damage output and focus her towards physical damage. Though she should focus on increasing physical damage output, giving her a
Metal Knuckles to give her the highest possible damage output and focus her towards physical damage. Though she should focus on increasing physical damage output, giving her a ![]() Lightning Materia is helpful to sometimes stun the enemy.
Lightning Materia is helpful to sometimes stun the enemy.
Cloud can be built either towards physical or magic damage to great effect, but should be built towards one or the other for maximum damage output. Cloud can serve both as a support character or a potential main character instead of Tifa. If he is controlled as the main character, he should use parry and deadly dodge materia instead of Tifa and be built similarly. For a magic damage build, Cloud should be given lightning and ![]() Fire Materia, as well as any other materia that improve his magic stats, while he equips the
Fire Materia, as well as any other materia that improve his magic stats, while he equips the ![]() Mythril Saber. For physical damage, he should instead equip
Mythril Saber. For physical damage, he should instead equip ![]() Hardedge.
Hardedge.
Aerith is built entirely around magic damage, and her Arcane Ward and high magic damage output make her a very strong candidate. She should be used for strategies involving bursting Weiss down during stagger. Because Weiss is a single boss battle, Aerith does not need to worry too much about improving her already high MP stat; as such, giving her ![]() Mythril Rod is ideal to boost her magic damage output. Aerith's limit breaks are less useful for strategies involving bursting Weiss, so she could carry
Mythril Rod is ideal to boost her magic damage output. Aerith's limit breaks are less useful for strategies involving bursting Weiss, so she could carry ![]() Refocus Materia and/or equip Fury Ring/Revival Earrings rather than Götterdämmerung.
Refocus Materia and/or equip Fury Ring/Revival Earrings rather than Götterdämmerung.
Barret is less useful for the fight than the other characters, because he is slower, and is built more towards endurance and longer fights.
Battle[]
Weiss in his first phase mostly uses melee weapons. During this, he is quick, and his attacks have a long reach, making them difficult to dodge. Most of Weiss's abilities can kill characters in relatively few hits, making dodging them crucial. However, if his unblockable attacks are dodged, he will be pressured, making him significantly easier to stagger. In his second phase, he instead uses ranged weapons, making him harder to dodge; most strategies involve beating him before he can phase shift.
Cloud or Tifa can dodge Weiss's unblockable ability Stab if they perform a dodge roll toward him, after which they will leap over him and cause him to become pressured. The rest of his unblockable abilities are easier to dodge using parry, especially with Tifa. Evisceration is most difficult, as the player must time their parry dodge away moments after Weiss enters the stance or it will land.
The fight can be begun by dodging Weiss's first few attacks, after which he will use an unblockable attack. Upon dodging it, the player can then build up Weiss's stagger a little while he is pressured, before quickly preparing to dodge his next set of attacks. After the second or third unblockable attack, Weiss can be staggered.
When Weiss is staggered, using Tifa's True Strike and her Rise and Fall, Omnistrike, and Whirling Uppercut attacks will increase the damage he receives dramatically. Meanwhile the other two characters should focus on using their best skills (using magic while standing in Aerith's Arcane Ward can be extremely helpful; if so, Arcane Ward should be placed on the character closest to Weiss). The player should focus on dealing as much damage to Weiss as possible before stagger ends, with the hope to either kill him during stagger, or to get his HP low enough that only a single spell or attack after stagger end will kill him.
Episode INTERmission[]
Challenges can be faced in chapter 2 only upon replaying the episode after beating it a first time. Both involve Yuffie Kisaragi paired with Sonon Kusakabe, meaning Synergized can be used effectively.
| Challenge | Description | Rank | Gil | Enemy level | Reward |
|---|---|---|---|---|---|
| Yuffie & Sonon vs. Shinra's Dark Secrets | A series of two-person team battles for Yuffie and Sonon. Face off against Shinra forces designed for deployment in the war against Wutai. | 3 | 300 | ? | Enfeeblement Ring x1 |
| Yuffie & Sonon vs. Midgarian Monsters | A series of two-person team battles for Yuffie and Sonon. Face off against creatures known to prowl the urban jungle of Midgar. | 4 | 400 | ? | Enfeeblement Ring x1 |
| Yuffie & Sonon vs. Top Secrets | A series of two-person team battles for Yuffie and Sonon. Take on summons and an upgraded version of Shinra's deadliest weapons platform. | 7 | 700 | ? | Götterdämmerung x2 |
Yuffie & Sonon vs. Shinra's Dark Secrets[]
This challenge involves three rounds against Shinra soldiers. The first is fought simply against three security officers and three riot troopers, which can be defeated easily with Windstorm attacks. The second involves a battle against two Deepground SOLDIERs and one helitrooper, which are slightly more difficult to defeat due to the Deepground SOLDIER's ability to teleport and the helitrooper's flight; Fire Ninjutsu can be used with ranged attacks against the helitroopers, while well-timed Synergized Windstorm attacks are effective against the Deepground SOLDIER. The final round is against three 3-C SOLDIER operators, against which a mix of Fire Ninjutsu, Synergized Windstorm, and Synergized Art of War attacks can be used to empower a fully-charged Fiery Banishment to great effect.
Yuffie & Sonon vs. Midgarian Monsters[]
This challenge involves three rounds against monsters, most of which are weak to ice. As such, ice materia paired with elemental materia can be used, and Ice Ninjutsu is the best bet. The first round is fought against bugaboos, which can be cleared out quickly with Throw + Windstorm. The second is fought against a horned cripshay and a levrikon; against both foes, Synergized Art of War can make quick work of them.
The final round is fought against the Type-0 Behemoth, a slightly more challenging enemy. The strategy is similar to when it is fought in the base game: cripple its lower and upper body to stagger it, and then destroy its horns to remove a major source of damage. For Yuffie and Sonon, this can be done quickly and easily by waiting for it to stay in one place, and using Synergized Art of War to destroy its lower body, then immediately using the same move to destroy its upper body and stagger it. After this, a mix of this move and a Banishment from Yuffie can bring it down. Brumal Form can also come in handy for Yuffie to allow her to dodge many powerful attacks.
This challenge is also a great way to farm AP. By using Throw + Windstorm against the bugaboos on the first round earns 32 AP. Combined with materia and armor that improve AP gains, this can be used to quickly max AP on several materia for Yuffie and Sonon, especially when preparing for the "Top Secrets" challenge.
Yuffie & Sonon vs. Top Secrets[]
vs. Top Secrets in "Episode INTERmission" comprises three rounds: one against Bahamut and Ifrit, one against Ramuh, and one against Pride and Joy Prototype. These enemies (aside from Ramuh) are weaker versions of the enemies fought in the base game, and entirely different strategies should be deployed against them. For weaponry, when using magic-based strategies, Yuffie should use ![]() Boomerang, and Sonon should use Djinn Staff. For physical attack strategies, Yuffie should use Steel Reaper and Sonon should use Indurate Staff. Preference for armor should be given to those with higher
Boomerang, and Sonon should use Djinn Staff. For physical attack strategies, Yuffie should use Steel Reaper and Sonon should use Indurate Staff. Preference for armor should be given to those with higher ![]() Magic Defense, and Sonon should use Kindred Cord.
Magic Defense, and Sonon should use Kindred Cord.
Because each boss has a different elemental weakness, the best weakness to exploit is ![]() Wind to quickly defeat the second boss, meaning
Wind to quickly defeat the second boss, meaning ![]() Wind Materia is best paired with elemental to a weapon. For defensive purposes, elemental can be paired with fire materia in armor. For those using magic-based strategies, lightning materia should also be used, along with Magic Up and MP Up materia, and
Wind Materia is best paired with elemental to a weapon. For defensive purposes, elemental can be paired with fire materia in armor. For those using magic-based strategies, lightning materia should also be used, along with Magic Up and MP Up materia, and ![]() Synergy Materia is a great pairing for Sonon.
Synergy Materia is a great pairing for Sonon. ![]() Magnify Materia should be paired with
Magnify Materia should be paired with ![]() Barrier Materia,
Barrier Materia, ![]() Time Materia, or
Time Materia, or ![]() Healing Materia. Beyond this, materia that improves ATB is necessary.
Healing Materia. Beyond this, materia that improves ATB is necessary.
Bahamut and Ifrit are the most difficult opponents of the group, and Bahamut's usual attacks can be devastating. This means keeping up ![]() Barrier and
Barrier and ![]() Manaward is very helpful, and that for most of the fight, it will be necessary to keep a distance and avoid his attacks. Yuffie should use Brumal Form often, especially when dodging Divebomb. When Bahamut uses his countdown abilities (such as "Five..."), Yuffie and Sonon should sweep in with Synergized Art of War, which will pressure Bahamut and apply more damage until Bahamut resumes attack. In-between, moderate Throw attacks can be used with a physical damage strategy, or level three spells can be cast with a magic strategy. The ranged Windstorm is good, and Mug can be used to pressure Bahamut though he has nothing to steal.
Manaward is very helpful, and that for most of the fight, it will be necessary to keep a distance and avoid his attacks. Yuffie should use Brumal Form often, especially when dodging Divebomb. When Bahamut uses his countdown abilities (such as "Five..."), Yuffie and Sonon should sweep in with Synergized Art of War, which will pressure Bahamut and apply more damage until Bahamut resumes attack. In-between, moderate Throw attacks can be used with a physical damage strategy, or level three spells can be cast with a magic strategy. The ranged Windstorm is good, and Mug can be used to pressure Bahamut though he has nothing to steal.
When Bahamut summons Ifrit, a fully-charged Icy Banishment followed by a few Synergized Art of Wars should be used to take Ifrit down quickly, while continuing to avoid Bahamut's attacks. Eventually, by attacking during Bahamut's countdown phases, Bahamut should be taken down before he can ever use Megaflare. If Bahamut is lower than Ifrit, defeating Bahamut first can make Ifrit on his own an insignificant threat.
Ramuh is a much simpler opponent. Ramuh's magic attacks are once again very powerful, but his own HP is fairly low. Manawall helps guard against Ramuh's attacks, while using Synergized Windstorm repeatedly can make short work of him. It is best to destroy his sparks when he launches them, avoid or heal through his attacks, and then get in Synergized Windstorms to defeat him quickly. Wind-augmented Banishment deals severe damage.
Pride and Joy Prototype is the only opponent more challenging than in the base game, because its ability to grab Yuffie or Sonon can easily kill them if they are not freed (which is significantly more challenging to do with only one other party member). The easiest way to prevent Pride and Joy from grabbing Sonon is to immediately use Synergize to pull Sonon away, while for Yuffie, keeping her distance with dodge rolls or using Brumal Form work. For damage, in-between pressure, Lightning Ninjutsu should be used, and magic strategies can deploy ![]() Thundaga effectively; otherwise, wait for it to be pressured and use Synergized moves and Thunderous Banishment to deal damage, then quickly escape when it gets back on its feet. It is crucial to use Brumal Form (twice after waiting two seconds) to dodge its Beam Cannon attack, as this can kill in one hit.
Thundaga effectively; otherwise, wait for it to be pressured and use Synergized moves and Thunderous Banishment to deal damage, then quickly escape when it gets back on its feet. It is crucial to use Brumal Form (twice after waiting two seconds) to dodge its Beam Cannon attack, as this can kill in one hit.
Grab Bag[]
After completing a challenge, repeating it will offer a "Grab Bag" as a reward. This gives a random set of rewards dependent on the challenge.
| Rank | 50% | 30% | 15% | 5% |
|---|---|---|---|---|
| Rank 3 | 1000 gil | Hi-Potion x3 Orb of Gravity x1 Phoenix Down x1 |
Mega-Potion x1 Remedy x1 Celeris x1 |
Mega-Potion x2 Molotov Cocktail x1 Ether x1 |
| Rank 4 | 2000 gil | Hi-Potion x2 Orb of Gravity x1 Celeris x1 |
Mega-Potion x3 Remedy x1 Ether x1 |
Mega-Potion x4 Big Bomber x1 Turbo Ether x1 |
| Rank 5 Rank 6 Rank 7 |
2500 gil | Mega-Potion x3 Remedy x1 Ether x1 |
Mega-Potion x4 Big Bomber x1 Turbo Ether x1 |
Elixir x1 |
Behind the scenes[]

Portable version by Chadley.
The Shinra Combat Simulator was included as a tribute to Crisis Core -Final Fantasy VII-, in which virtual battles were used for SOLDIER training opportunities. [1] Because the Shinra Building is not visited until later in the game, a portable version was given to Chadley to allow the player to fight summons earlier. This portable VR headset was inspired by PlayStation VR.[1]
The battle planner in charge of the "Top Secrets" level in the simulator suggested that Bahamut would summon Ifrit, and Co-Director Naoki Hamaguchi allowed it. The battle would take place in VR and thus it didn't pose problems for the lore. Hamaguchi was shocked by the difficulty, considering it the most difficult battle in the game.[2]
Gallery[]
")
")
")
")
![]]" from "Episode INTERmission".](/wiki/File:Combat_Simulator_Prototype_from_FFVIIR_INTERmission.png "Combat Simulator Prototype from FFVIIR INTERmission.png (5.06 MB)")
References[]
- ↑ 1.0 1.1 Hamaguchi, Naoki (2020, June 22). "How Square Enix created the Summons in Final Fantasy VII Remake". From PlayStation Blog. Archived from the original on June 22, 2020.
- ↑ [translation], MKillerby (2020, July 22). "Translation: Toriyama and Hamaguchi (FF7R co-directors) interviews in Famitsu". From 'Famitsu (original). Archived from the original on July 22, 2022.