No edit summary |
|||
| (7 intermediate revisions by 3 users not shown) | |||
| Line 7: | Line 7: | ||
|image=<gallery> |
|image=<gallery> |
||
Balouve-Mines-Tunnel-FFXV.png|Mines |
Balouve-Mines-Tunnel-FFXV.png|Mines |
||
| − | Balouve-Mines-Map-FFXV.png|Map |
+ | Balouve-Mines-Map-FFXV.png|World Map |
Tomb-of-the-Clever-Map-FFXV.png|Tomb of the Clever |
Tomb-of-the-Clever-Map-FFXV.png|Tomb of the Clever |
||
</gallery> |
</gallery> |
||
| Line 69: | Line 69: | ||
}} |
}} |
||
|quests=*[[#Retrieve the royal arm|Retrieve the royal arm]] |
|quests=*[[#Retrieve the royal arm|Retrieve the royal arm]] |
||
| + | *[[Photo Op: Quarry|Photo Op]] |
||
*[[#Menace Sleeps in Balouve|Menace Sleeps in Balouve]] |
*[[#Menace Sleeps in Balouve|Menace Sleeps in Balouve]] |
||
}} |
}} |
||
| Line 99: | Line 100: | ||
Upon entering the mines the party takes the elevator down. The player is free to explore each floor, but needs to go to the second basement floor, and head north to the bottom right corner of the map to come across a bridge. When on the bridge the dungeon boss appears to knock the party off. If this happens, the player can make their way either to the elevator, or to the staircase that leads up. |
Upon entering the mines the party takes the elevator down. The player is free to explore each floor, but needs to go to the second basement floor, and head north to the bottom right corner of the map to come across a bridge. When on the bridge the dungeon boss appears to knock the party off. If this happens, the player can make their way either to the elevator, or to the staircase that leads up. |
||
| − | At the bottom of the mine the player will find the boss. In the room where Aramusha is fought the player can climb the stairs to the top to find an [[Final Fantasy XV accessories#Emerald Bracelet|Emerald Bracelet]]. Near the red |
+ | At the bottom of the mine the player will find the boss. In the room where Aramusha is fought the player can climb the stairs to the top to find an [[Final Fantasy XV accessories#Emerald Bracelet|Emerald Bracelet]]. The player can collect this without fighting Aramusha when entering from the second floor entrance. Near the red excavator there is a random treasure with a 25% chance of being a [[Final Fantasy XV accessories#Champions Anklet|Champions Anklet]]. |
Aramusha can kill in one hit and has strong area of effect moves. He can launch purple tentacles out the floor. Aramusha is weak to lightning. He won't leave the bottom floor, so the player can hit him from afar with ranged weapons and magic. Aramusha can be [[Final Fantasy XV statuses#Poison|poisoned]], and thus his HP can be whittled down even early on in the game. |
Aramusha can kill in one hit and has strong area of effect moves. He can launch purple tentacles out the floor. Aramusha is weak to lightning. He won't leave the bottom floor, so the player can hit him from afar with ranged weapons and magic. Aramusha can be [[Final Fantasy XV statuses#Poison|poisoned]], and thus his HP can be whittled down even early on in the game. |
||
| Line 106: | Line 107: | ||
After the boss battle, the player can search the northeast corner of the room on one of the upper levels for a crack [[Noctis Lucis Caelum|Noctis]] can squeeze though to reach the royal tomb to claim the [[Final Fantasy XV weapons#Bow of the Clever|Bow of the Clever]]. This yields 10,000 EXP. After the boss room the player can head towards the elevator on that level and find a [[Final Fantasy XV accessories#Friendship Band|Friendship Band]] behind it. |
After the boss battle, the player can search the northeast corner of the room on one of the upper levels for a crack [[Noctis Lucis Caelum|Noctis]] can squeeze though to reach the royal tomb to claim the [[Final Fantasy XV weapons#Bow of the Clever|Bow of the Clever]]. This yields 10,000 EXP. After the boss room the player can head towards the elevator on that level and find a [[Final Fantasy XV accessories#Friendship Band|Friendship Band]] behind it. |
||
{{-}} |
{{-}} |
||
| + | |||
| + | ===Photo Op: Quarry=== |
||
| + | {{#invoke:FFXV Data|Sidequests|name=Photo Op: Quarry |
||
| + | |displaycategory=false|displaylocation=true}} |
||
| + | Th quest will trigger when auto-driving to the Balouve Mines parking spot. |
||
| + | <gallery> |
||
| + | Photo op Quarry map in FFXV.png |
||
| + | Photo Op Quarry from FFXV.png |
||
| + | </gallery> |
||
=== Menace Sleeps in Balouve === |
=== Menace Sleeps in Balouve === |
||
| Line 115: | Line 125: | ||
Some floors have branching paths that lead to dead ends; the player should try to visit the dead ends before moving on to get all the treasures, as the way back gets blocked off. |
Some floors have branching paths that lead to dead ends; the player should try to visit the dead ends before moving on to get all the treasures, as the way back gets blocked off. |
||
| + | [[File:Psychomancer in Balouve Mines Menace in FFXV.png|thumb|Psychomancer.]] |
||
The enemies in this menace dungeon are relatively simple. The player should equip a [[Ribbon (Final Fantasy XV)|Ribbon]] or eat [[Resistant (Final Fantasy XV)|Resistant]] food beforehand on 1F-9F for enemies that inflict [[Poison (Final Fantasy XV)|Poison]] and [[Confusion (Final Fantasy XV)|Confusion]]. After the haven at the 10F, one is better off playing defensively against the [[Mindflayer (Final Fantasy XV)|mindflayers]] and the boss [[psychomancer]] since their attacks are easily blocked. |
The enemies in this menace dungeon are relatively simple. The player should equip a [[Ribbon (Final Fantasy XV)|Ribbon]] or eat [[Resistant (Final Fantasy XV)|Resistant]] food beforehand on 1F-9F for enemies that inflict [[Poison (Final Fantasy XV)|Poison]] and [[Confusion (Final Fantasy XV)|Confusion]]. After the haven at the 10F, one is better off playing defensively against the [[Mindflayer (Final Fantasy XV)|mindflayers]] and the boss [[psychomancer]] since their attacks are easily blocked. |
||
| Line 143: | Line 154: | ||
*[[Final Fantasy XV accessories#Emerald Bracelet|Emerald Bracelet]] (very top of the boss room) |
*[[Final Fantasy XV accessories#Emerald Bracelet|Emerald Bracelet]] (very top of the boss room) |
||
*[[Oracle Ascension Coin]] (bottom of the boss room) |
*[[Oracle Ascension Coin]] (bottom of the boss room) |
||
| − | *[[Final Fantasy XV accessories#Champions Anklet|Champions Anklet]] |
+ | *[[Final Fantasy XV accessories#Champions Anklet|Champions Anklet]] (25% chance, boss area by the excavator machine) |
*[[Auto Parts#Prismatic Dust|Prismatic Dust]] |
*[[Auto Parts#Prismatic Dust|Prismatic Dust]] |
||
*[[Treasures (Final Fantasy XV)#Chrome Bit|Chrome Bit]] x2 |
*[[Treasures (Final Fantasy XV)#Chrome Bit|Chrome Bit]] x2 |
||
| Line 192: | Line 203: | ||
*There is a glitch at the elevator on the third floor of the Balouve Mines. If the player's first meets the Goblin encounters on the third floor under the bridge by Aramusha knocking Noctis down from the second floor, an invisible obstruction will stand between the party and the elevator, making entering or exiting the elevator on the third floor impossible for the remainder of the game. The cause of this glitch is unknown. |
*There is a glitch at the elevator on the third floor of the Balouve Mines. If the player's first meets the Goblin encounters on the third floor under the bridge by Aramusha knocking Noctis down from the second floor, an invisible obstruction will stand between the party and the elevator, making entering or exiting the elevator on the third floor impossible for the remainder of the game. The cause of this glitch is unknown. |
||
*Balouve Mines was inspired by an actual abandoned mine in Japan the developers had visited.<ref>{{Refwebsite| page url = http://www.novacrystallis.com/2016/09/heres-what-you-missed-at-final-fantasy-xvs-pax-west-panel/| page name = Here's what you missed at Final Fantasy XV’s PAX West panel| site url = http://www.novacrystallis.com| site name = Nova Crystallis| access time = 10:45, June 04, 2018 (UTC)}}</ref> |
*Balouve Mines was inspired by an actual abandoned mine in Japan the developers had visited.<ref>{{Refwebsite| page url = http://www.novacrystallis.com/2016/09/heres-what-you-missed-at-final-fantasy-xvs-pax-west-panel/| page name = Here's what you missed at Final Fantasy XV’s PAX West panel| site url = http://www.novacrystallis.com| site name = Nova Crystallis| access time = 10:45, June 04, 2018 (UTC)}}</ref> |
||
| + | *If the player crosses the railroad track on the 2BF floor, the boss will knock them down to the 3BF floor and when they encounter the boss, the party will recognize the boss as the one who knocked Noctis down and express excitement over paying it back. |
||
==References== |
==References== |
||
| Line 197: | Line 209: | ||
{{navbox setting FFXV}} |
{{navbox setting FFXV}} |
||
| + | |||
| + | [[ru:Шахты Балува]] |
||
[[Category:Locations in Final Fantasy XV]] |
[[Category:Locations in Final Fantasy XV]] |
||
[[Category:Mines]] |
[[Category:Mines]] |
||
Revision as of 17:01, 20 November 2019
Template:Sideicon Balouve Mines is a dungeon in the Leide region in Final Fantasy XV. It is a multi-tiered mine where the player can take an elevator to travel between its four levels. It is on the way to Galdin Quay from the rest of Leide, and there is a parking spot outside the mines.
Although the player can come across it in Chapter 1 and all regular enemies are level 7 goblins, the dungeon boss is a level 52 enemy. The boss can be taken out even at low levels with the right strategy. The boss can perform Instant Death attacks, so the player should be sure to bring Phoenix Downs. Retrieving the royal arm in the mines yields 10,000 EXP. The mines have many good accessories to find as treasures.
The goblin's bestiary entry implies that the miners who used to work at the mines were turned to goblins by the Starscourge. The monolith found in Balouve Mines Menace implies it is the newest menace dungeon. The About the Kings of Yore document in Final Fantasy XV: Comrades posits that royal tombs were erected as a memorial to the king or queen who claimed that land in the name of Lucis, suggesting the site was joined in Lucis during the rule of the Clever whose tomb now lies in the mines.
Almanac

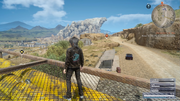
Atop the pipes near the parking spot.
- Excavating facility dug out of the Callaegh Steps. These mines single-handedly supported the modernization of Lucian architecture: the Insomnian skyline is composed almost entirely of the skyscrapers constructed with Balouve-made building stones.
- While some sought employment of the mines as a more traditional means of achieving economic security, many hoped to strike it rich by capitalizing on rumors of rare metals hidden within the limestone walls. People flocked to the area, and a bustling mining town arose in turn.
- The pipelines winding across present-day Leide are a testament to the centrality of natural resources like oil and gas to the region's economy, while the trade of mineral resources has all but dried up. After the daemons made the nest of the mines, the miasma they produced began eroding the walls and tainting their composition. Before long, the area was deemed unfit for excavation, and the mines closed for good.
Quests
Retrieve the royal arm
The player can attempt the dungeon at a lower level, especially if they eat something that provides substantial stats boosts, such as Kenny's Special Recipe. The dish only needs to be ordered once at Crow's Nest for 7,200 gil, and can then be recreated using garlic, which can be bought for a low price, and wennath salmon, which can be fished at Rachsia Bridge.
Stat boosts from camping last longer if the player upgrades it via the Ascension Grid.
The dungeon only has level 7 goblins and the boss, Aramusha, who is at level 52. The goblins will send minecarts hurtling toward the party. They can be avoided by staying off the tracks, but being hit by them doesn't do much damage.
The dungeon can be considered the easiest optional dungeon. Many of the treasure found in the mine are items for the player's car and basic healing items, but there are also some good accessories and the royal arm at the end.
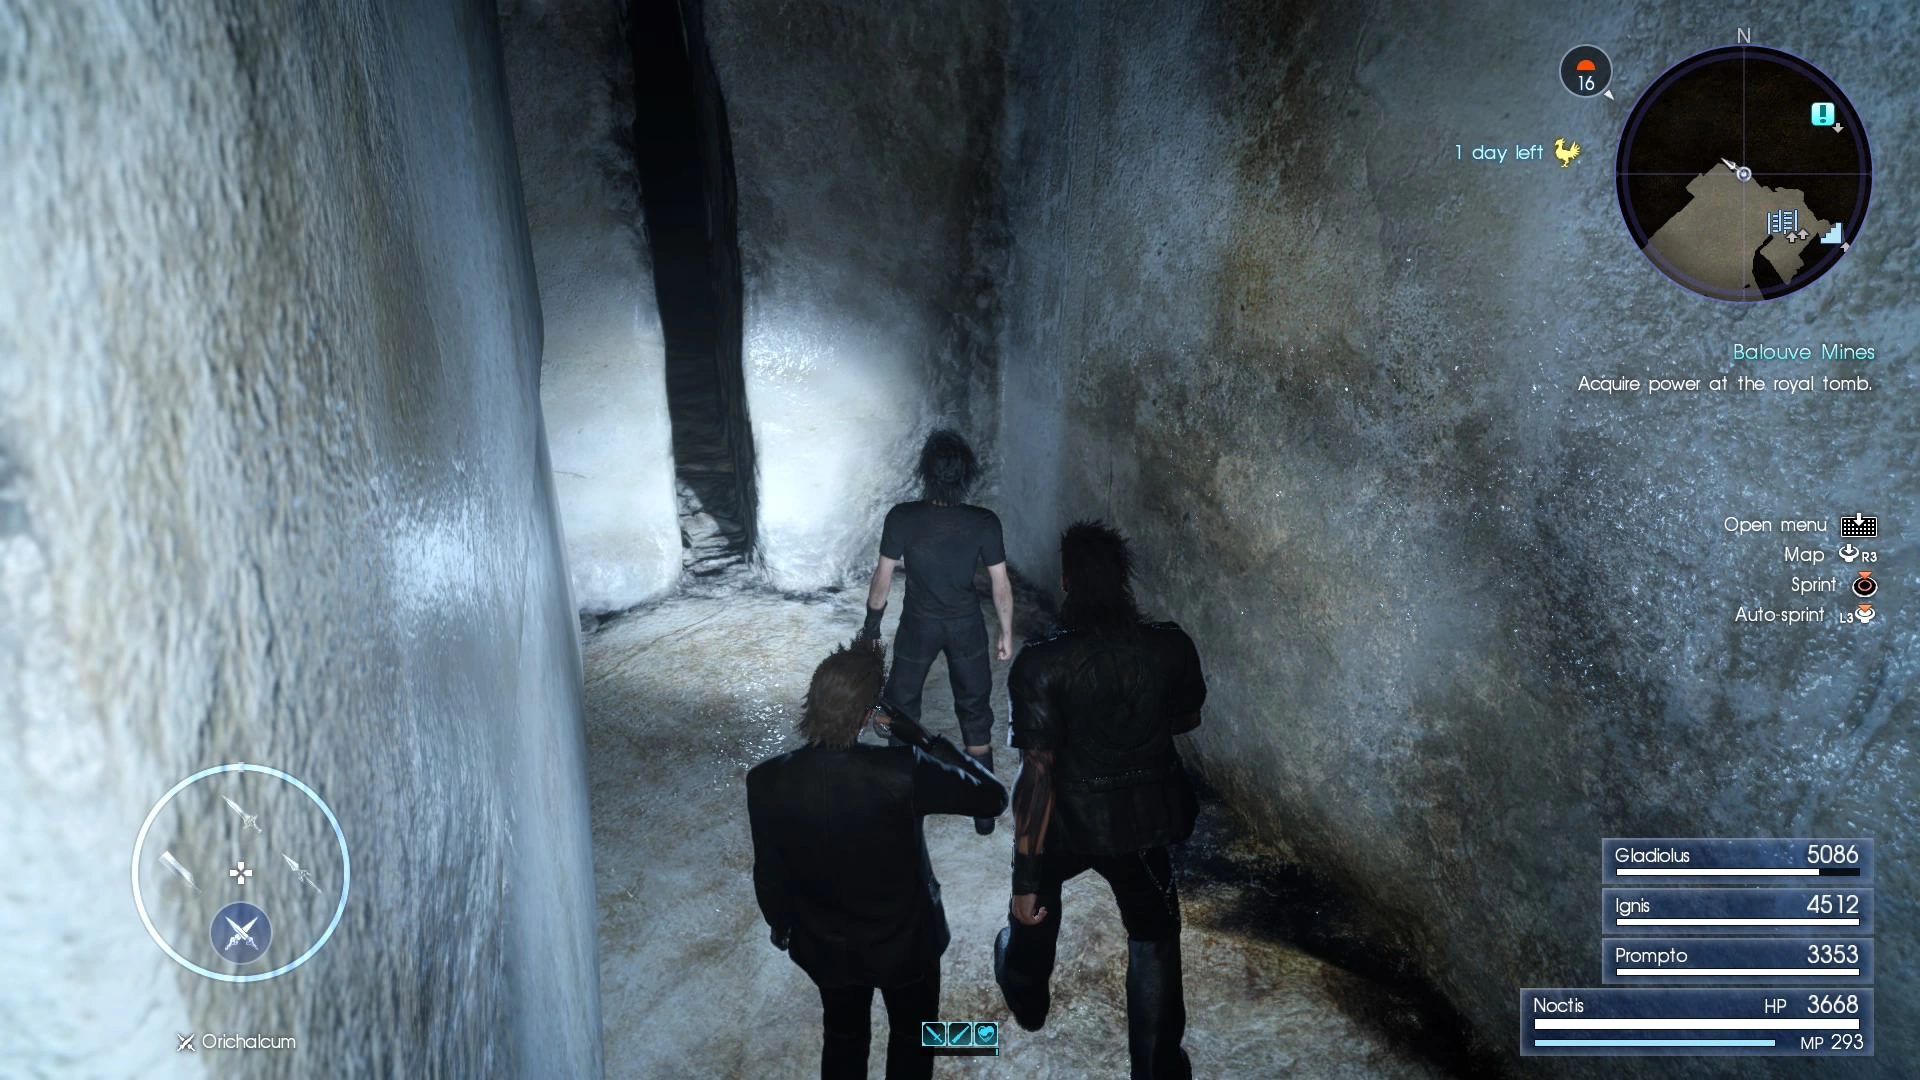
Upon entering the mines the party takes the elevator down. The player is free to explore each floor, but needs to go to the second basement floor, and head north to the bottom right corner of the map to come across a bridge. When on the bridge the dungeon boss appears to knock the party off. If this happens, the player can make their way either to the elevator, or to the staircase that leads up.
At the bottom of the mine the player will find the boss. In the room where Aramusha is fought the player can climb the stairs to the top to find an Emerald Bracelet. The player can collect this without fighting Aramusha when entering from the second floor entrance. Near the red excavator there is a random treasure with a 25% chance of being a Champions Anklet.
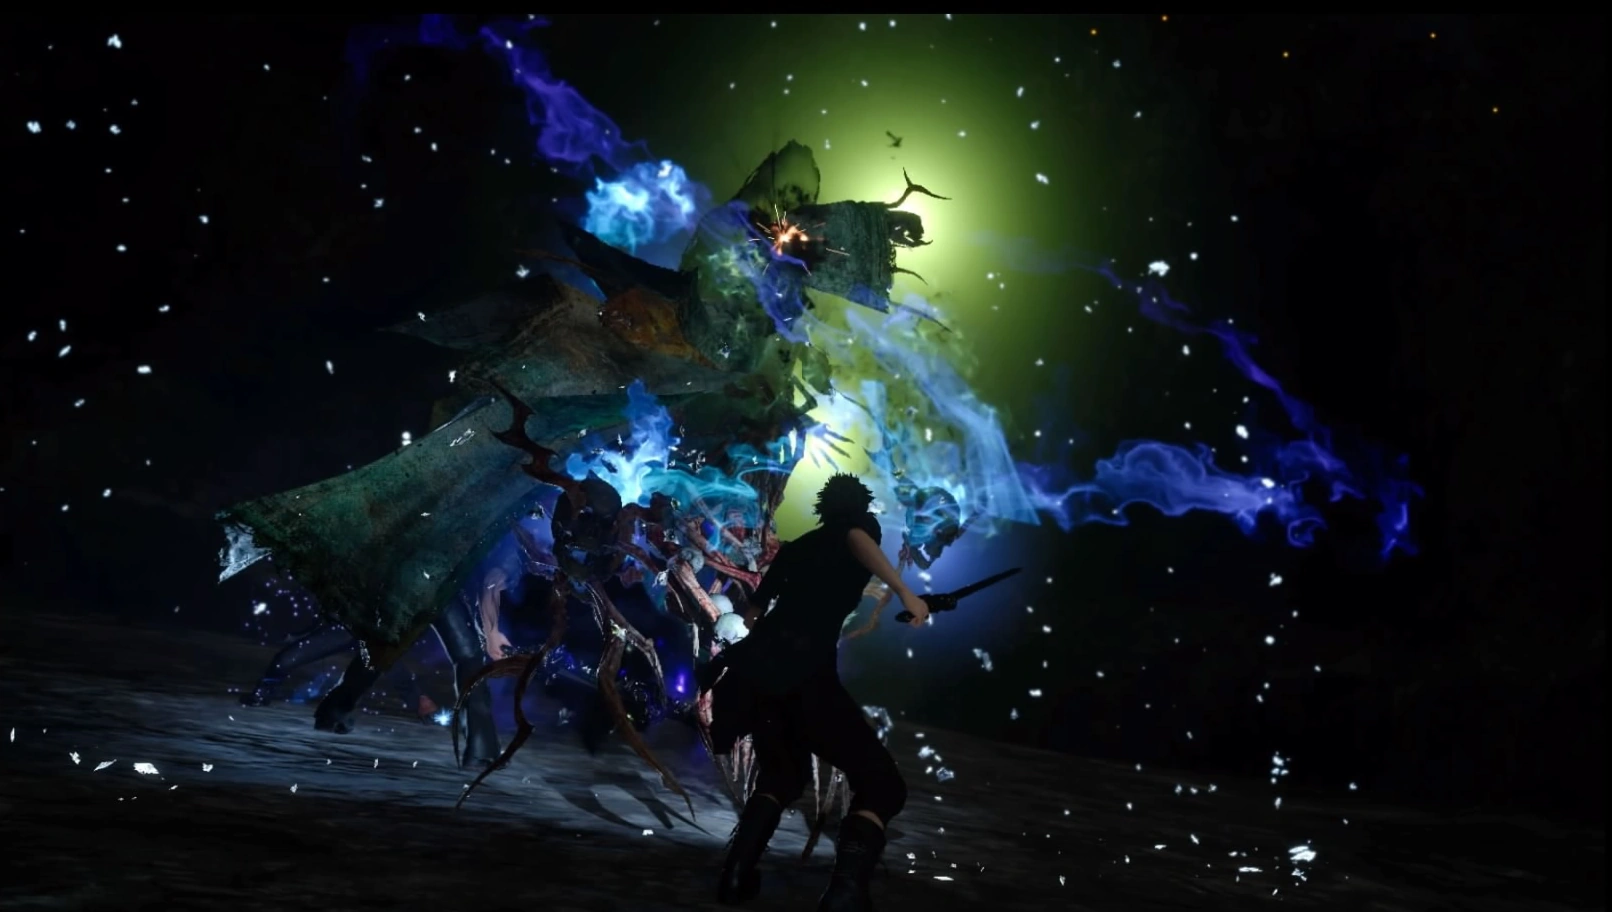
Aramusha can kill in one hit and has strong area of effect moves. He can launch purple tentacles out the floor. Aramusha is weak to lightning. He won't leave the bottom floor, so the player can hit him from afar with ranged weapons and magic. Aramusha can be poisoned, and thus his HP can be whittled down even early on in the game.
The crack on the wall that leads to the royal arm.
After the boss battle, the player can search the northeast corner of the room on one of the upper levels for a crack Noctis can squeeze though to reach the royal tomb to claim the Bow of the Clever. This yields 10,000 EXP. After the boss room the player can head towards the elevator on that level and find a Friendship Band behind it.
Photo Op: Quarry
| Name | Location | Unlock | Reward |
|---|---|---|---|
| Photo Op: Quarry | Near Balouve Mines | Reach Chapter 04 | 200 EXP |
Th quest will trigger when auto-driving to the Balouve Mines parking spot.
")
")
Menace Sleeps in Balouve
Template:See Also In Chapter 15, the player can do the Menace Beneath Lucis sidequests after completing the following optional dungeons: Costlemark Tower, Crestholm Channels, Balouve Mines and Daurell Caverns. At Meldacio Hunter HQ Ezma Auburnbrie will provide the Sealbreaker's Key to open the sealed doors, including the one in Balouve Mines. The recommended level for this dungeon is 78. The Windows and Royal Editions add monoliths to the dungeons, which the player can read to fill out their Datalog and get further lore information.
The sealed door for the menace is found in the same area as the Tomb of the Clever behind a crack in the northeast wall of the boss room. This menace dungeon has 20 floors each consisting of one item and a set of monsters the player must defeat to proceed to the next floor. There is a haven along the journey, so the player can replenish health and cook.
Some floors have branching paths that lead to dead ends; the player should try to visit the dead ends before moving on to get all the treasures, as the way back gets blocked off.

Psychomancer.
The enemies in this menace dungeon are relatively simple. The player should equip a Ribbon or eat Resistant food beforehand on 1F-9F for enemies that inflict Poison and Confusion. After the haven at the 10F, one is better off playing defensively against the mindflayers and the boss psychomancer since their attacks are easily blocked.
There are a few noteworthy items that can be obtained in this menace dungeon. The weapons are the Apocalypse greatsword & the Death Penalty gun. The accessories are Emperor's Anklet, Oracle Earring, & Platinum Bangle, which all have a 50% chance of being obtained.
List of floors
Enemies
- Main dungeon portion
Defeating Aramusha unlocks a hunt for Yojimbo at Longwythe Rest Area.
- Menace dungeon portion
Items
- Main dungeon portion
- Rainbow Pendant
- Rusted Bit
- Silver Ore x2
- Gold Ore x2
- Emerald Bracelet (very top of the boss room)
- Oracle Ascension Coin (bottom of the boss room)
- Champions Anklet (25% chance, boss area by the excavator machine)
- Prismatic Dust
- Chrome Bit x2
- Elixir x2
- Friendship Band
- Megalixir
- Mythril Shaft
- Circlet
- Iron Shavings
- Bow of the Clever (royal arm)
- Menace dungeon portion
- Potion
- Hi-Potion x2
- Mega Potion
- Hi-Elixir
- Megalixir x2
- Ether
- Beautiful Bottle
- Rusted Bit
- Chrome Bit
- Earth Gemstone
- Mythril Shaft
- Platinum Ingot
- Silver Ore
- Gold Ore
- Prismatic Dust
- Prismatic Shard x2
- Prismatic Ore
- Oracle Ascension Coin x2
- Emperor's Anklet (50% chance; 12th floor—middle dead end)
- Oracle Earring (50% chance; 12th floor—right dead end)
- Platinum Bangle (50% chance; 16th floor—right dead end)
- Apocalypse (10th floor haven)
- Death Penalty (20th floor boss level)
Gallery
")
")
")
")
")
")
")
Trivia
- There is a glitch at the elevator on the third floor of the Balouve Mines. If the player's first meets the Goblin encounters on the third floor under the bridge by Aramusha knocking Noctis down from the second floor, an invisible obstruction will stand between the party and the elevator, making entering or exiting the elevator on the third floor impossible for the remainder of the game. The cause of this glitch is unknown.
- Balouve Mines was inspired by an actual abandoned mine in Japan the developers had visited.[1]
- If the player crosses the railroad track on the 2BF floor, the boss will knock them down to the 3BF floor and when they encounter the boss, the party will recognize the boss as the one who knocked Noctis down and express excitement over paying it back.