m (Drake Clawfang moved page Bahamut (Final Fantasy IV) to Bahamut (Final Fantasy IV Boss) without leaving a redirect) |
mNo edit summary |
||
| (41 intermediate revisions by 11 users not shown) | |||
| Line 1: | Line 1: | ||
| − | {{ |
+ | {{sideicon|prime=FFIV}} |
| + | {{DISPLAYTITLE:Bahamut (''Final Fantasy IV'' 2D)}} |
||
| − | {{FFIV Enemies |
||
| + | {{infobox enemy |
||
| − | | image = [[File:Bahamut-ffiv-snes.png]] [[File:Bahamut-ffiv-snes 2.png]] |
||
| ⚫ | |||
| − | | GBAimage = [[File:Bahamut-ffiv-gba.png]] [[File:Bahamut-ffiv-gba 2.png]] |
||
| + | | release = FFIV |
||
| − | | PSPimage = [[File:FF4PSP Bahamut.png]] [[File:FF4PSP Bahamut 2.png]] |
||
| ⚫ | |||
| − | | iOS image = [[File:Bahamut ffiv ios 1.PNG|200px]] |
||
| ⚫ | |||
| ⚫ | |||
| ⚫ | |||
| ⚫ | |||
| ⚫ | |||
| ⚫ | |||
| ⚫ | |||
| ⚫ | |||
| − | | HP = 45,001 |
||
| − | | MP = 2,812 |
||
| ⚫ | |||
| ⚫ | |||
| ⚫ | |||
| ⚫ | |||
| − | | MDef = 4 |
||
| ⚫ | |||
| ⚫ | |||
| romaji = Bahamūto |
| romaji = Bahamūto |
||
| − | | |
+ | | image = <gallery> |
| + | FF4PSP Bahamut.png|Battle (PSP) |
||
| ⚫ | |||
| + | FF4PSP Bahamut 2.png|Charging (PSP) |
||
| ⚫ | |||
| + | Bahamut-ffiv-gba 2.png|Battle (GBA) |
||
| ⚫ | |||
| + | Bahamut-ffiv-gba.png|Charging (GBA) |
||
| ⚫ | |||
| + | Bahamut-ffiv-snes 2.png|Battle (SNES) |
||
| ⚫ | |||
| + | Bahamut-ffiv-snes.png|Charging (SNES) |
||
| ⚫ | |||
| + | </gallery> |
||
| ⚫ | |||
| + | |type = Heavy |
||
| ⚫ | |||
| − | | |
+ | |location = [[Lair of the Father]] |
| + | |remake = Bahamut (Final Fantasy IV 3D) |
||
| ⚫ | |||
| − | | Gil = 0 |
||
| − | | EXP = 35,000 |
||
| − | | Steal = [[Potion (Item)|Potion]] |
||
| − | | Drop = - |
||
| − | | Weak Against = - |
||
| − | | Resistant to = [[Poison (Status)|Poison]], [[Blind (Status)|Blind]], [[Silence (Status)|Silence]], [[Pig (Ability)|Pig]], [[Mini (Status)|Mini]], [[Toad (Status)|Toad]], [[Petrify (Status)|Petrify]], [[Instant Death|Death]], [[Berserk (Status)|Berserk]], [[Confuse (Status)|Confuse]], [[Sleep (Status)|Sleep]], [[Paralysis|Paralyze]], [[Curse (Status)|Curse]], [[Gradual Petrify (Status)|Slowing Petrify]] |
||
| − | | Immune to = - |
||
| − | | Absorbs = None |
||
| − | | Type = None |
||
| − | | Info = - |
||
| − | | SNESDrop = None |
||
| ⚫ | |||
| − | | GBAHP = 45,001 |
||
| ⚫ | |||
| ⚫ | |||
| − | | GBAGil = 0 |
||
| − | | GBAEXP = 35,000 |
||
| − | | GBATreasure = - |
||
| ⚫ | |||
| − | | DS bestiary = 186 |
||
| ⚫ | |||
| − | | DSlevel = N/A |
||
| − | | DSLocation = [[Lair of the Father]] |
||
| − | | DSHP = 45,001 |
||
| − | | DSEXP = 180,400 |
||
| − | | DSGil = 17,000 |
||
| − | | DSSteal = N/A |
||
| − | | Drop1 = N/A |
||
| − | | Drop2 = N/A |
||
| − | | Drop3 = N/A |
||
| − | | Drop4 = N/A |
||
| − | | DSWeak = N/A |
||
| − | | DSResist = N/A |
||
| − | | DSAbsorb = N/A |
||
| − | | DSImmune = [[Poison (Status)|Poison]], [[Blind (Status)|Blind]], [[Silence (Status)|Silence]], [[Pig (Ability)|Pig]], [[Mini (Status)|Mini]], [[Toad (Status)|Toad]], [[Petrify (Status)|Petrify]], [[Instant Death|Death]], [[Berserk (Status)|Berserk]], [[Confuse (Status)|Confuse]] [[Sleep (Status)|Sleep]], [[Paralysis|Paralyze]], [[Curse (Status)|Curse]] |
||
| − | | SNESSteal = N/A |
||
| − | | PSSteal = N/A |
||
| − | | PSDrop = N/A |
||
| − | | PSPSteal = N/A |
||
| − | | PSPDrop = N/A |
||
}} |
}} |
||
| ⚫ | |||
| ⚫ | |||
| ⚫ | |||
| ⚫ | |||
| − | ==Strategy== |
||
| ⚫ | |||
| + | == Stats == |
||
| ⚫ | [[Rosa Joanna Farrell|Rosa]] and Fusoya should cast [[Reflect ( |
||
| + | {{infobox enemy stats FFIV |
||
| ⚫ | |||
| ⚫ | |||
| ⚫ | |||
| ⚫ | |||
| + | | 1 hp = 45001 |
||
| ⚫ | |||
| + | | 1 defense = 1 |
||
| + | | 1 evasion = 0 |
||
| ⚫ | |||
| + | | 1 magic def = 4 |
||
| ⚫ | |||
| ⚫ | |||
| + | | snes = Bahamut |
||
| ⚫ | |||
| ⚫ | |||
| ⚫ | |||
| ⚫ | |||
| ⚫ | |||
| + | | 1 psp abilities = [[Megaflare]] |
||
| ⚫ | |||
| ⚫ | |||
| + | | 1 exp = 35000 |
||
| + | | 1 drop rate = 0 |
||
| + | | 1 snes drop 1 = [[Final Fantasy IV items#Potion|Cure1]] |
||
| + | | 1 snes drop 2 = [[Final Fantasy IV items#Potion|Cure1]] |
||
| + | | 1 snes drop 3 = [[Final Fantasy IV items#Potion|Cure1]] |
||
| + | | 1 snes drop 4 = [[Final Fantasy IV items#Potion|Cure1]] |
||
| + | | 1 psp drop 1 = [[Final Fantasy IV items#Potion|Potion]] |
||
| + | | 1 psp drop 2 = [[Final Fantasy IV items#Potion|Potion]] |
||
| + | | 1 psp drop 3 = [[Final Fantasy IV items#Potion|Potion]] |
||
| + | | 1 psp drop 4 = [[Final Fantasy IV items#Potion|Potion]] |
||
| + | | 1 gba drop 1 = [[Final Fantasy IV items#Potion|Potion]] |
||
| + | | 1 gba drop 2 = [[Final Fantasy IV items#Potion|Potion]] |
||
| + | | 1 gba drop 3 = [[Final Fantasy IV items#Potion|Potion]] |
||
| + | | 1 gba drop 4 = [[Final Fantasy IV items#Potion|Potion]] |
||
| + | | 1 ps drop 1 = [[Final Fantasy IV items#Potion|Potion]] |
||
| + | | 1 ps drop 2 = [[Final Fantasy IV items#Potion|Potion]] |
||
| + | | 1 ps drop 3 = [[Final Fantasy IV items#Potion|Potion]] |
||
| + | | 1 ps drop 4 = [[Final Fantasy IV items#Potion|Potion]] |
||
| + | | 1 poison = Immune |
||
| + | | 1 blind = Immune |
||
| + | | 1 silence = Immune |
||
| + | | 1 pig = Immune |
||
| + | | 1 mini = Immune |
||
| + | | 1 toad = Immune |
||
| + | | 1 stone = Immune |
||
| + | | 1 death = Immune |
||
| + | | 1 petrify = Immune |
||
| + | | 1 berserk = Immune |
||
| + | | 1 confuse = Immune |
||
| + | | 1 sleep = Immune |
||
| + | | 1 paralyze = Immune |
||
| + | | 1 curse = Immune |
||
| + | | 1 heavy = true |
||
| ⚫ | |||
| ⚫ | |||
| ⚫ | |||
| + | | sec 2 = Easy Type |
||
| ⚫ | |||
| ⚫ | |||
| ⚫ | |||
| ⚫ | |||
| + | | 2 hp = 37000 |
||
| + | | 2 mp = 2312 |
||
| + | | 2 strength = 174 |
||
| + | | 2 defense = 1 |
||
| + | | 2 evasion = 0 |
||
| + | | 2 magic = 17 |
||
| + | | 2 magic def = 4 |
||
| ⚫ | |||
| ⚫ | |||
| + | | 2 exp = 35000 |
||
| + | | 2 drop rate = 0 |
||
| + | | 2 snes drop 1 = [[Final Fantasy IV items#Potion|Cure1]] |
||
| + | | 2 snes drop 2 = [[Final Fantasy IV items#Potion|Cure1]] |
||
| + | | 2 snes drop 3 = [[Final Fantasy IV items#Potion|Cure1]] |
||
| + | | 2 snes drop 4 = [[Final Fantasy IV items#Potion|Cure1]] |
||
| + | | 2 poison = Immune |
||
| + | | 2 blind = Immune |
||
| + | | 2 silence = Immune |
||
| + | | 2 pig = Immune |
||
| + | | 2 mini = Immune |
||
| + | | 2 toad = Immune |
||
| + | | 2 stone = Immune |
||
| + | | 2 death = Immune |
||
| + | | 2 petrify = Immune |
||
| + | | 2 berserk = Immune |
||
| + | | 2 confuse = Immune |
||
| + | | 2 sleep = Immune |
||
| + | | 2 paralyze = Immune |
||
| + | | 2 curse = Immune |
||
| + | | 2 heavy = true |
||
| ⚫ | |||
| + | == Battle == |
||
| ⚫ | If the party has no Reflect items or Fusoya, winning is harder. Before the battle the player should kill all party members but two, Rosa and another character. This is needed because Rosa is usually the last to take her turn, so by killing off two characters Rosa will definitely get a turn in before Bahamut uses Megaflare and can cast Reflect on herself. If the other member survives Megaflare, Rosa should cast Reflect on him, if not, just leave [[Knocked Out|knocked out]]. When Bahamut uses Megaflare again, Rosa should re-cast Reflect. The player will still win as Bahamut will kill himself. |
||
| ⚫ | |||
| + | Bahamut uses Megaflare, but it can be reflected. |
||
| − | === |
+ | === Strategy === |
| ⚫ | |||
| ⚫ | |||
| ⚫ | [[Rosa Joanna Farrell/Gameplay|Rosa]] and Fusoya should cast [[Reflect (ability)|Reflect]], and other members use any items to cast walls. It is best to cast Reflect on Fusoya and Rydia first, and then cast it on members with the lowest HP. When Bahamut uses [[Megaflare]] it will reflect back onto him. The Reflect wall will last two uses of the Megaflare before the player must re-cast it. Recasting it when the Reflect wall is still up will cause it to bounce to Bahamut. It is possible to win the battle by simply allowing Bahamut to kill himself, applying magic only to the player party. |
||
| ⚫ | |||
| ⚫ | If the party has no Reflect items or Fusoya, winning is harder. Before the battle the player should kill all party members but two, Rosa and another character. This is needed because Rosa is usually the last to take her turn, so by killing off two characters Rosa will definitely get a turn in before Bahamut uses Megaflare and can cast Reflect on herself. If the other member survives Megaflare, Rosa should cast Reflect on him, if not, just leave them [[Knocked Out|knocked out]]. When Bahamut uses Megaflare again, Rosa should re-cast Reflect. The player will still win as Bahamut will kill himself. |
||
| − | ===DS Strategy=== |
||
| − | The strategy of casting Reflect is useless in the DS remake, as Bahamut's Mega Flare pierces reflect spells altogether. Mega Flare is much weaker than previous versions, so with proper buffs and high-enough [[level]]s, the party can survive it. |
||
| ⚫ | In the GBA and PSP versions, the above strategy works, and [[Porom/Gameplay|Porom]] would also be recommended for she can also learn Reflect. Rydia or [[Palom/Gameplay|Palom]] can help by casting either [[Tsunami]] or [[Quake (ability)|Quake]], but it is possible to take Bahamut out with just one character: Kain Highwind. |
||
| − | A useful strategy is to quickly cast Slow on Bahamut, and have Rosa and Fusoya cast Haste on the party, then Berserk on Cecil and Edge, unless Cecil is equipped with the Avenger sword. After Haste has been applied, have one of the primary magic users cast Hastemarch with Bardsong, which should give the main attackers near instant turns. Bahamut should fall before he even gets the chance to use Mega Flare once. |
||
| ⚫ | |||
| − | If the player waits until after returning to [[Earth (Final Fantasy IV)|Earth]], they can return later and defeat Bahamut using only Kain's jump attack. Bahamut will count down from 5 to 1 before casting Mega Flare and the player will be able to jump with Kain twice per countdown, once after 5 and then again after 1. As long as Kain jumps right after Bahamut counts 1, he will be in the air when the spell is cast and will not take damage. However, if Kain is the only one alive and in the air, Bahamut will not bother to cast Mega Flare. Once Kain comes down from his jump the count starts over at 5. Depending on Kain's level, the player can defeat Bahamut fairly quickly without using any magic or items. |
||
| − | == |
+ | == Etymology == |
| ⚫ | |||
| − | {{Gallery |
||
| + | |||
| ⚫ | |||
| ⚫ | |||
| − | |File:FFIVDS Megaflare.png|Megaflare (DS). |
||
| ⚫ | |||
| − | |File:Megaflare_Bahamut_ffiv_ios.PNG|Megaflare (iOS). |
||
| + | * [[Lunar Bahamut (Final Fantasy IV)|Lunar Bahamut]] |
||
| ⚫ | |||
| ⚫ | |||
| ⚫ | |||
| − | *[[ |
+ | * [[Bahamut (Final Fantasy IV -Interlude- enemy)|Bahamut]] |
| ⚫ | |||
| − | ===''[[Final Fantasy IV |
+ | === ''[[Final Fantasy IV: The After Years]]'' === |
| − | *[[Bahamut ( |
+ | * [[Bahamut (The After Years boss)|Bahamut]] |
| + | * [[Lunar Bahamut (The After Years)|Lunar Bahamut]] |
||
| ⚫ | |||
| ⚫ | |||
[[it:Bahamut (Final Fantasy IV)]] |
[[it:Bahamut (Final Fantasy IV)]] |
||
| − | [[Category:Final Fantasy IV |
+ | [[Category:Bosses in Final Fantasy IV]] |
Revision as of 20:12, 2 June 2020
Template:Sideicon
Bahamut is a boss in Final Fantasy IV who cannot be challenged until Leviathan has been defeated. Defeating him earns Rydia the Bahamut summon.
Stats
#248
Easy Type
Battle

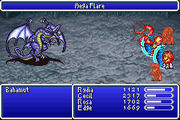
Mega Flare (GBA).
Bahamut uses Megaflare, but it can be reflected.
Strategy
It is best to enter the battle when Fusoya first joins the party, and not after having gone back to the Overworld, and switch him for Kain.
Rosa and Fusoya should cast Reflect, and other members use any items to cast walls. It is best to cast Reflect on Fusoya and Rydia first, and then cast it on members with the lowest HP. When Bahamut uses Megaflare it will reflect back onto him. The Reflect wall will last two uses of the Megaflare before the player must re-cast it. Recasting it when the Reflect wall is still up will cause it to bounce to Bahamut. It is possible to win the battle by simply allowing Bahamut to kill himself, applying magic only to the player party.
If the party has no Reflect items or Fusoya, winning is harder. Before the battle the player should kill all party members but two, Rosa and another character. This is needed because Rosa is usually the last to take her turn, so by killing off two characters Rosa will definitely get a turn in before Bahamut uses Megaflare and can cast Reflect on herself. If the other member survives Megaflare, Rosa should cast Reflect on him, if not, just leave them knocked out. When Bahamut uses Megaflare again, Rosa should re-cast Reflect. The player will still win as Bahamut will kill himself.
In the GBA and PSP versions, the above strategy works, and Porom would also be recommended for she can also learn Reflect. Rydia or Palom can help by casting either Tsunami or Quake, but it is possible to take Bahamut out with just one character: Kain Highwind.
Kain should Jump at Bahamut between the count of 3 and 2, and he will land right after Bahamut casts Megaflare. The player does not need to bother to revive the other members, as they will not survive most of the time.
Etymology
Bahamut (Arabic بهموت Bahamūt) originated as an enormous whale in ancient pre-Islamic Arabian mythology. Upon Bahamut's back stands a bull with four thousand eyes, ears, noses, mouths, tongues and feet called Kujuta (also spelled "Kuyutha") (compared with the pair of Behemoth and Leviathan). Between each of these is a distance of a 500-year journey. On the back of Kujuta is a mountain of ruby. Atop this mountain is an angel who carries six hells, earth, and seven heavens on its shoulders.
Another version of the Arabic story is that Bahamut is indeed a dragon and he stands on a whale called Liwash.
In modern times, the game Dungeons & Dragons is responsible for reimagining Bahamut as the king of dragons, a benevolent Platinum Dragon; the opposite of the malevolent Tiamat, the five-headed Chromatic Queen of Dragons.
Related enemies
Final Fantasy IV -Interlude-
- Bahamut