No edit summary |
No edit summary |
||
| (45 intermediate revisions by 21 users not shown) | |||
| Line 1: | Line 1: | ||
| + | {{sideicon|prime=FFIII|FFRK}} |
||
| ⚫ | |||
| + | {{infobox location |
||
| ⚫ | |||
| + | |name=Bahamut's Lair |
||
| + | |release=FFIII |
||
| + | |japanese=バハムートの洞窟 |
||
| + | |romaji=Bahamūto no Doukutsu |
||
| + | |lit=Bahamut's Cave |
||
| + | |image=<gallery> |
||
| ⚫ | |||
| + | FFIIIDS Bahamut's Lair WM.png|World Map |
||
| + | </gallery> |
||
| + | |type=Lair, [[bonus dungeon]] |
||
| + | |region=[[Final Fantasy III locations#Floating Continent|Floating Continent]] |
||
| + | |residents=[[Bahamut#Final Fantasy III|Bahamut]] |
||
| + | |items=*[[Final Fantasy III items#Eathern Drums|Earthen Drums]] |
||
| + | *[[Final Fantasy III items#Heavenly Wrath|Heavenly Wrath]] |
||
| + | *[[Final Fantasy III items#Phoenix Down|Phoenix Down]] x2 |
||
| + | *[[Final Fantasy III items#Arctic Wind|Arctic Wind]] |
||
| + | *[[Final Fantasy III weapons#Golem Staff|Golem Staff]] |
||
| + | *White Musk |
||
| + | *[[Final Fantasy III items#Bacchus's Cider|Bacchus's Cider]] |
||
| + | *Chocobo's Wrath |
||
| + | *Turtle Shell |
||
| + | *DarkScent (NES Only) |
||
| + | *Eurytos Bow (3D Only) |
||
| + | *[[Final Fantasy III items#Elixir|Elixir]] |
||
| + | *[[Final Fantasy III weapons#Kotetsu|Kotetsu]] |
||
| + | *[[Bahamut#Final Fantasy III|Bahamut]] |
||
| + | |enemies=*[[Drake (Final Fantasy III)|Drake]] |
||
| + | *[[Greater Boros]] |
||
| + | *[[Grenade (Final Fantasy III)|Grenade]] |
||
| + | *[[Sabertooth Liger]] |
||
| + | *[[Queen Lamia]] |
||
| + | *[[Bahamut (Final Fantasy III boss)|Bahamut]] (boss) |
||
| + | |quests=*Completing the bonus dungeon |
||
| + | }} |
||
| + | '''Bahamut's Lair''', also known as '''Cave of Bahamut''', is an [[bonus dungeon|optional dungeon]] in ''[[Final Fantasy III]]'' on the [[Final Fantasy III locations#Floating Continent|Floating Continent]]. |
||
| + | |||
| ⚫ | The cave itself is located to the southeast of [[Vikings' Cove]], but the player must cross the mountains to the east of Bahamut's Lair on the ''[[Invincible (Final Fantasy III)|Invincible]]'' to reach the entrance. The party can fight [[Bahamut#Final Fantasy III|Bahamut]] here to obtain him as a [[summoned monsters|summon]]. The player must first travel through the cave and return to the entrance to fight Bahamut. |
||
| − | == |
+ | == Items == |
| − | {| |
+ | {|class="half-width FFIII article-table" style="text-align:center" |
| + | |-class="a" |
||
| − | |bgcolor="#90EE90" width="15%" style="text-align:center"|'''Item''' |
||
| + | !Item |
||
| − | |bgcolor="#90EE90" width="20%" style="text-align:center"|'''Location''' |
||
| + | !Location |
||
|- |
|- |
||
| − | ! |
+ | !class="b"|[[Final Fantasy III items#Eathern Drums|Earthen Drums]] |
|First Area |
|First Area |
||
|- |
|- |
||
| − | ! |
+ | !class="b"|[[Final Fantasy III items#Heavenly Wrath|Heavenly Wrath]] |
|First Area |
|First Area |
||
|- |
|- |
||
| − | ! |
+ | !class="b"|[[Final Fantasy III items#Phoenix Down|Phoenix Down]] |
|First Area |
|First Area |
||
|- |
|- |
||
| − | ! |
+ | !class="b"|[[Final Fantasy III items#Arctic Wind|Arctic Wind]] |
|First Area |
|First Area |
||
|- |
|- |
||
| − | ! |
+ | !class="b"|[[Final Fantasy III weapons#Golem Staff|Golem Staff]] |
|Second Area |
|Second Area |
||
|- |
|- |
||
| − | ! |
+ | !class="b"|White Musk |
|Second Area |
|Second Area |
||
|- |
|- |
||
| − | ! |
+ | !class="b"|[[Final Fantasy III items#Bacchus's Cider|Bacchus's Cider]] |
|Second Area |
|Second Area |
||
|- |
|- |
||
| − | ! |
+ | !class="b"|Chocobo's Wrath |
|Second Area |
|Second Area |
||
|- |
|- |
||
| − | ! |
+ | !class="b"|Turtle Shell |
|Second Area |
|Second Area |
||
|- |
|- |
||
| − | ! |
+ | !class="b"|DarkScent (NES Only) |
|Third Area |
|Third Area |
||
|- |
|- |
||
| − | ! |
+ | !class="b"|Eurytos Bow (DS Only) |
|Third Area |
|Third Area |
||
|- |
|- |
||
| − | ! |
+ | !class="b"|[[Final Fantasy III items#Phoenix Down|Phoenix Down]] |
|Third Area |
|Third Area |
||
|- |
|- |
||
| − | ! |
+ | !class="b"|[[Final Fantasy III items#Elixir|Elixir]] |
|Third Area |
|Third Area |
||
|- |
|- |
||
| − | ! |
+ | !class="b"|[[Final Fantasy III weapons#Kotetsu|Kotetsu]] |
|Third Area |
|Third Area |
||
|- |
|- |
||
| − | ! |
+ | !class="b"|[[Bahamut#Final Fantasy III|Bahamut]] |
|Defeat Bahamut |
|Defeat Bahamut |
||
|} |
|} |
||
| − | == |
+ | == Enemies == |
| − | *[[Grenade (Final Fantasy III)|Grenade]] |
+ | * [[Grenade (Final Fantasy III)|Grenade]] |
| − | *[[Drake (Final Fantasy III)|Drake]] |
+ | * [[Drake (Final Fantasy III)|Drake]] |
| − | *[[Greater Boros]] |
+ | * [[Greater Boros]] |
| − | *[[Sabertooth Liger]] |
+ | * [[Sabertooth Liger]] |
| − | *[[Queen Lamia]] |
+ | * [[Queen Lamia]] |
| − | *[[Bahamut (Final Fantasy III)|Bahamut]] (boss) |
+ | * [[Bahamut (Final Fantasy III boss)|Bahamut]] (boss) |
| − | ==Battle |
+ | == Battle background == |
[[File:FFIII Molten Cave Background.PNG]] |
[[File:FFIII Molten Cave Background.PNG]] |
||
| + | == Musical themes == |
||
| − | ==Music== |
||
| − | Bahamut's Lair background music is |
+ | Bahamut's Lair background music is the "[[dungeon theme|Dungeon]]" theme. |
| + | |||
| + | == Other appearances == |
||
| + | === ''[[Final Fantasy Record Keeper]]'' === |
||
| + | |||
| + | [[File:FFRK Bahamut's Lair FFIII.png|right|150px]] |
||
| + | {{Location section|Final Fantasy Record Keeper}} |
||
| + | {{clear}} |
||
| + | |||
| + | == Gallery == |
||
| + | <gallery> |
||
| + | FFIII NES - Bahamut's Lair First Floor.gif|First Floor (NES). |
||
| + | FFIII NES - Bahamut's Lair Second Floor.gif|Second Floor (NES). |
||
| + | FFIII NES - Bahamut's Lair Third Floor.gif|Third Floor (NES). |
||
| + | FFIII NES Cave of Bahamut.png|Bahamut's Lair on the world map (NES). |
||
| + | FFRK Bahamut's Lair JP FFIII.png|The Japanese dungeon image for ''Bahamut's Lair'' in ''Final Fantasy Record Keeper''. |
||
| + | </gallery> |
||
| + | |||
| + | == Etymology == |
||
| + | {{etym|Bahamut}} |
||
| − | {{FFIII}} |
+ | {{navbox setting FFIII}} |
| − | [[Category:Final Fantasy III |
+ | [[Category:Locations in Final Fantasy III]] |
[[Category:Caves]] |
[[Category:Caves]] |
||
Revision as of 10:30, 4 May 2020
Template:Sideicon Bahamut's Lair, also known as Cave of Bahamut, is an optional dungeon in Final Fantasy III on the Floating Continent.
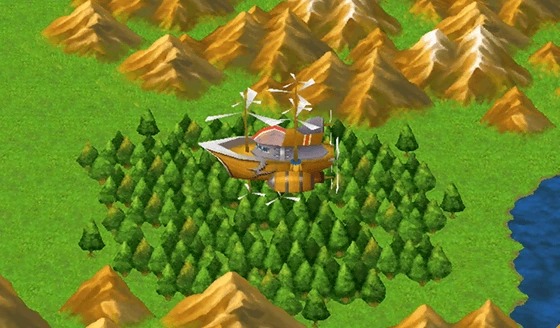
The cave itself is located to the southeast of Vikings' Cove, but the player must cross the mountains to the east of Bahamut's Lair on the Invincible to reach the entrance. The party can fight Bahamut here to obtain him as a summon. The player must first travel through the cave and return to the entrance to fight Bahamut.
Items
| Item | Location |
|---|---|
| Earthen Drums | First Area |
| Heavenly Wrath | First Area |
| Phoenix Down | First Area |
| Arctic Wind | First Area |
| Golem Staff | Second Area |
| White Musk | Second Area |
| Bacchus's Cider | Second Area |
| Chocobo's Wrath | Second Area |
| Turtle Shell | Second Area |
| DarkScent (NES Only) | Third Area |
| Eurytos Bow (DS Only) | Third Area |
| Phoenix Down | Third Area |
| Elixir | Third Area |
| Kotetsu | Third Area |
| Bahamut | Defeat Bahamut |
Enemies
Battle background

Musical themes
Bahamut's Lair background music is the "Dungeon" theme.
Other appearances
Final Fantasy Record Keeper
Gallery
")
")
")
")
")
Etymology
Bahamut (Arabic بهموت Bahamūt) originated as an enormous whale in ancient pre-Islamic Arabian mythology. Upon Bahamut's back stands a bull with four thousand eyes, ears, noses, mouths, tongues and feet called Kujuta (also spelled "Kuyutha") (compared with the pair of Behemoth and Leviathan). Between each of these is a distance of a 500-year journey. On the back of Kujuta is a mountain of ruby. Atop this mountain is an angel who carries six hells, earth, and seven heavens on its shoulders.
Another version of the Arabic story is that Bahamut is indeed a dragon and he stands on a whale called Liwash.
In modern times, the game Dungeons & Dragons is responsible for reimagining Bahamut as the king of dragons, a benevolent Platinum Dragon; the opposite of the malevolent Tiamat, the five-headed Chromatic Queen of Dragons.